How do I create a Social Master post?
Managing social media across diverse platforms like Facebook, Instagram, LinkedIn, and Twitter can consume a lot of time. Social media managers aim for consistent messaging but also need to tailor content to suit each platform's specific nuances.
For example, incorporating links in Facebook and LinkedIn posts, maintaining concise content for Twitter, and utilizing additional hashtags for Instagram are common preferences. However, customizing content for each platform can be a laborious and time-intensive task.
Enter Birdeye Social's master post feature—a game-changer in the realm of social media management. With just one initial post and the power of AI, you can effortlessly create distinct, tailored posts for every social channel.
GENERATE MASTER POST
To create a master post and tweak the content for each social channel, follow these steps:
Step 1- Log in to your Birdeye account and click the 'Social' tab in the left navigation rail.
Step 2- Click the 'Create Post' button in the top left corner.

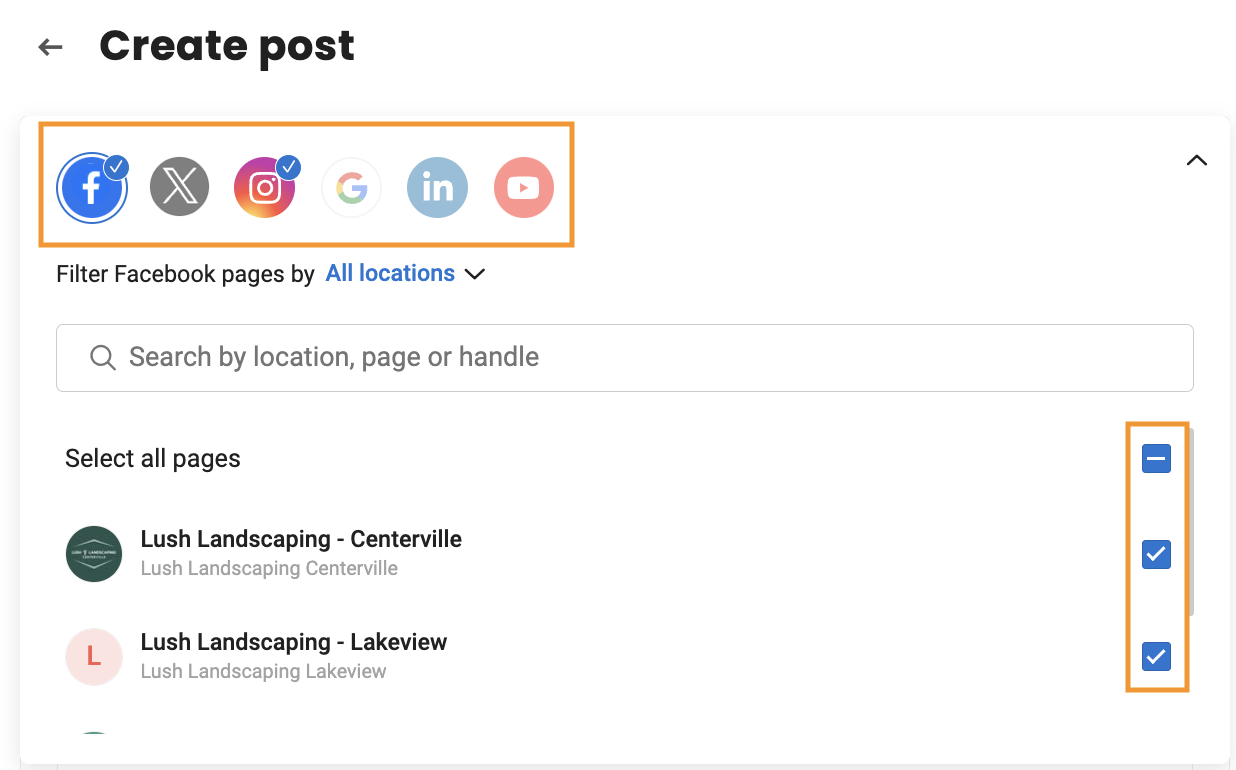
Step 3- Select the social channels, and under those channels, select locations, pages, and accounts for the channels.
Once selected, these channels will be integrated, and you will view the corresponding tabs linked to your content tab.

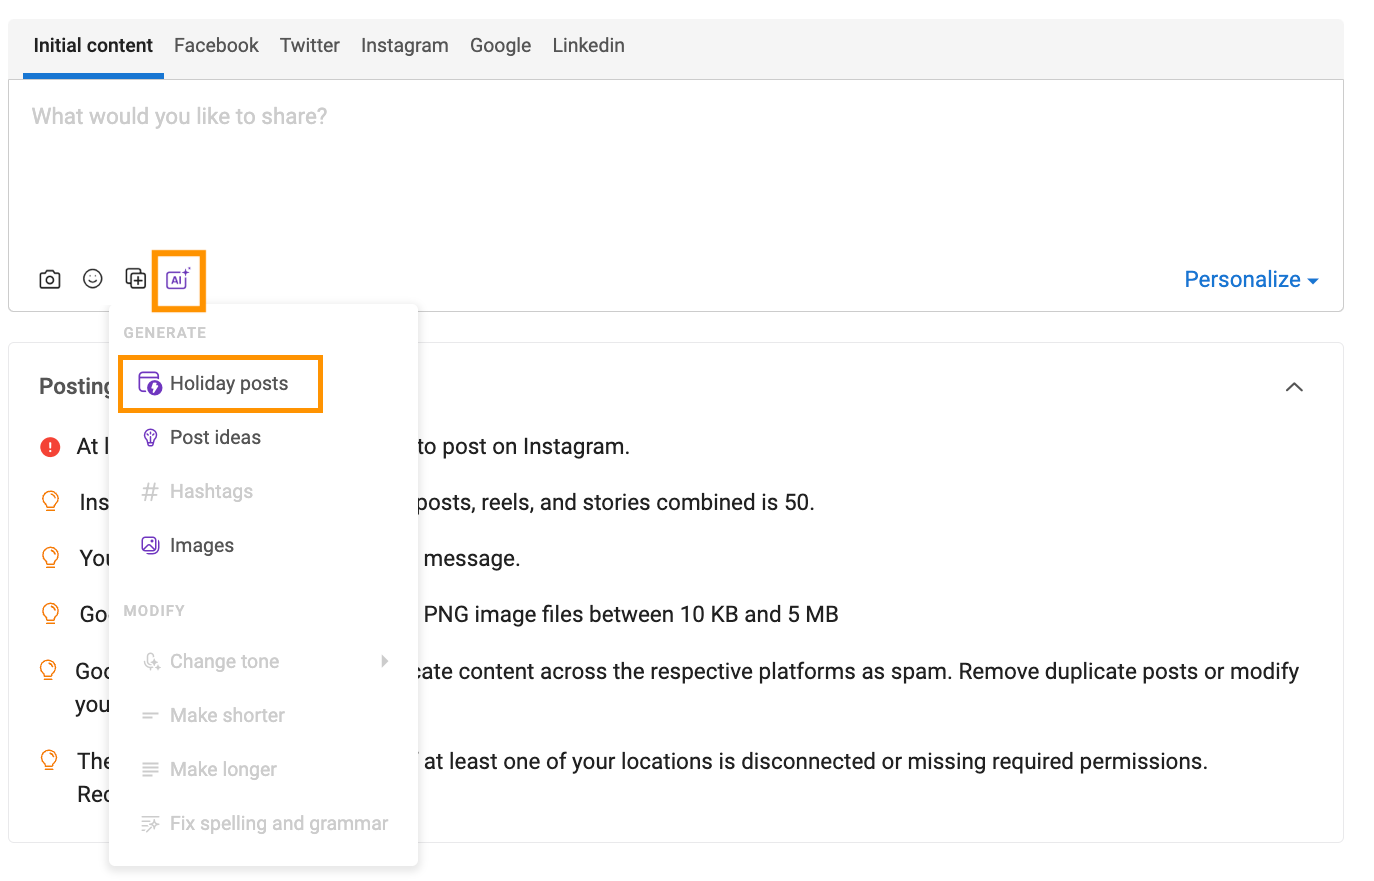
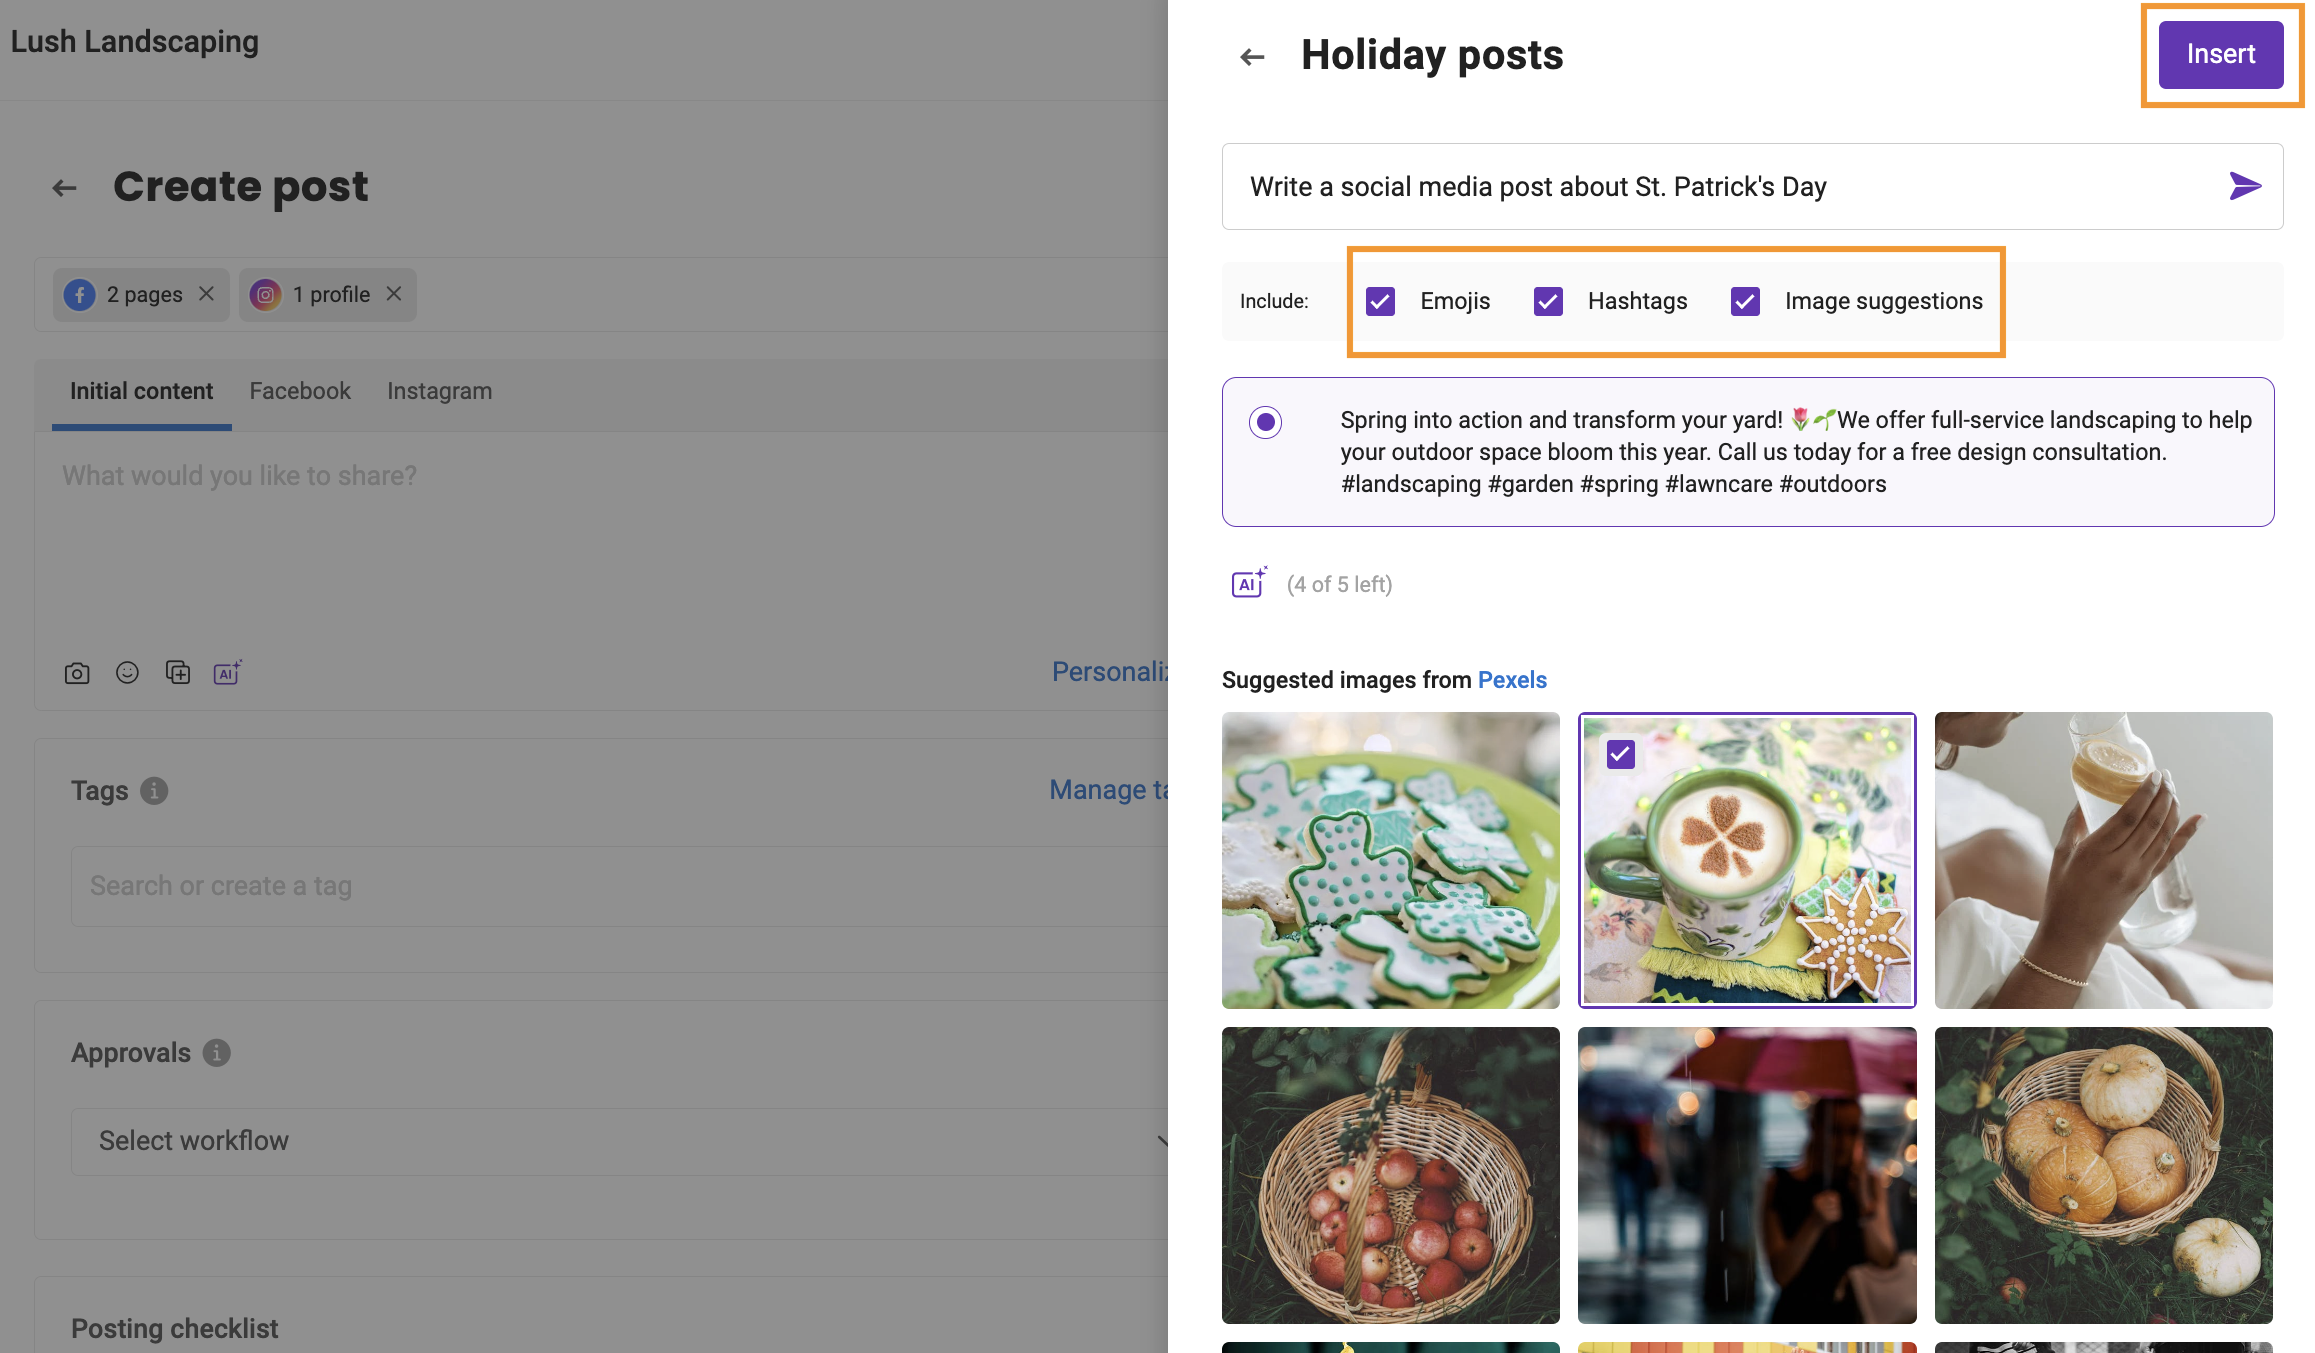
Step 4- You can choose to enter the text manually or click the 'AI' button and select 'Holiday posts' or 'Post ideas' to generate the initial content.
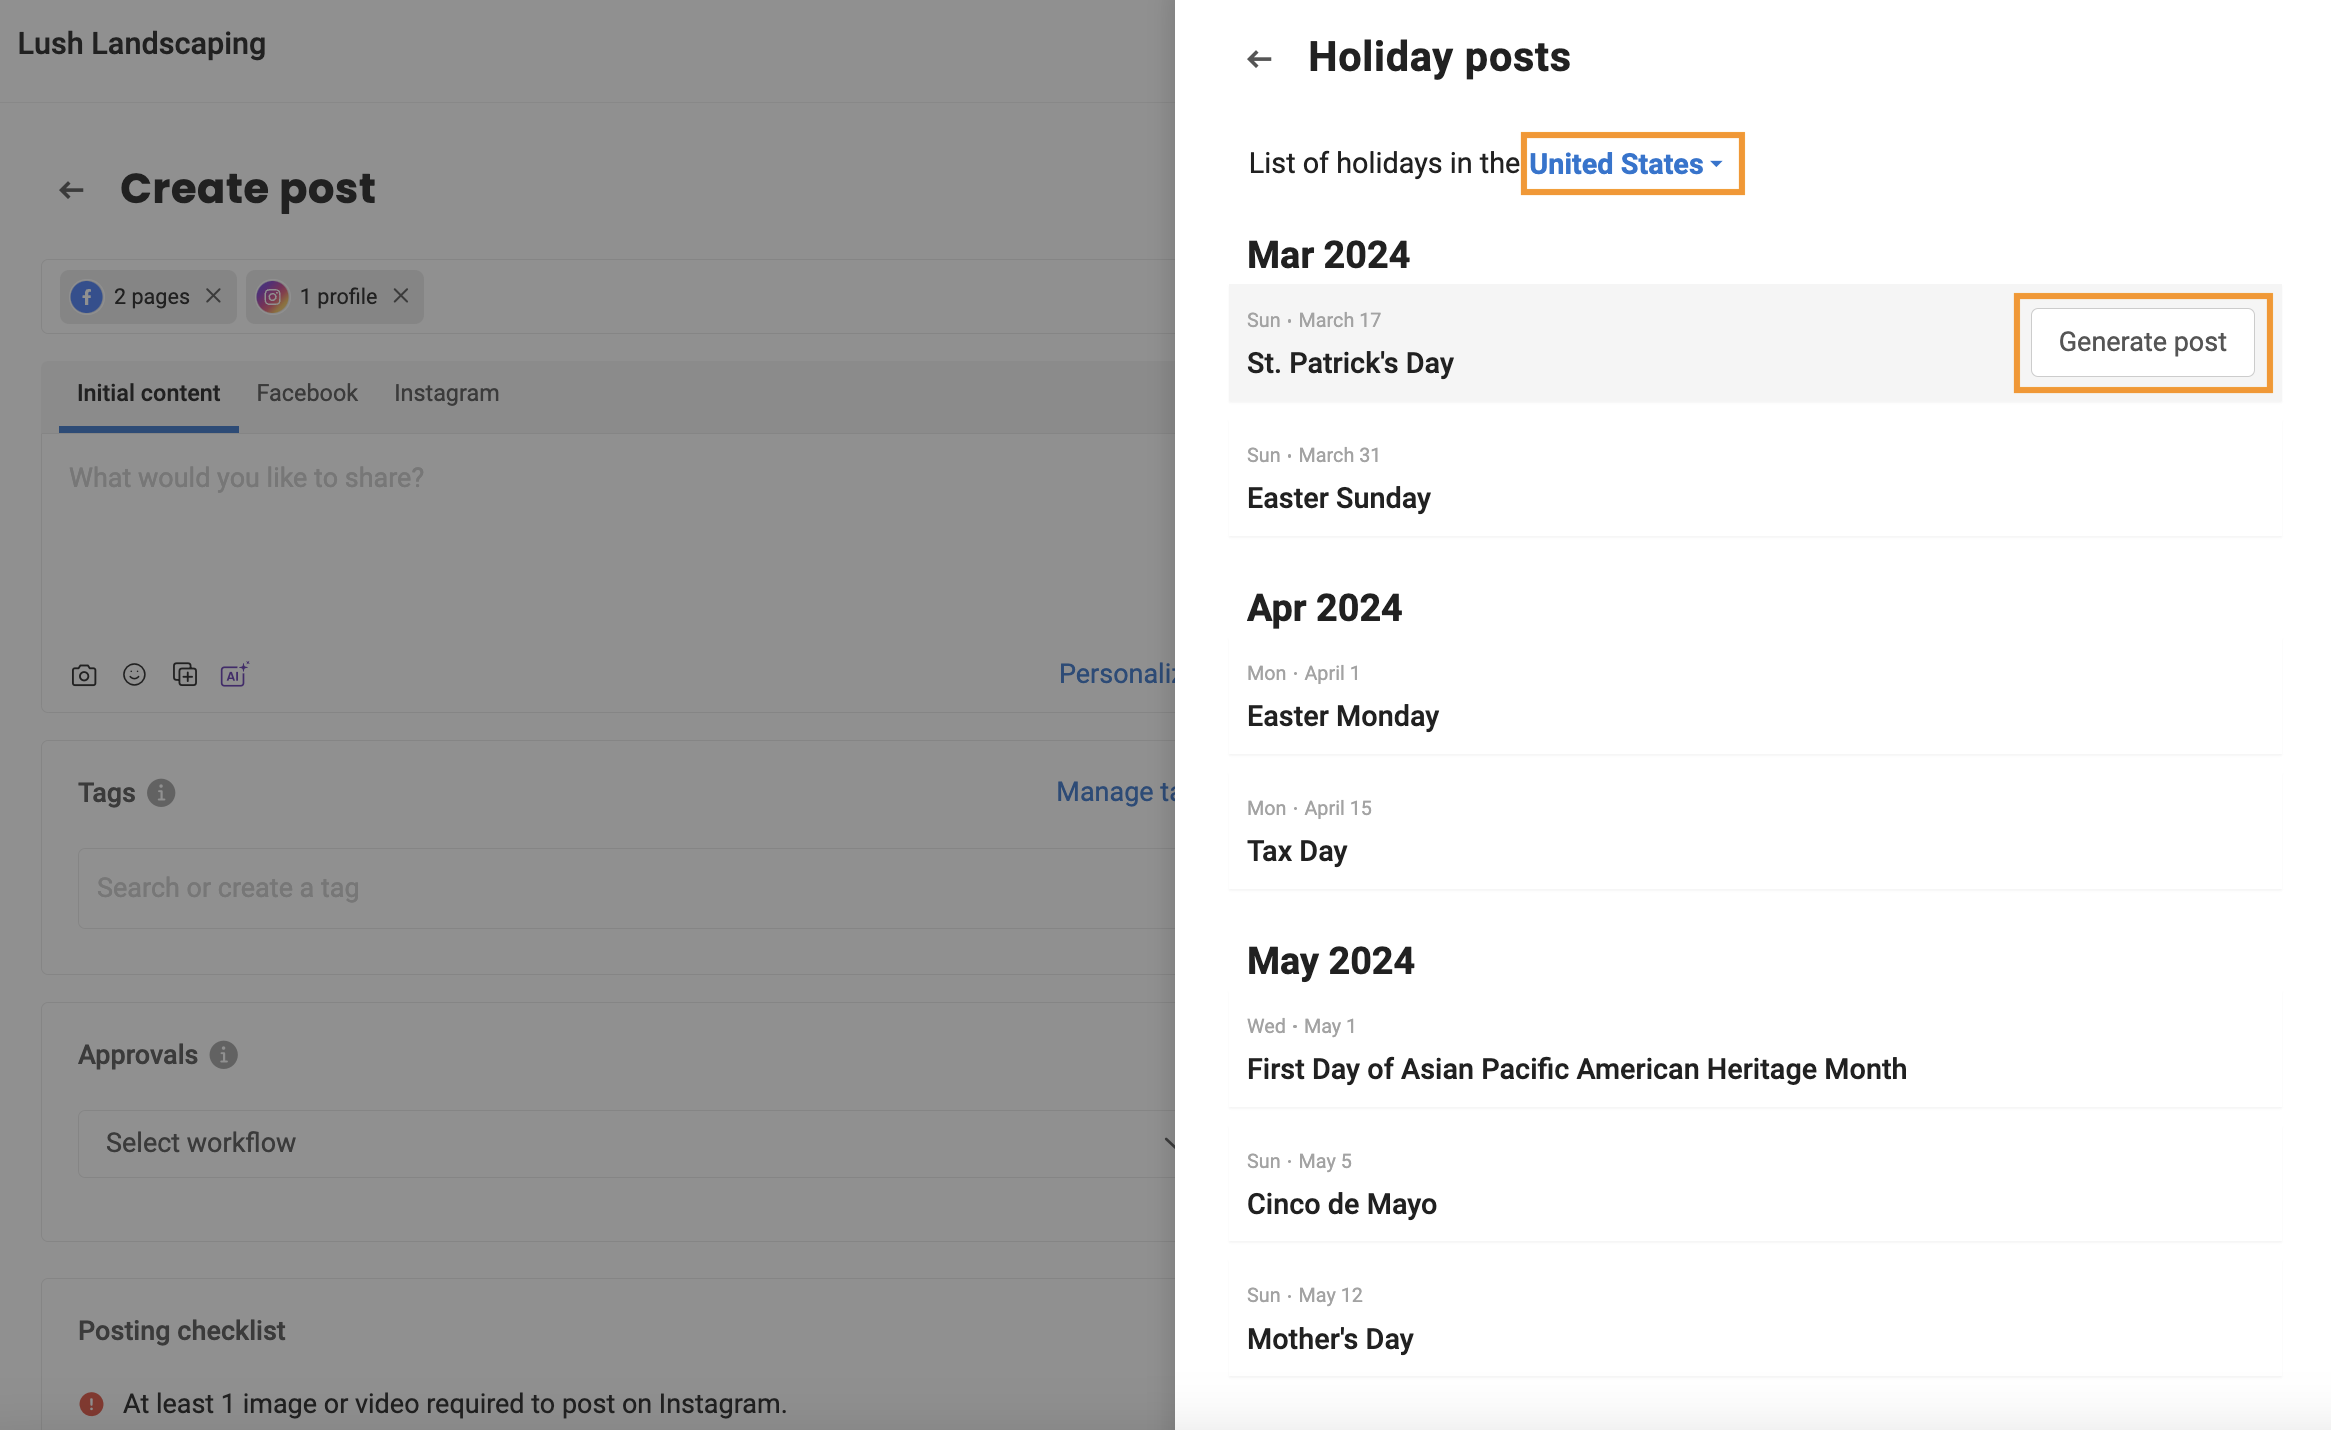
Step 5- In this side drawer, you will view the list of holidays for your country. Hover over the holiday you want to generate a post for and click 'Generate post.'
Step 6- You can select the image from the list of images, and by default, emojis and hashtags are included while the AI creates the post. Click 'Insert,' and the post will be auto-populated to all the individual social channels that have been selected.
Step 7- You can modify the initial post and also tweak the post individually for different channels by simply clicking on that particular channel.
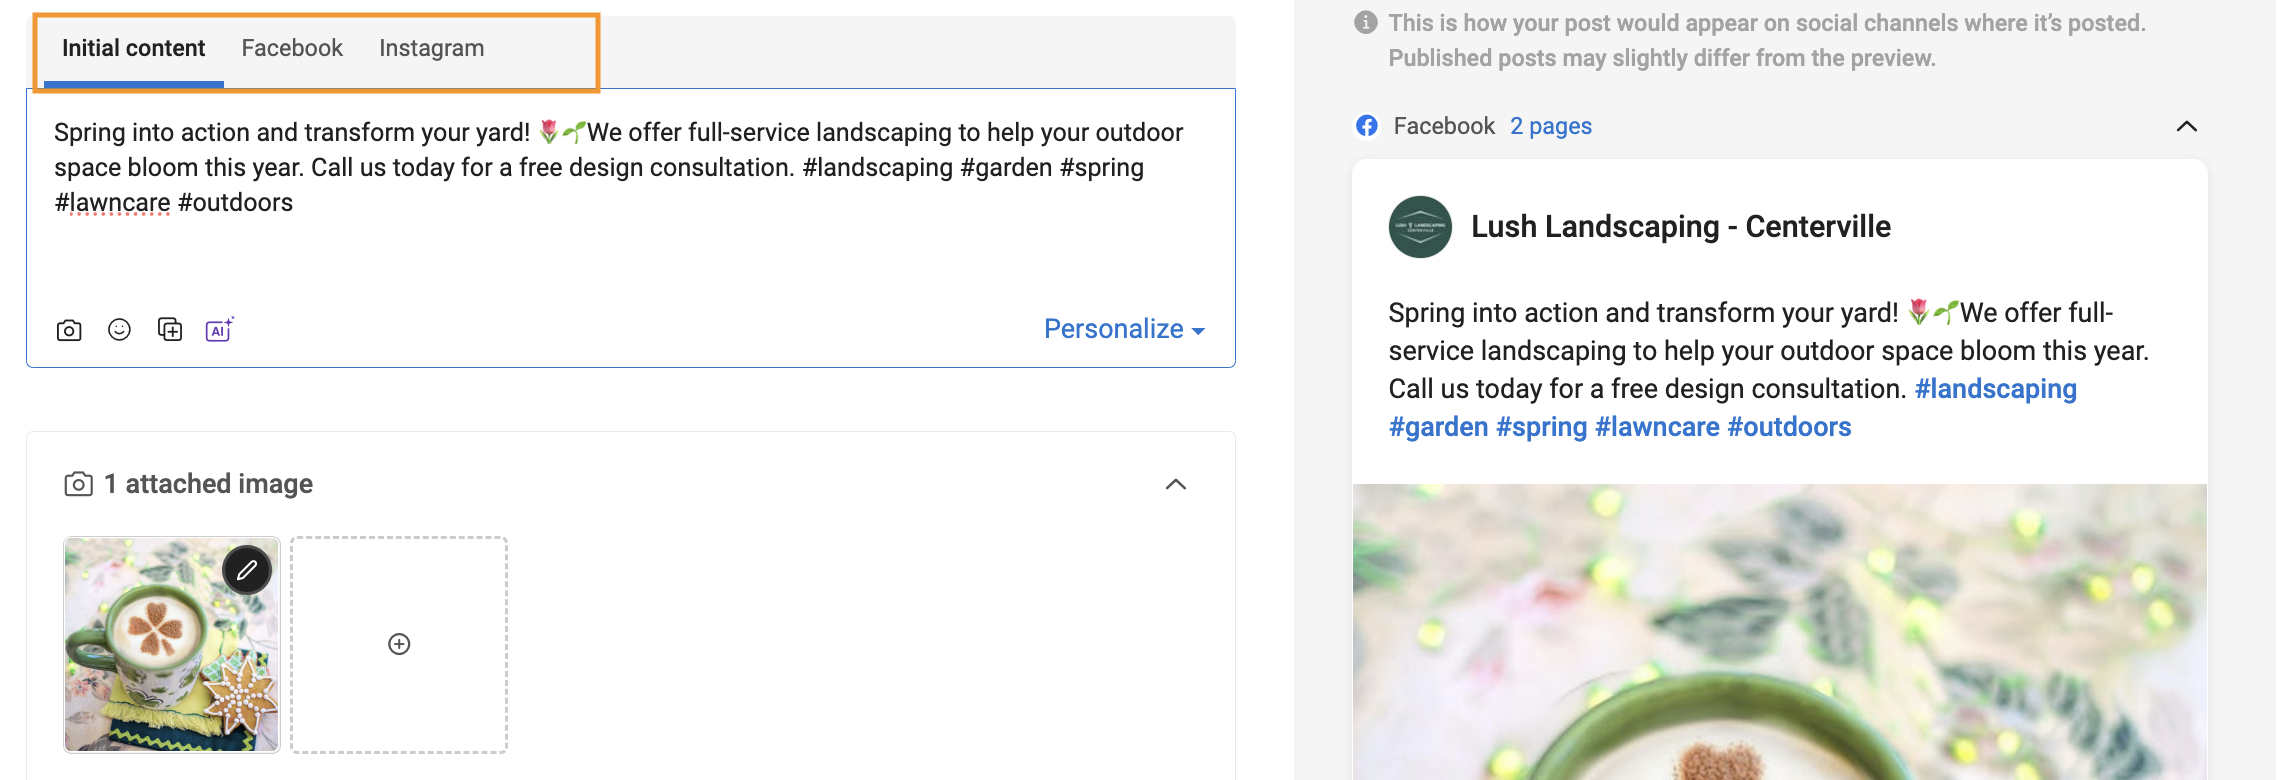
Check the checklist for posting on different channels.

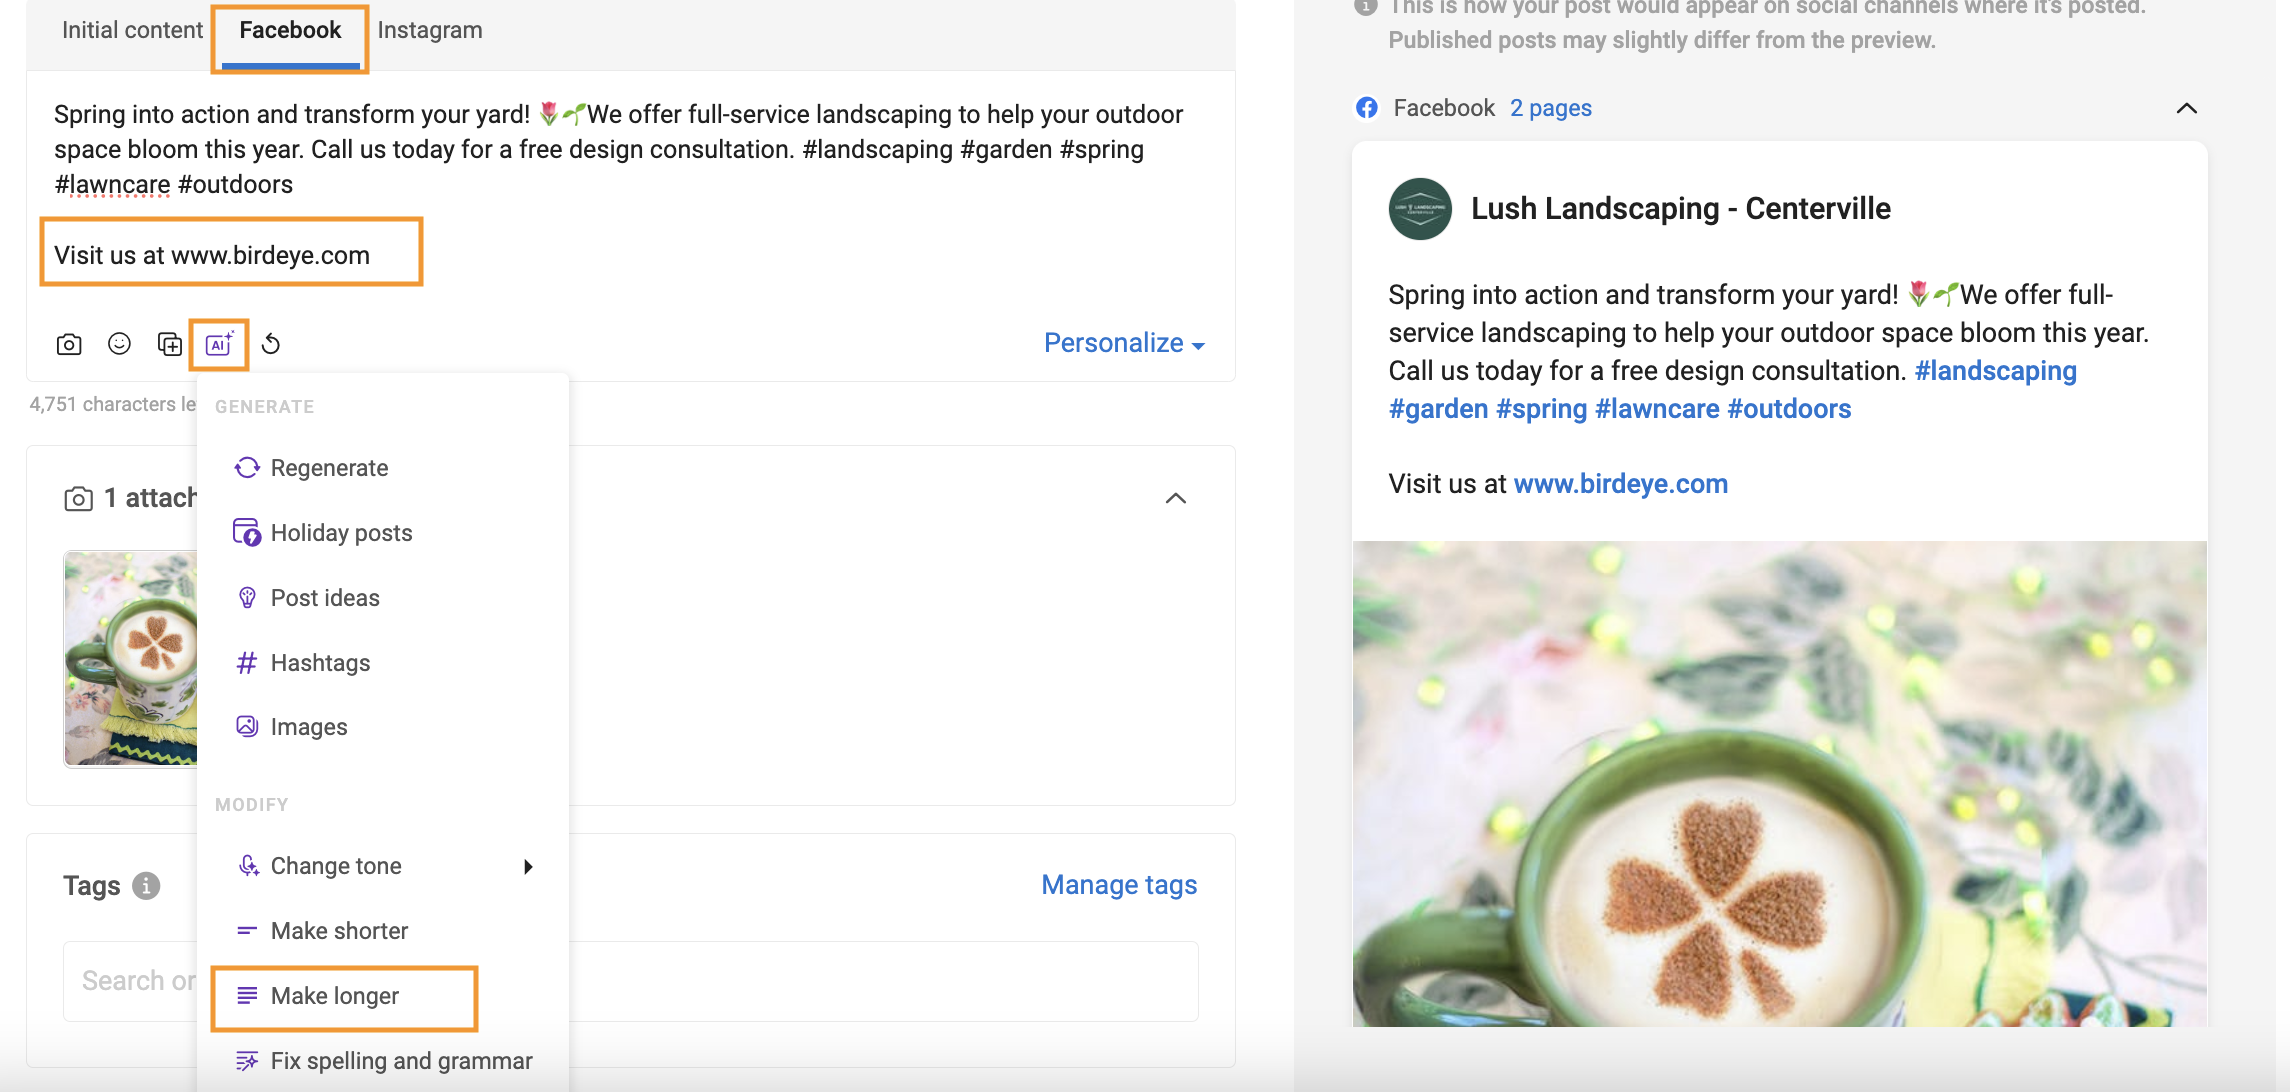
Step 8- Click Facebook, you will view the initial post. You have the option to modify the post by adding a link that acts as a call to action, and you can personalize the post using AI features to extend its length or even regenerate posts, among other capabilities.
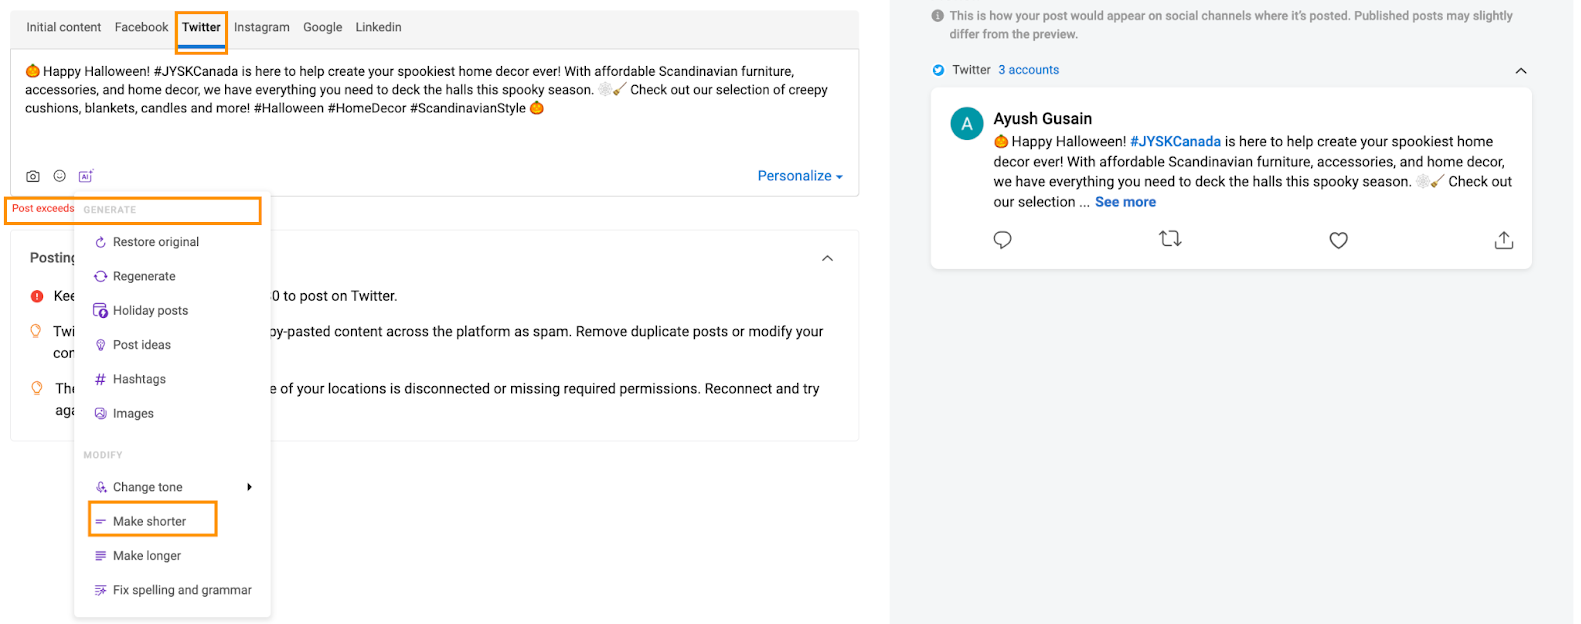
Step 9- Likewise, for Twitter, you can utilize the AI-driven text-condensing function to reduce the text length.
Step 10- For Instagram, use the AI-generated hashtag tool to include as many suitable hashtags as desired.
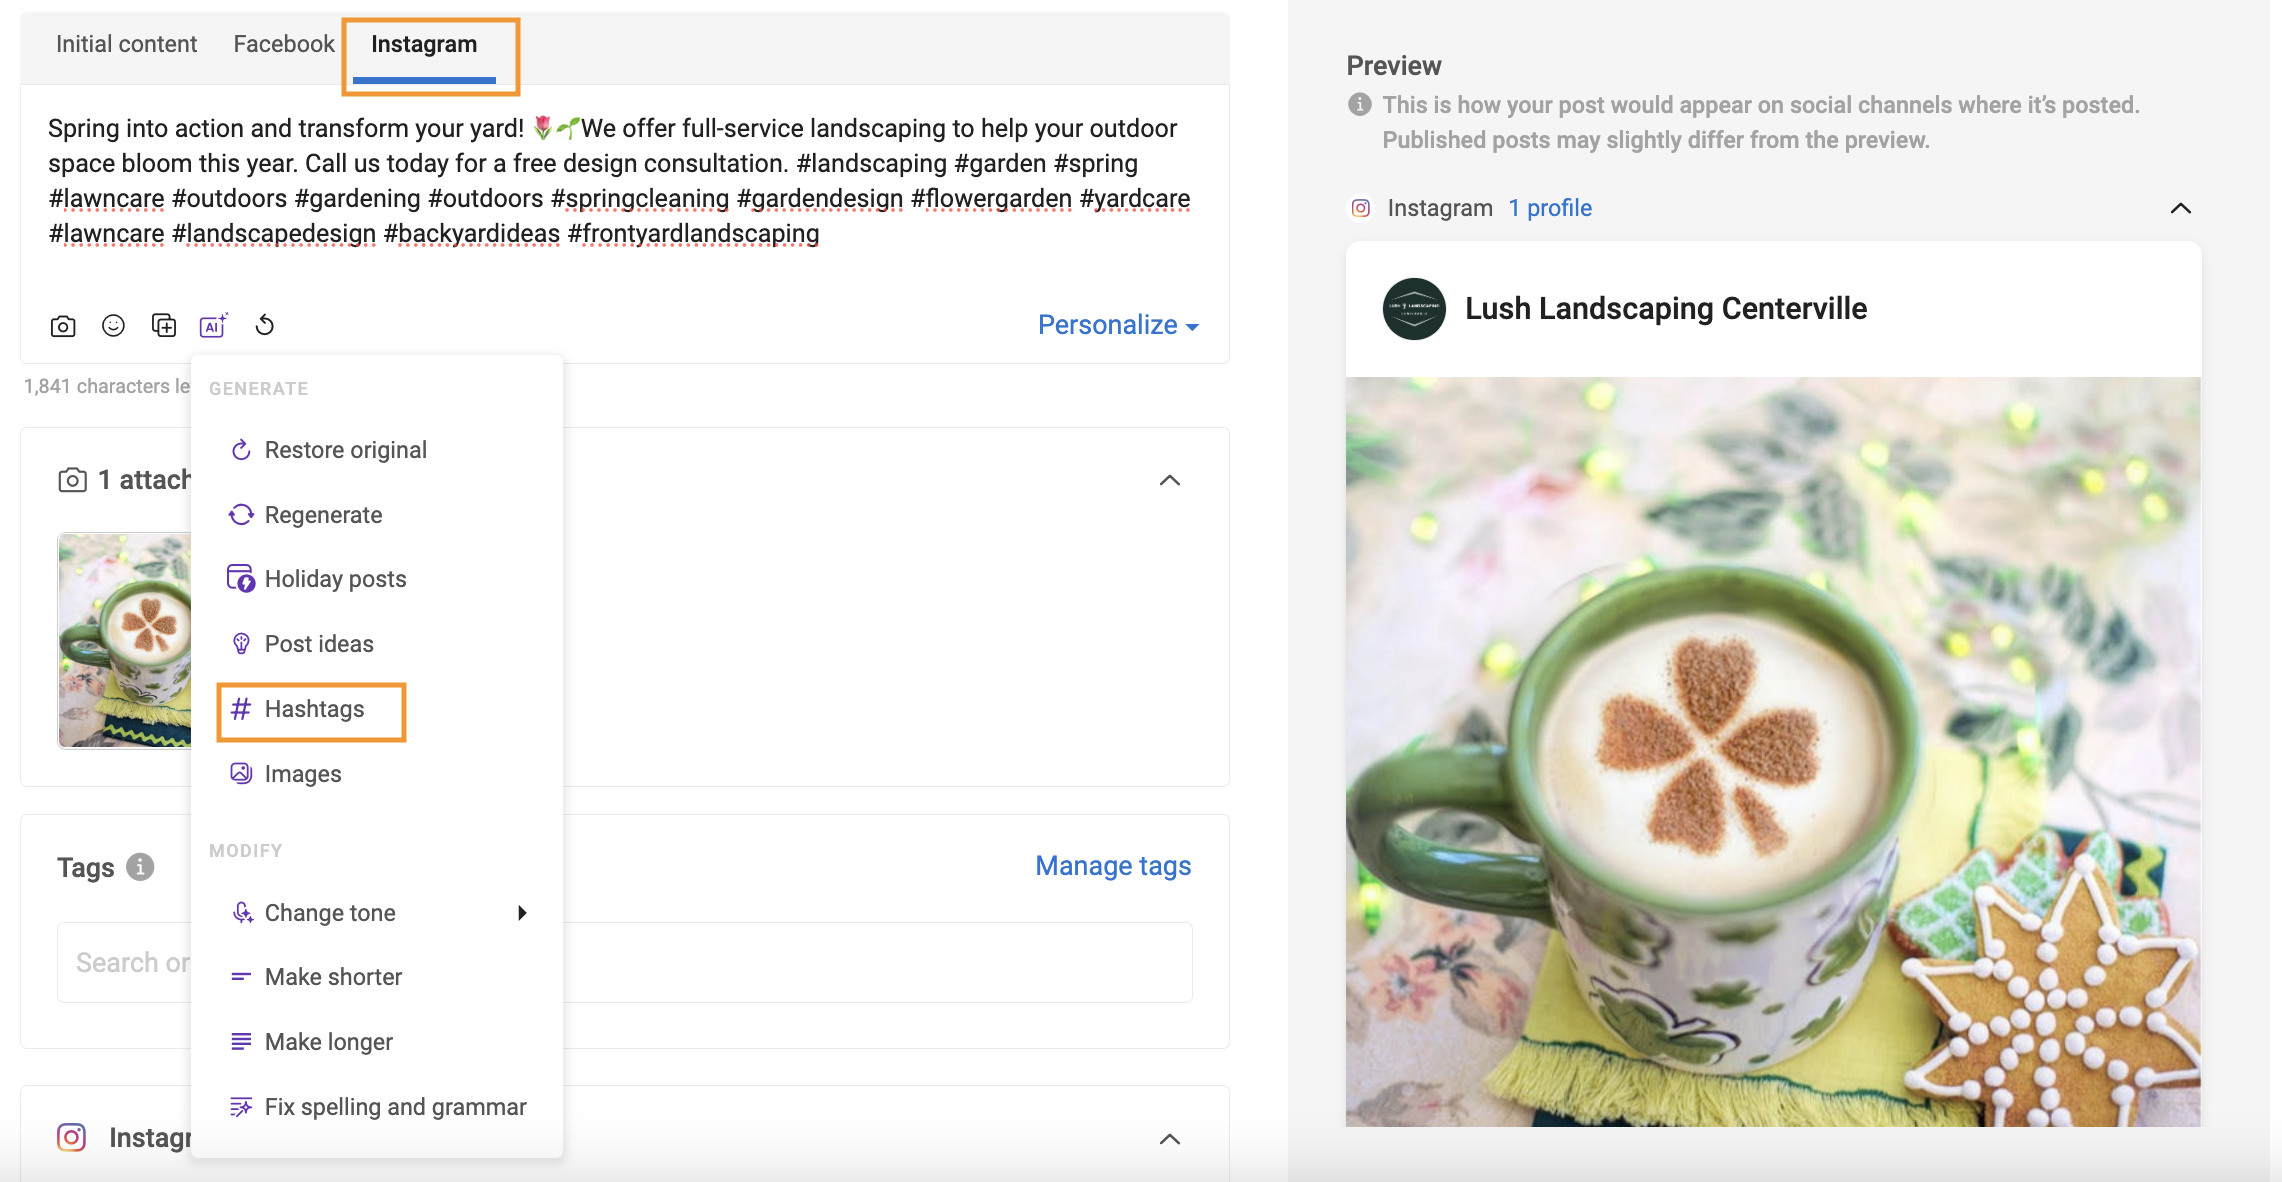
You can fine-tune the post for each channel, adding a personal touch or leveraging AI capabilities to make it stand out uniquely.
SCHEDULE POST
To schedule post, follow the below steps:
Step 1- Click the 'Schedule post' button.
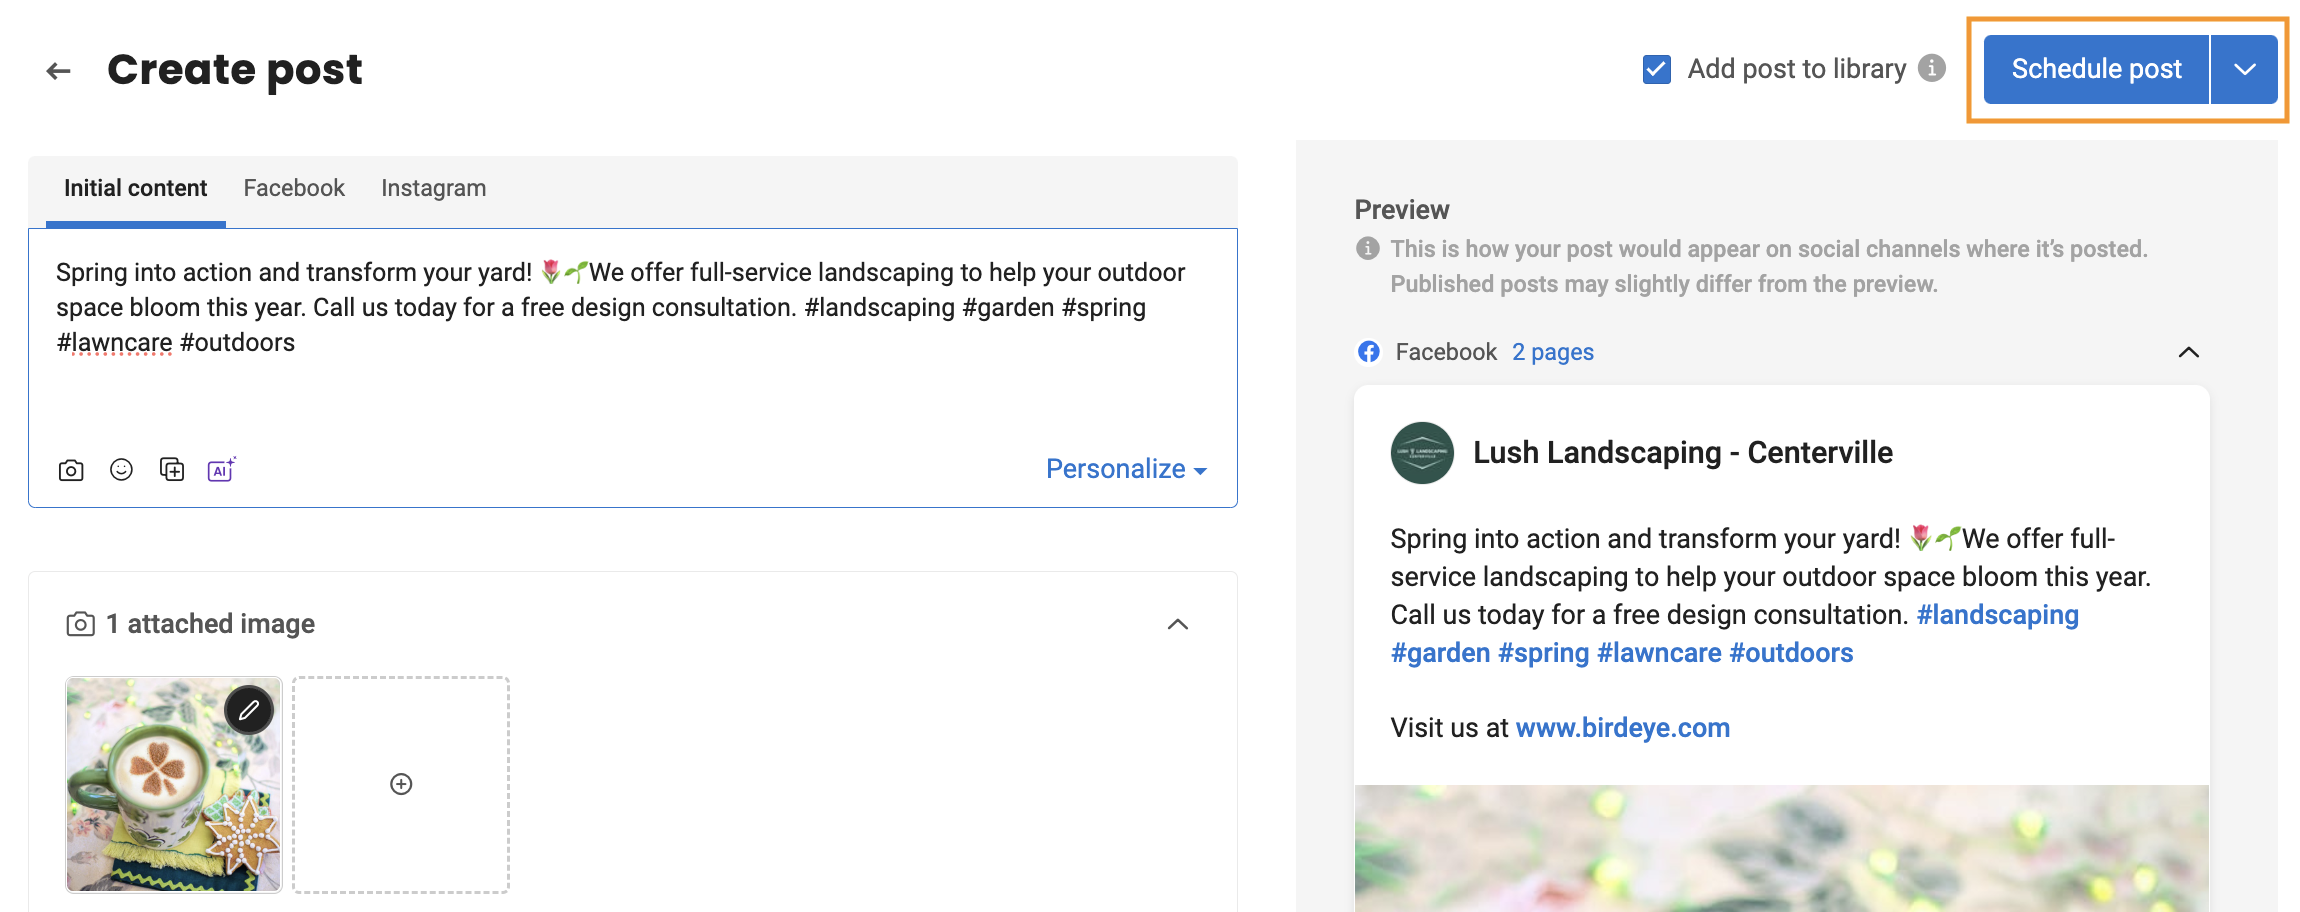
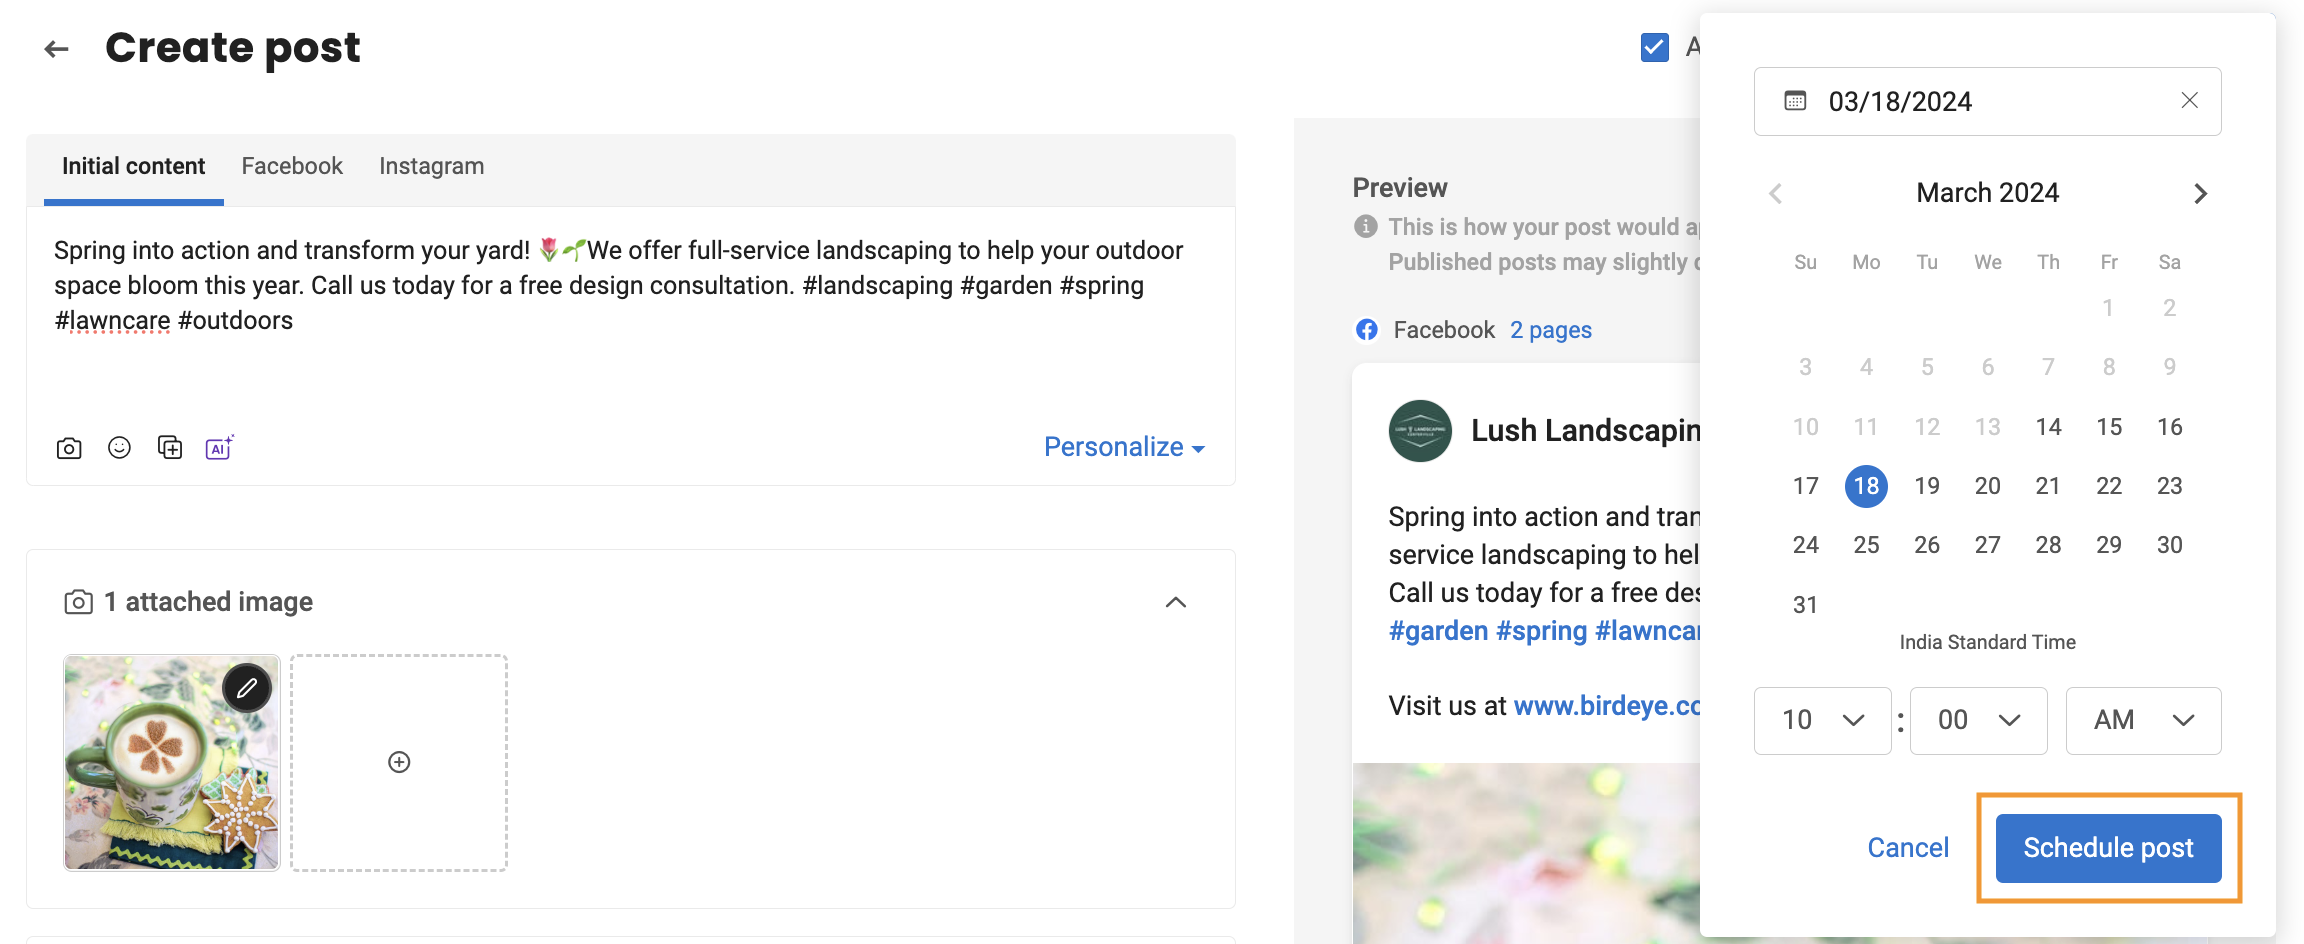
Step 2- A calendar will be displayed; choose a future date and time to schedule your post.
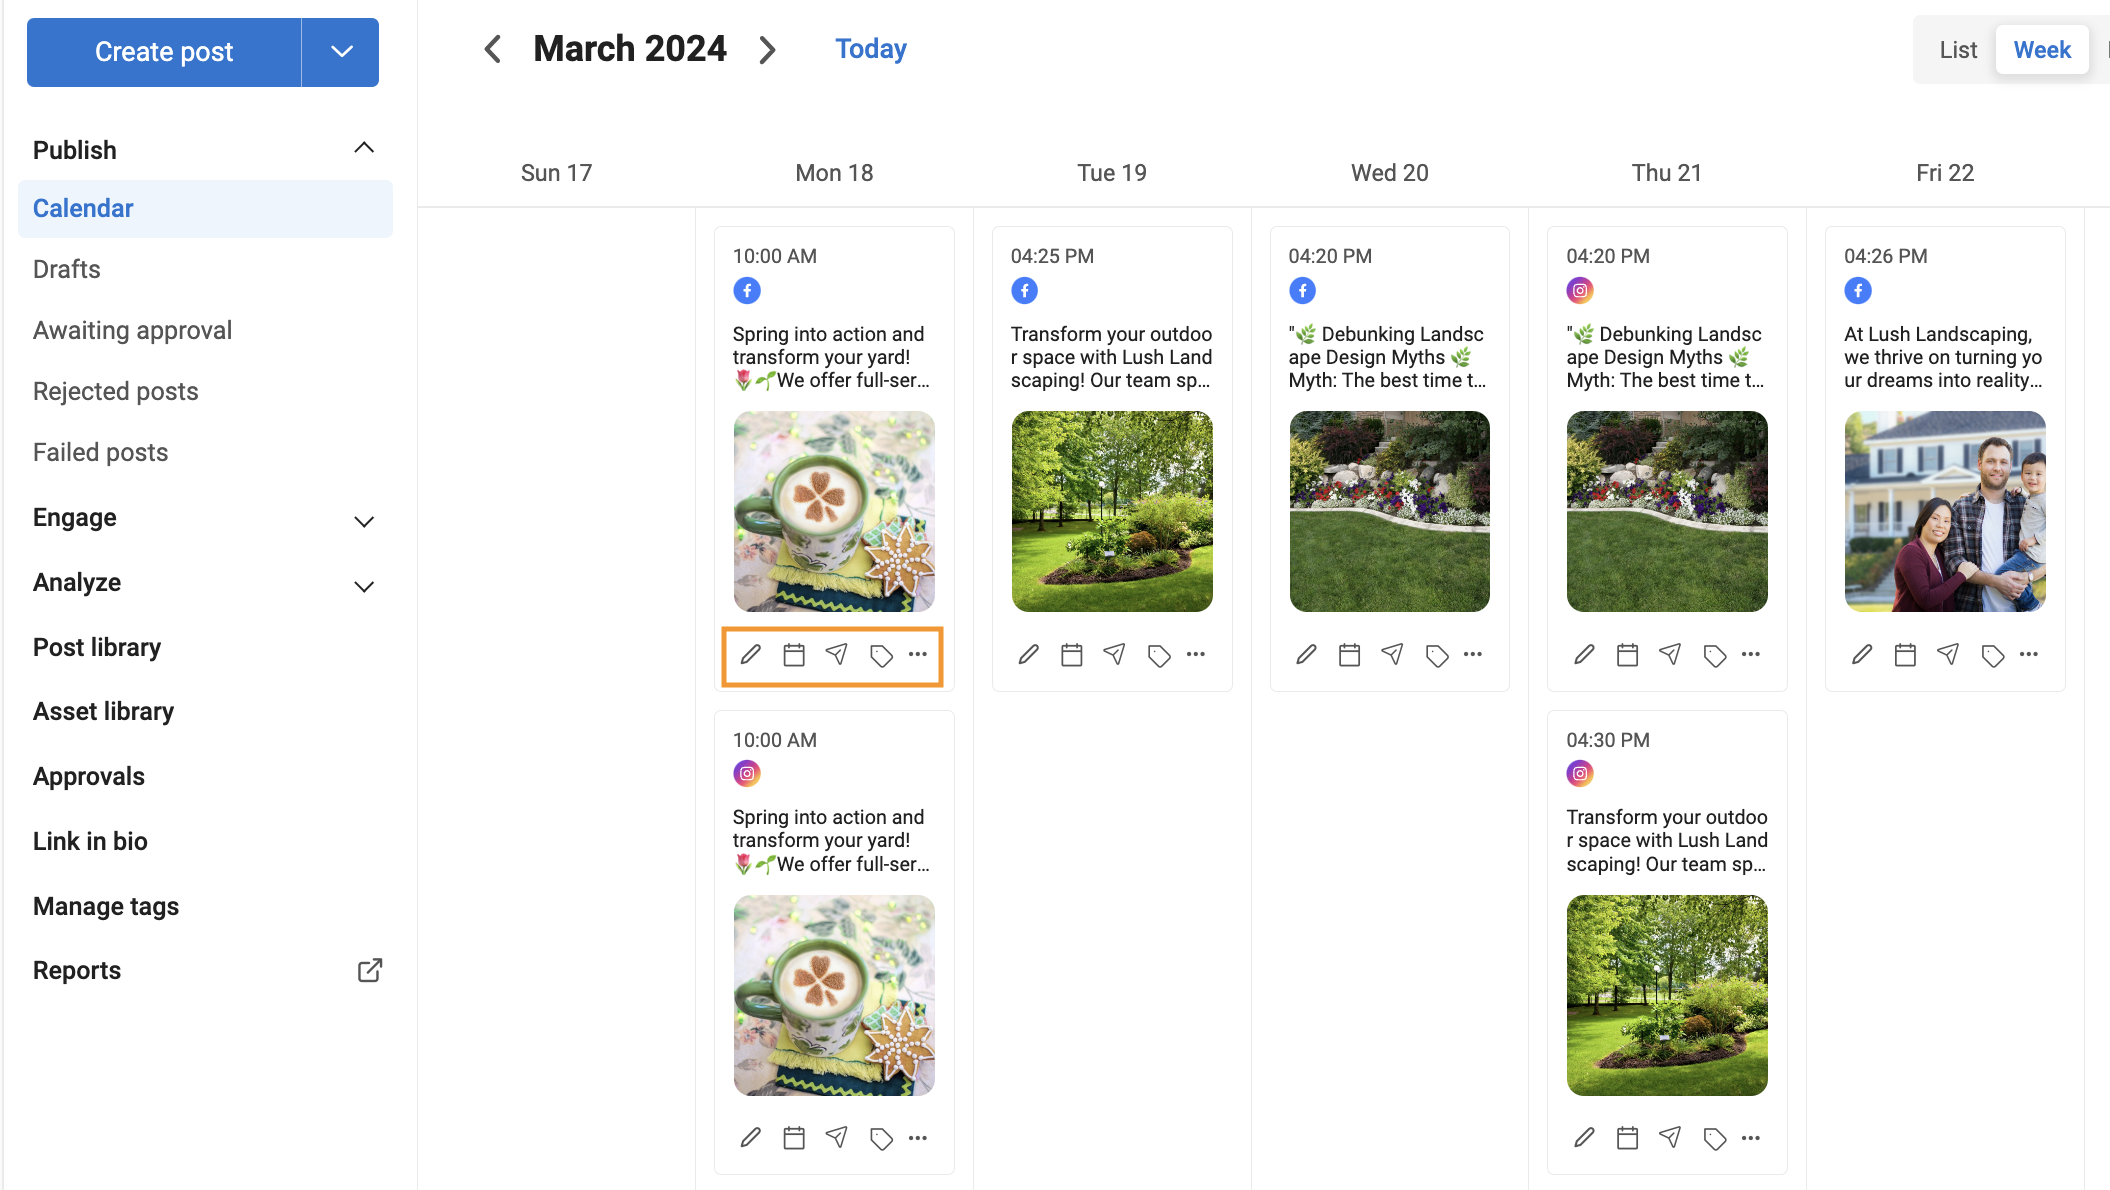
Step 3- After scheduling the post, it will redirect you to the social calendar page. In the calendar, you will see separate posts for each social channel.
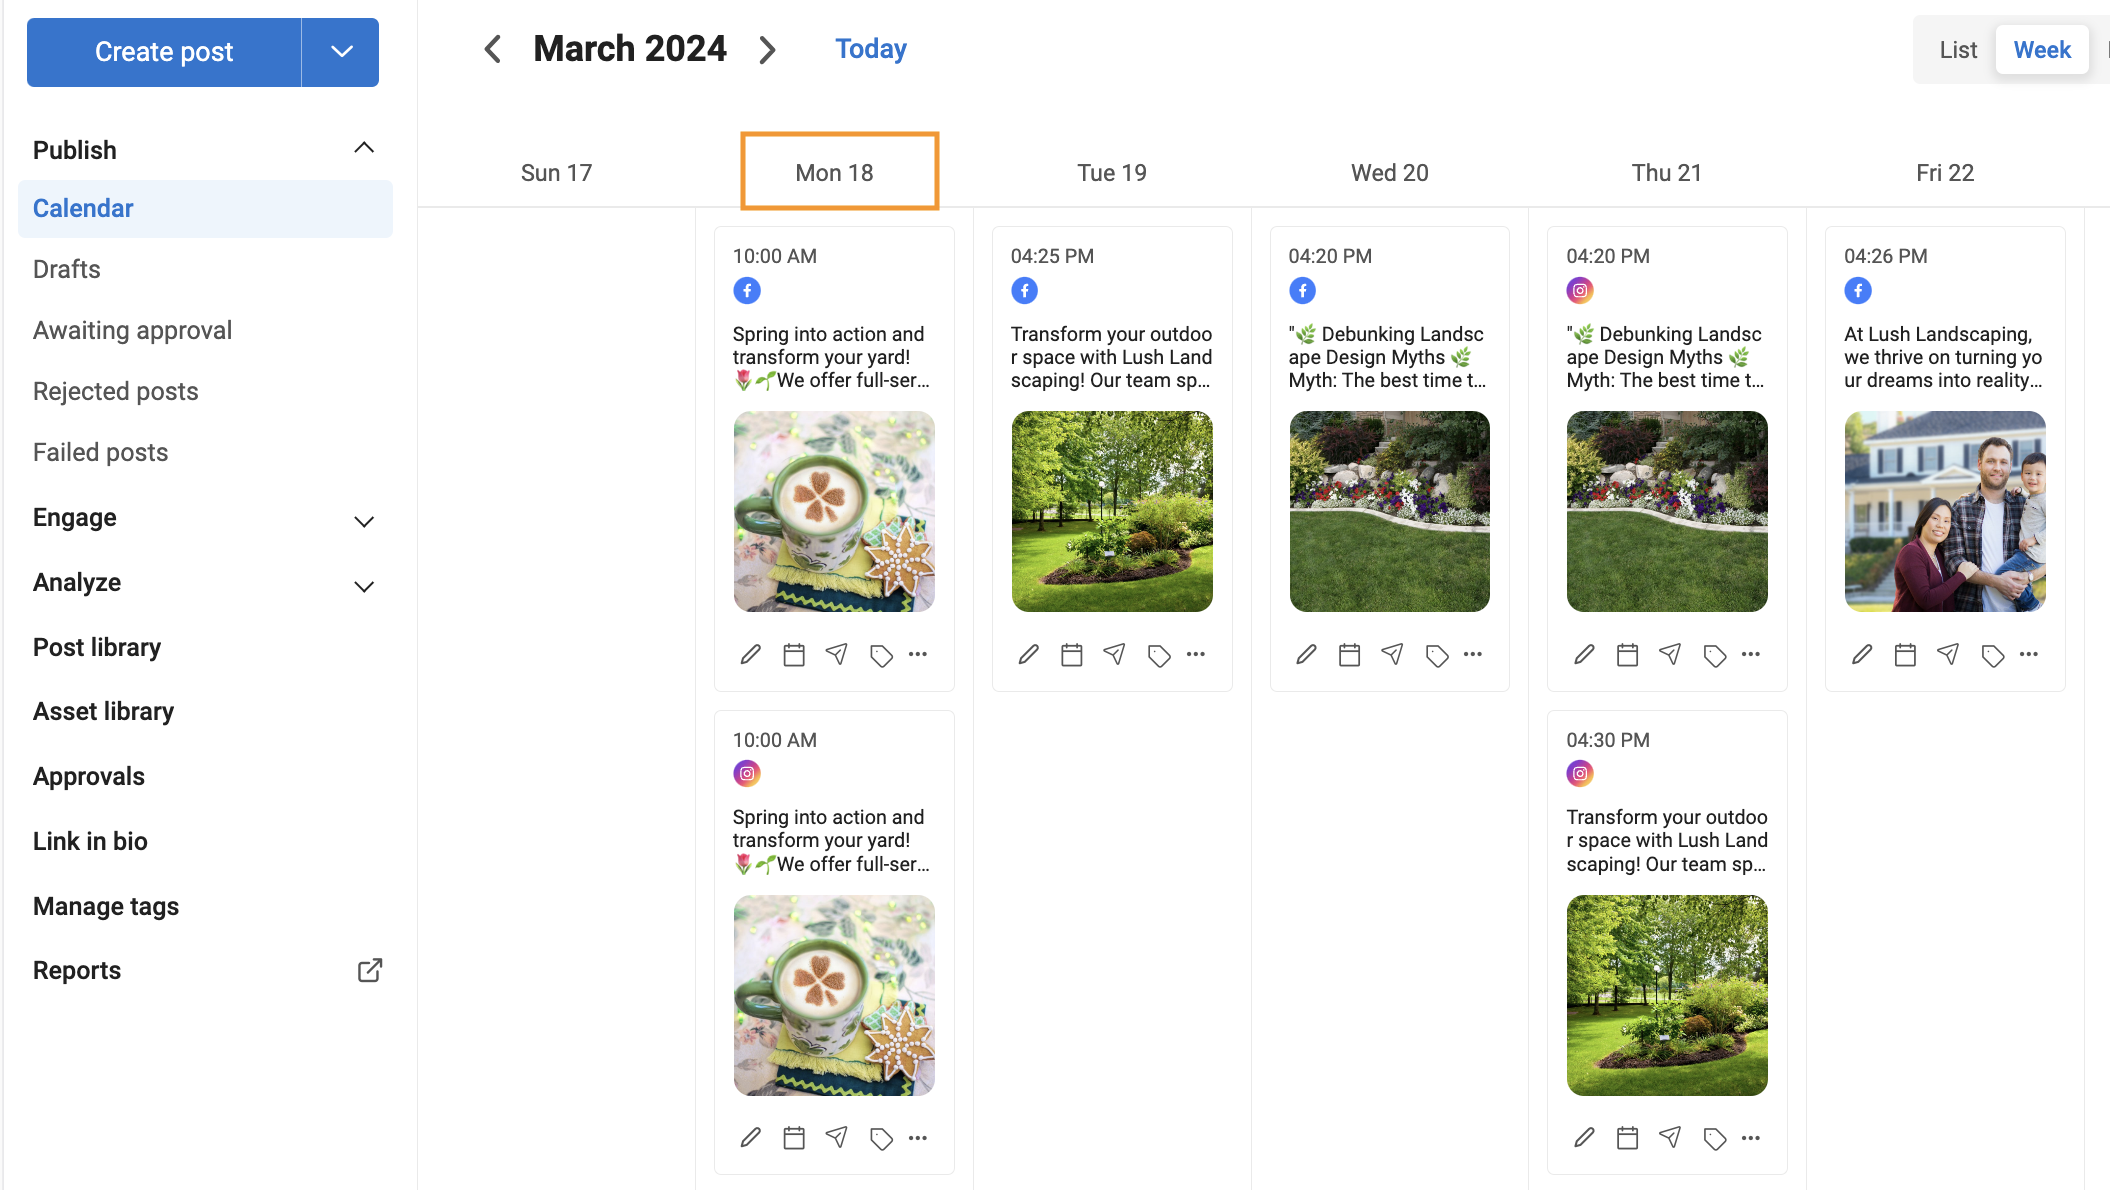
Step 4- You have the flexibility to make content adjustments specifically for each channel with ease. To illustrate, if you wish to alter the content for your LinkedIn post, simply click on the 'Pencil' icon, make your edits, and save them. Similarly, you can also adjust the posting date by selecting the 'Calendar' icon to reschedule the post. If you prefer to publish the post immediately, click the 'Instant Post' icon, you can view tag names associated with the post in case you have provided one. Click on the menu icon portrayed as three horizontal dots to duplicate, delete the post, or chat with approvers.
