What does each of the fields in the contact upload Excel file mean?
Birdeye gives you the ability to create campaigns and send out review, survey, customer experience or referral requests right from your dashboard. Before you get started with campaigns, you need to ensure that you have uploaded the customer information in Birdeye.
To upload the customer data, you need to fill in customer information in the template which can be downloaded from your account.
Downloading Bulk Import Template
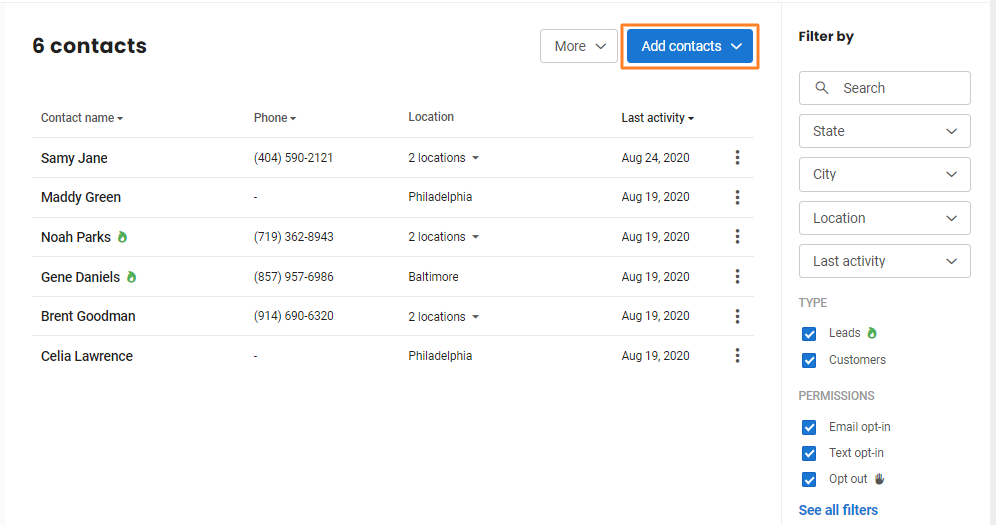
To download the template, go to the 'Contacts' tab on the left navigation rail and on the new page, click on the 'Add contacts' button.

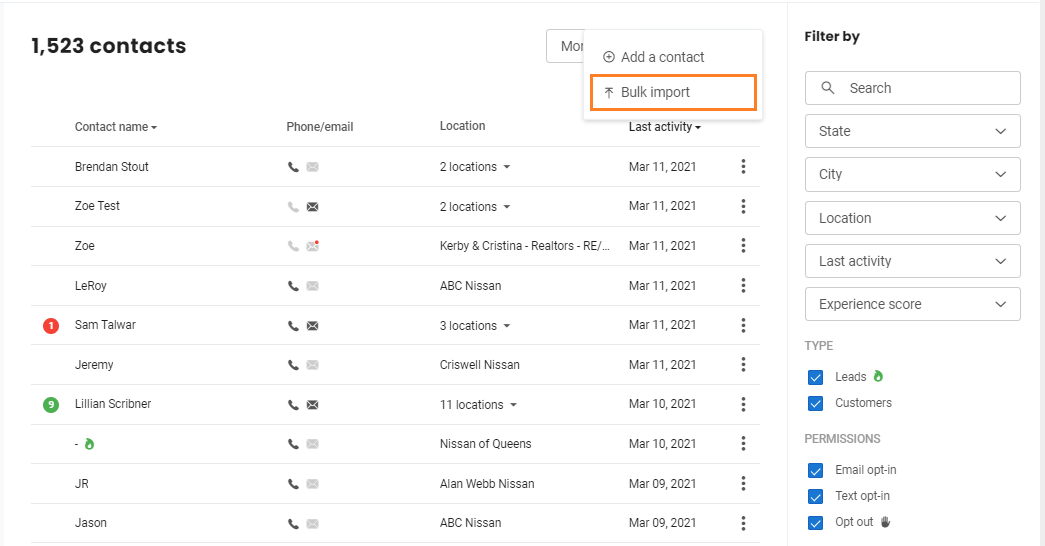
Click on the 'Bulk import' option.

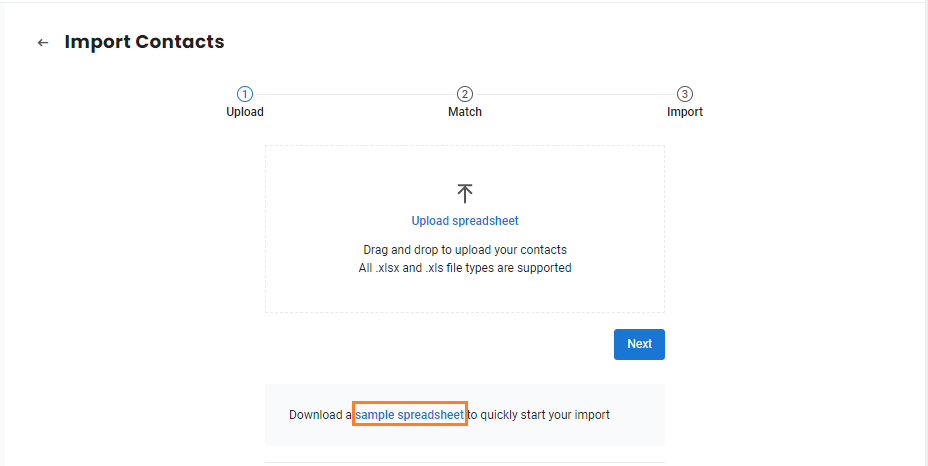
On the new page, download the template by clicking on the 'sample spreadsheet' button.  The downloaded Excel template contains 13 fields, out of which three are mandatory.

Fields In The Spreadsheet
- Enter your customer's 'First Name' in this field.
- Enter your customer's 'Last Name' in this field.
- Input the customer's 'Email ID' here. Make sure there are no extra spaces within the email address (eg: justinholland 200@gmail.com)
- Provide the customer's 'Mobile Phone' number in this field. Ensure that the area code is entered correctly before every contact number. This field is optional but in case the 'Email ID' field is blank, the 'Mobile Phone' field becomes mandatory.
- From the drop-down select your customer's country. This is an optional field.
- Opt in a contact for feedback emails, which allows you to send them customer feedback communications. Opting out means they will no longer receive these emails. Feedback emails include review requests, survey distributions, and other customer experience feedback messages.
- Opt in to enable communications for marketing emails, or opt out to stop them. These emails include referral programs, offers, and promotional messages.
- Opt in to enable communications for service emails, or opt out to stop them. These emails include appointment reminders, payment requests, office closure updates, and similar notifications.
- Opt in to enable text communications, or opt out to stop them. For example, choosing text opt-in allows you to send text messages to the contact, while text opt-out stops all text communications. By default, contacts are set to text opt-in.
- This field allows you to assign an employee to a customer. This is useful information to determine employee performance. You can enter the employee's email ID in this field or leave it blank.
- If you are using a multi-location account, enter your unique business ID here.
- Referred By Code, Email, or Phone — Enter the code, email address, or phone number of the customer who referred this contact. Example: johndoe@yahoo.com, (123) 456-7890, or 12345.
- This field allows you to add a tag to your contact. NOTE: All the contacts uploaded through the Excel file will be tagged with the upload date and version of the upload.