How to streamline the Social content approval process with our robust approval workflow feature
Birdeye empowers your social media strategy with our user-friendly, multi-step, multi-user Approval Workflow feature tailored for social users. Imagine seamlessly managing and optimizing your content approval processes directly within your social media tool. With our robust solution, social posts can only go live after obtaining approval from designated approvers. Guest users are not left out—submitting posts for approval is a breeze, though direct publishing remains exclusive to approved content. Approvers stay in the loop with email notifications and a dedicated 'Approvals' tab. Revolutionize your social team or agency's workflow, ensuring a streamlined approval process that aligns seamlessly with your social content creation journey.
SETUP APPROVAL WORKFLOWS
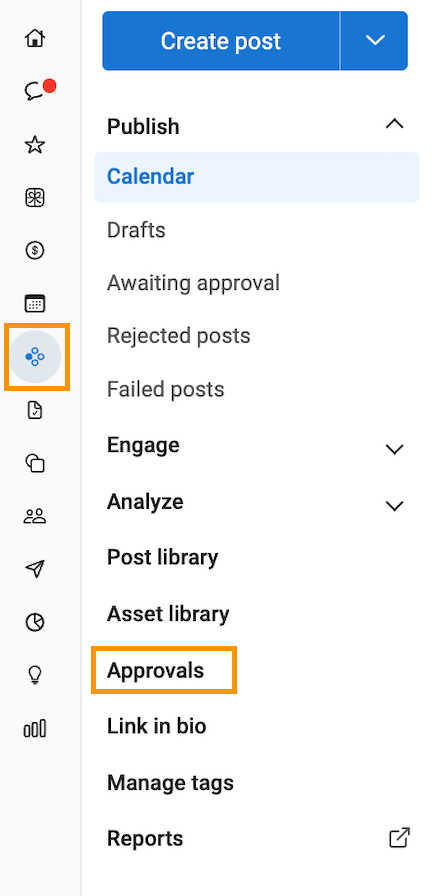
Log in to your Birdeye account and click on the 'Social' tab in the left navigation rail. Click the 'Approvals' button.
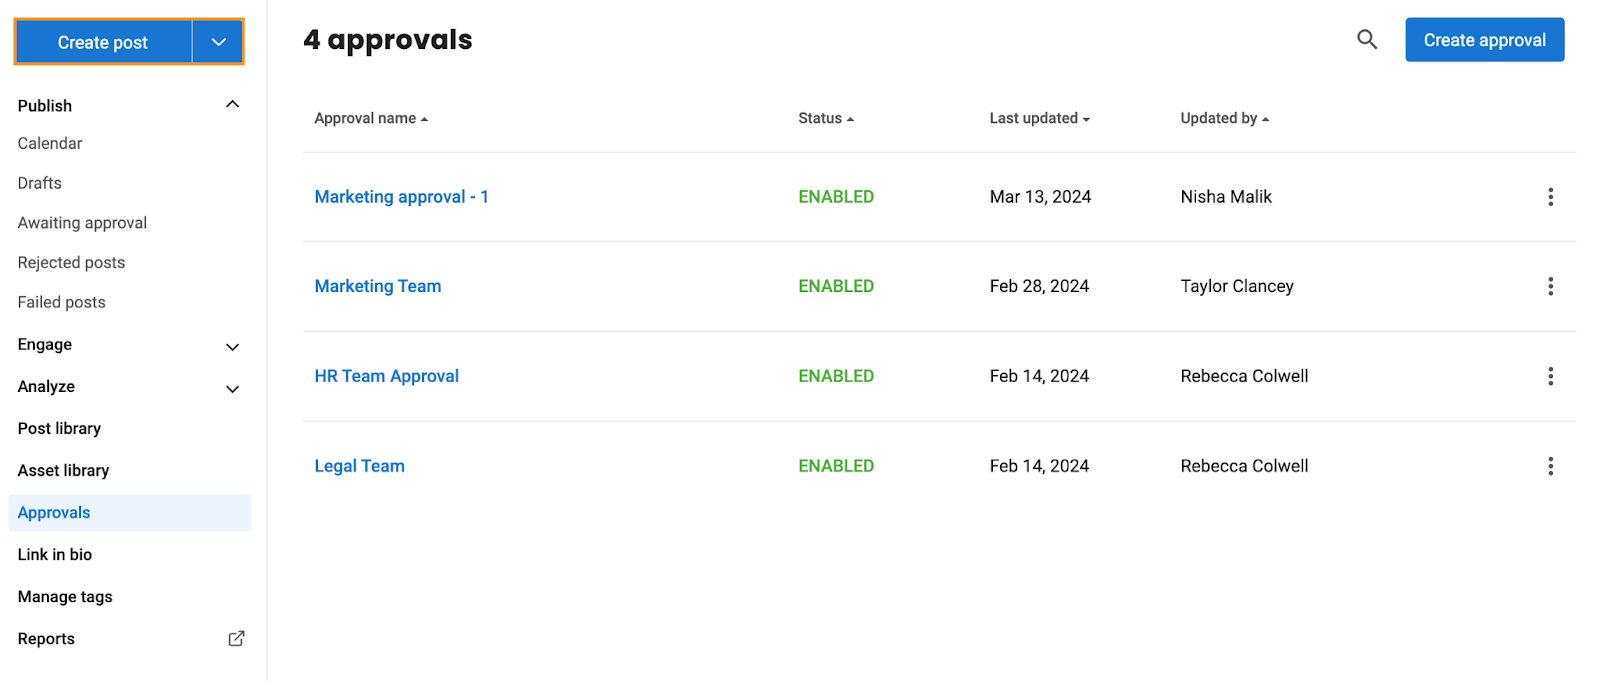
Click on the 'Create approval' button.
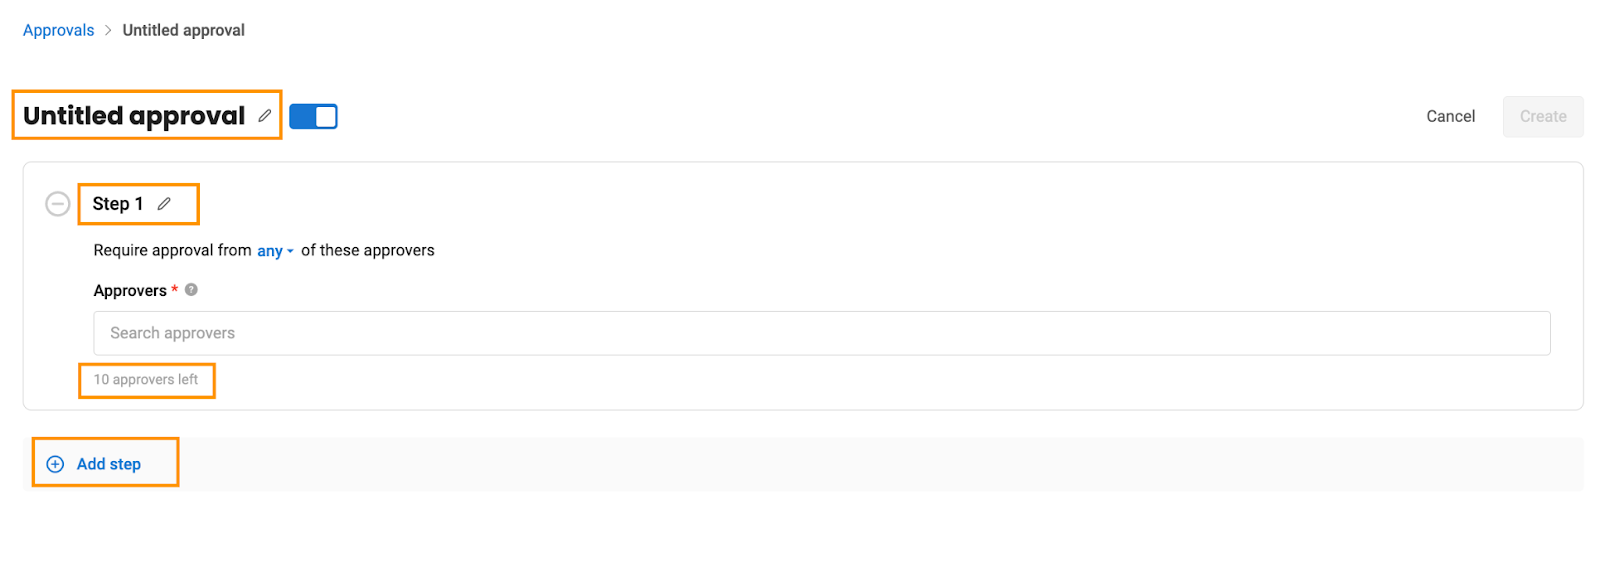
Click on the 'Pencil' icon to enter the 'Approval Name,' and users can also effortlessly add 'Step Names' by simply clicking on the same 'Pencil' icon. Specify the Approvers to whom you want to grant access for post-approval across different steps. Click on 'Add step' to add the next step.
HANDY TIP: It's crucial to note that there is a maximum limit of 10 approvers per step, limited to owners, admins, or external users. Additionally, users can add a maximum of 10 steps for the approval process.
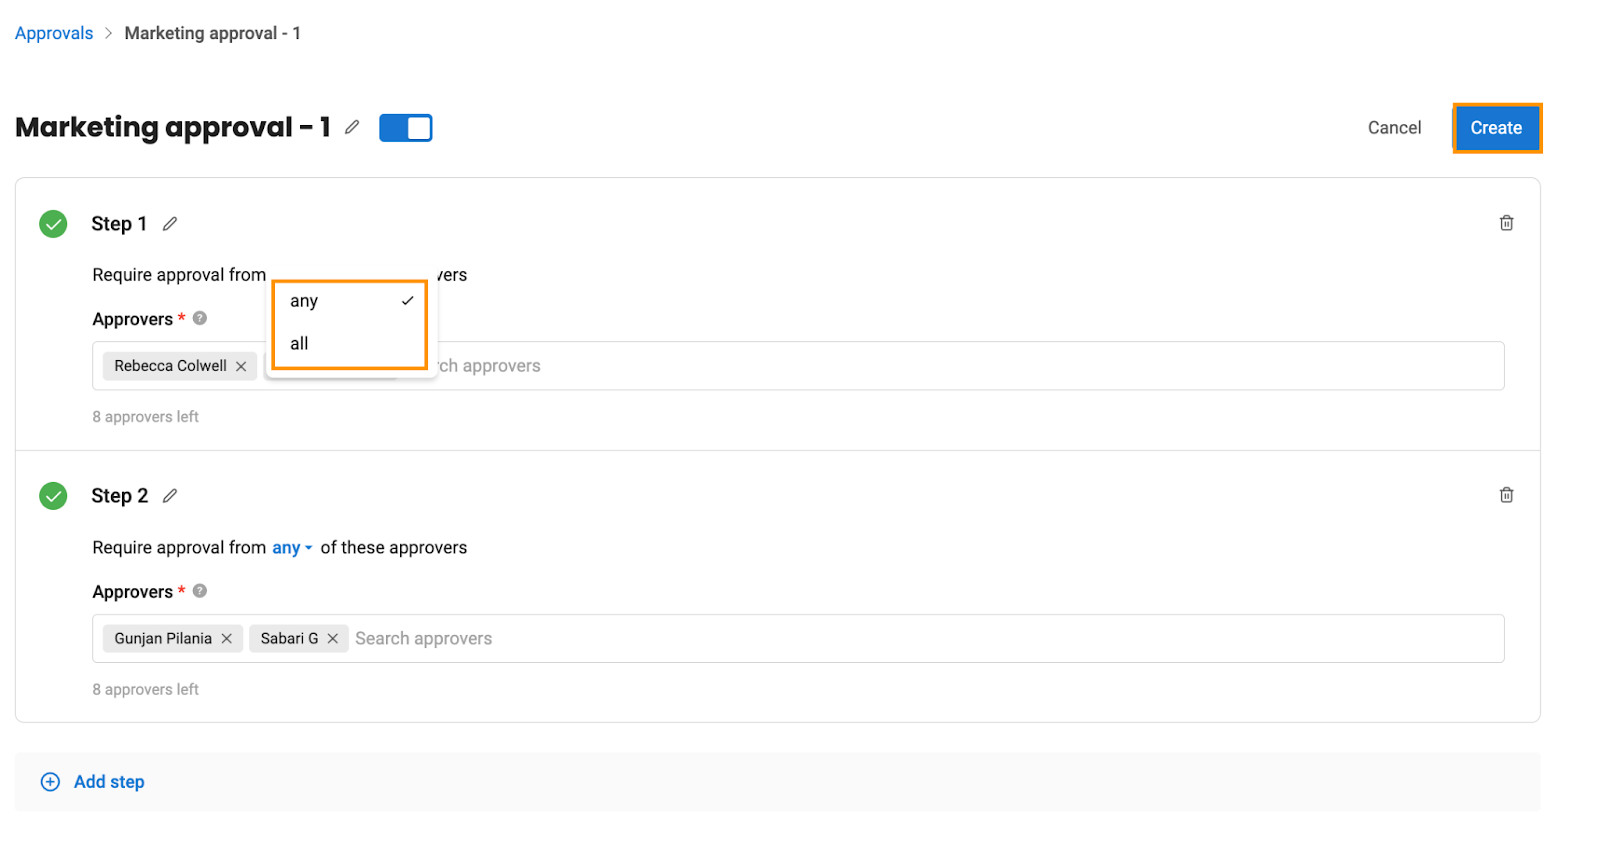
Now, choose the 'any or all' condition. Selecting 'All' implies that all added approvers in a step must approve a post for it to progress, while selecting 'Any' means that any one of the approvers can approve the post, and the process will move to the next step. Once steps and approvers are specified for each step, click on the 'Create' button to establish the workflow.
Once created, a toast message on the screen reads, 'Marketing approval 1 has been created.'
Once approval workflows are set up, you can Edit, Delete, Duplicate, or Disable actions for each approval row. Hover over the 'three dots,' and then click on the 'Actions' drop-down button to access these options.
Edit: You can modify the existing approval. You can add or remove approvers, adjust the number of steps, and change the condition to 'All' or 'Any' at each step. It’s important to save the changes after editing.
Disable: You can deactivate the workflow. This means the workflow will not appear in the create post flow moving forward, but the posts already linked to it will continue to function as they are.
Delete: You can permanently remove the workflow. Deleting the workflow will result in any post associated with it being rejected.
Duplicate: Select ‘Duplicate’ to create a copy of the current workflow.
CREATE A POST
Now, create a post with a selected approval by following the steps below:
Click on the 'Create post.'
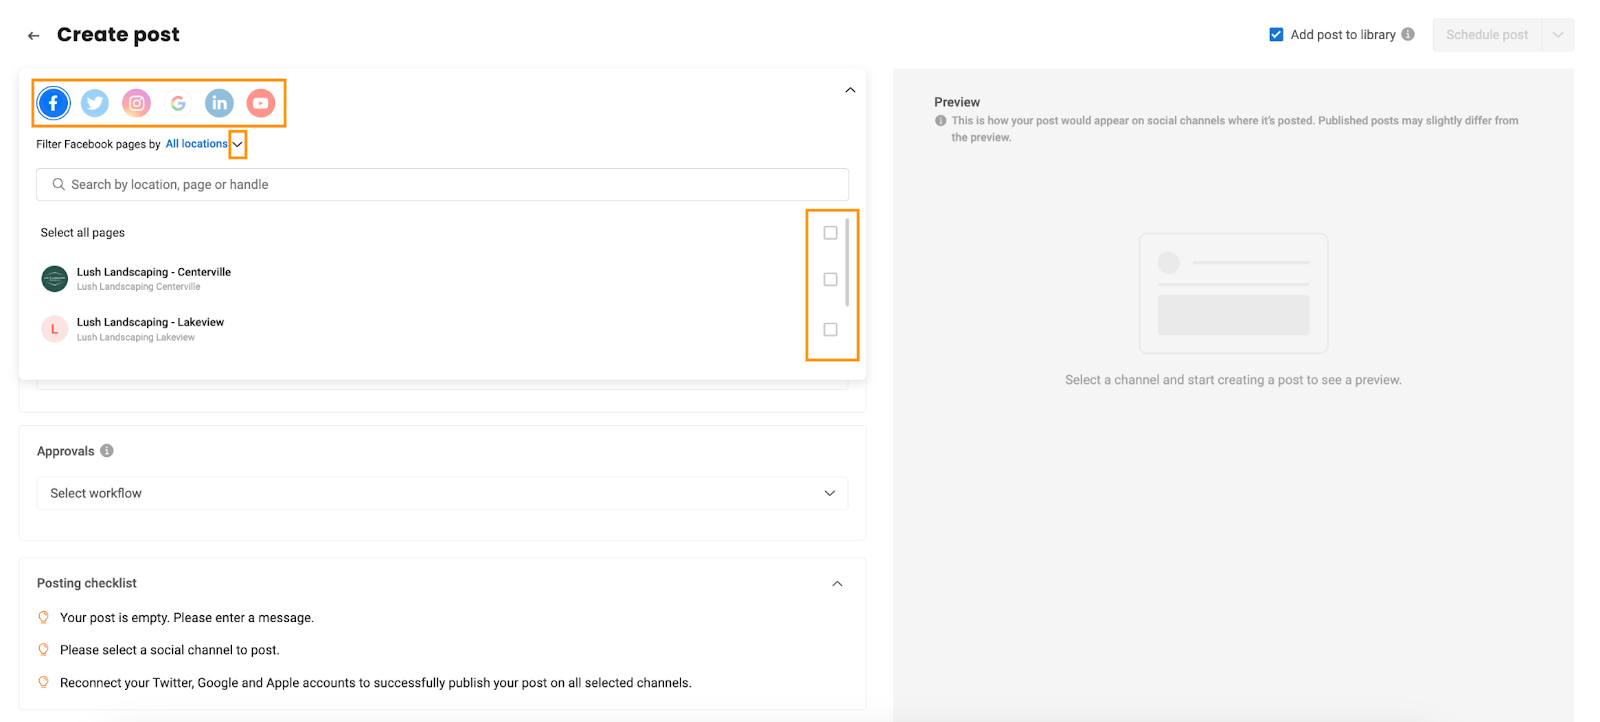
Select the desired channels and choose the locations from the available options.
Once locations are selected, navigate to the respective pages attached to those locations.
HANDY TIP: It will automatically copy the selected locations from the first channel to all other channels.
To learn more about creating Social posts, refer to the support article - How do I create a Social Master post?
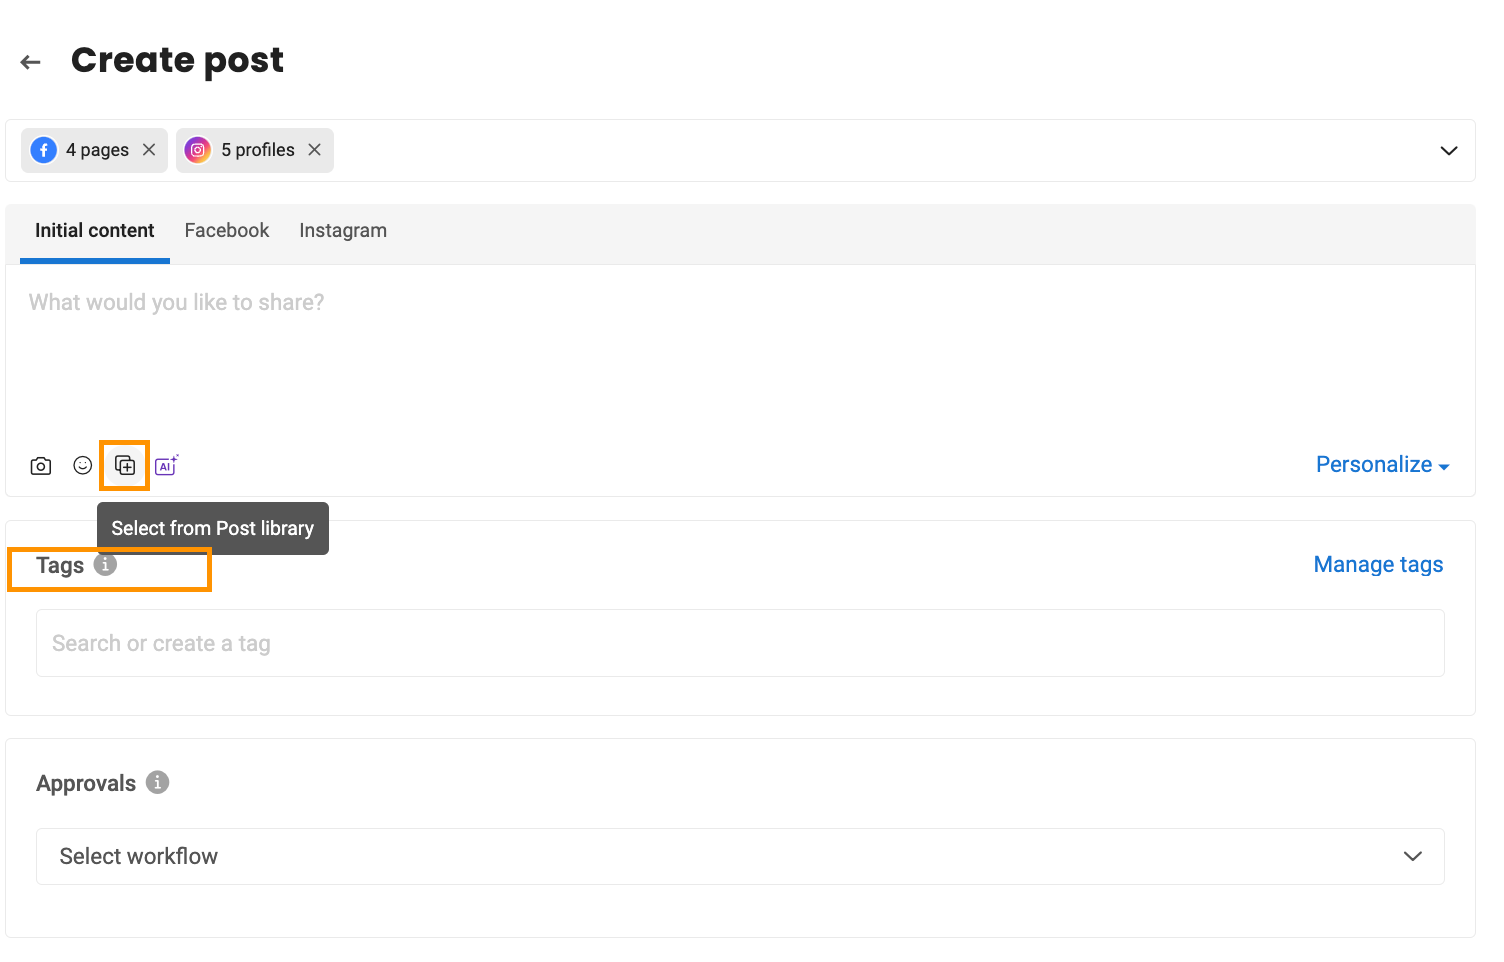
To create a post, you can also select posts from the ‘Post Library.’ To learn about the Post Library, refer to the article - How to Make the Most of Birdeye's Post Library Feature?
You can also add tags to find posts using tags across the dashboard.
To learn about the tagging feature, refer to the article - How to create and manage tags in Social?
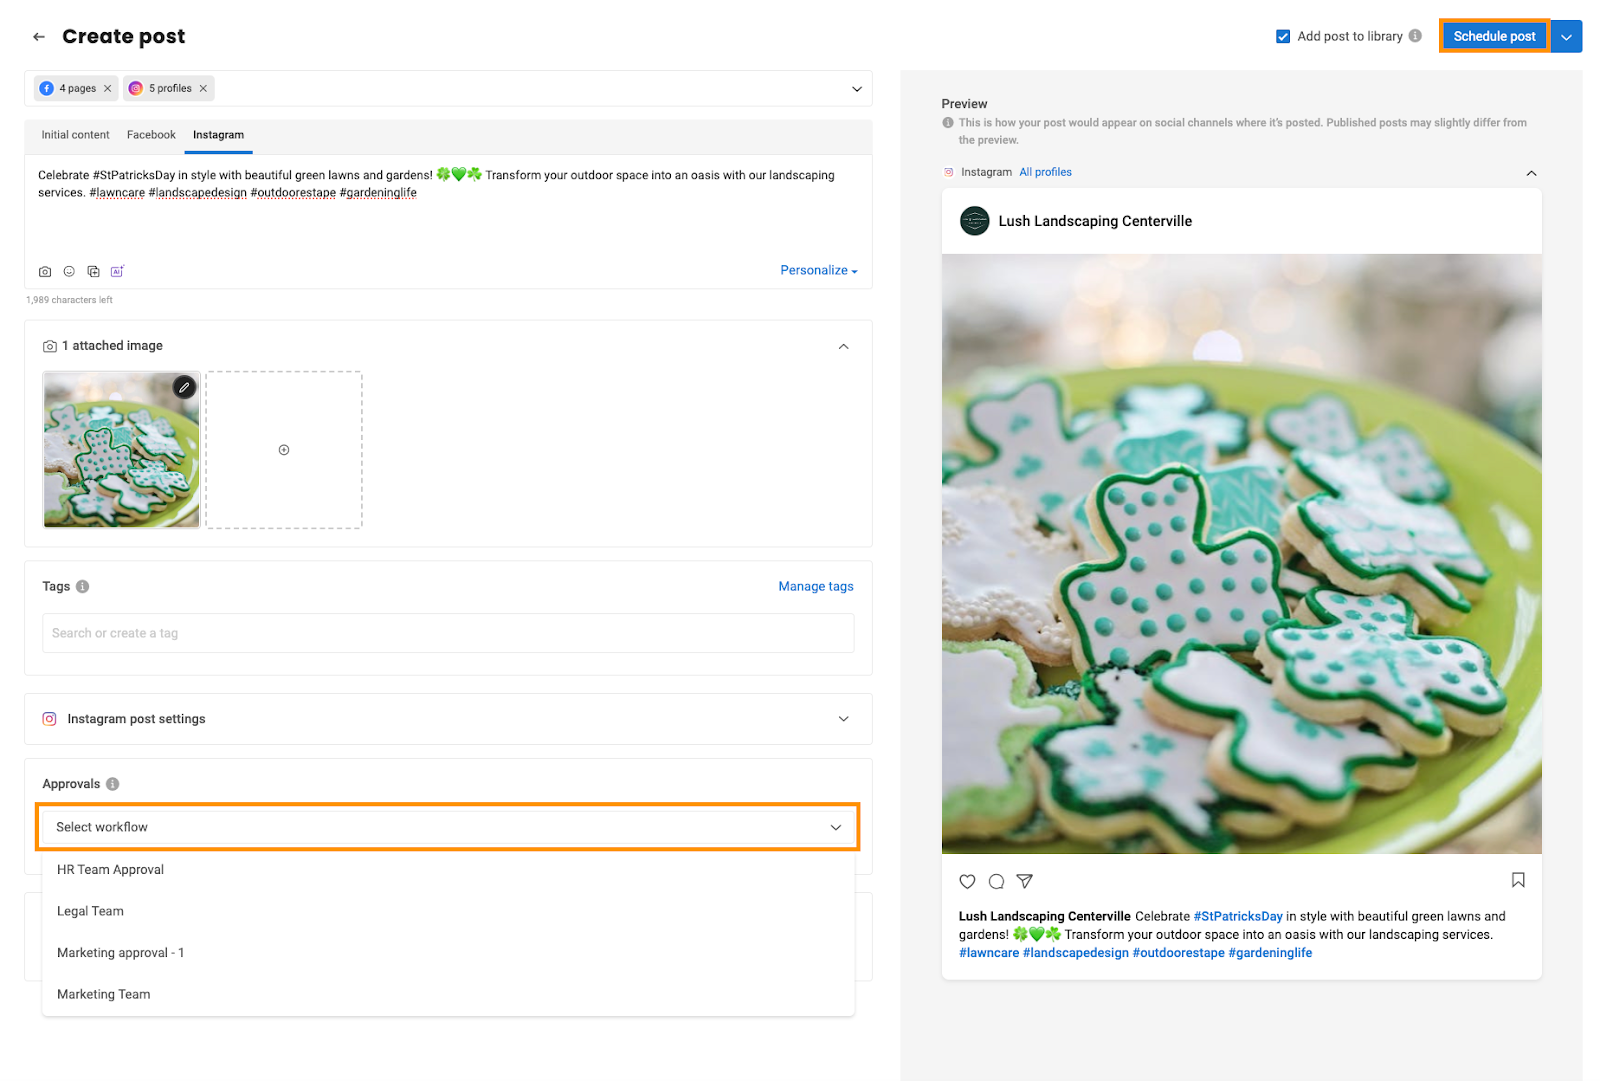
After creating the post, select 'Approvals' from the drop-down button during the post-creation process to select the workflows.
Once all steps are completed and approved, the post will be scheduled and published at the specified date and time.
HANDY TIP: Guest users can now create posts and submit them for approval, with selecting an approval workflow mandatory for scheduling a post. Admins and owners, however, can bypass selecting a workflow and schedule a post directly.
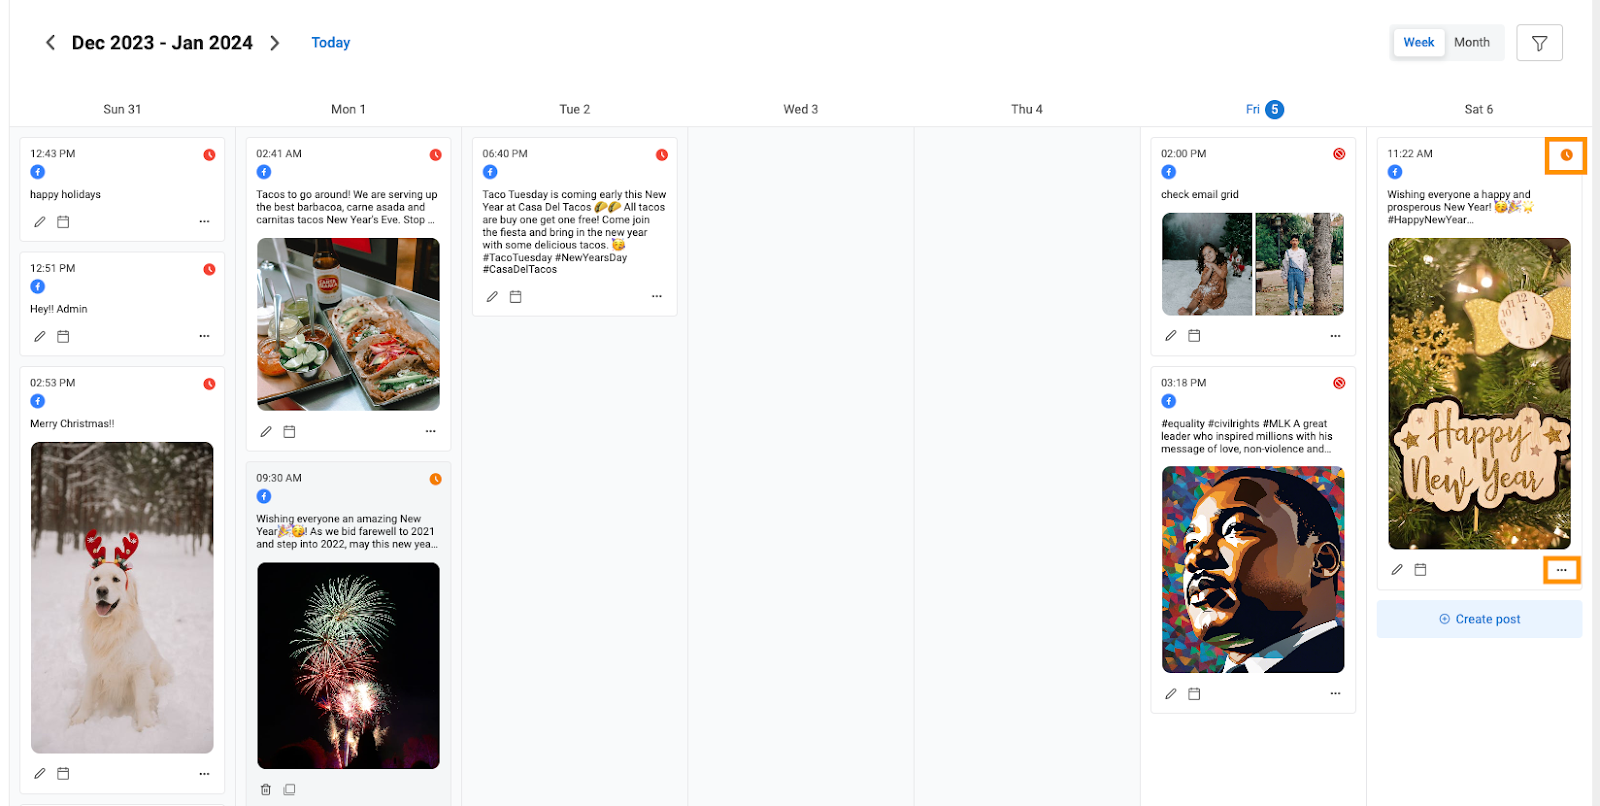
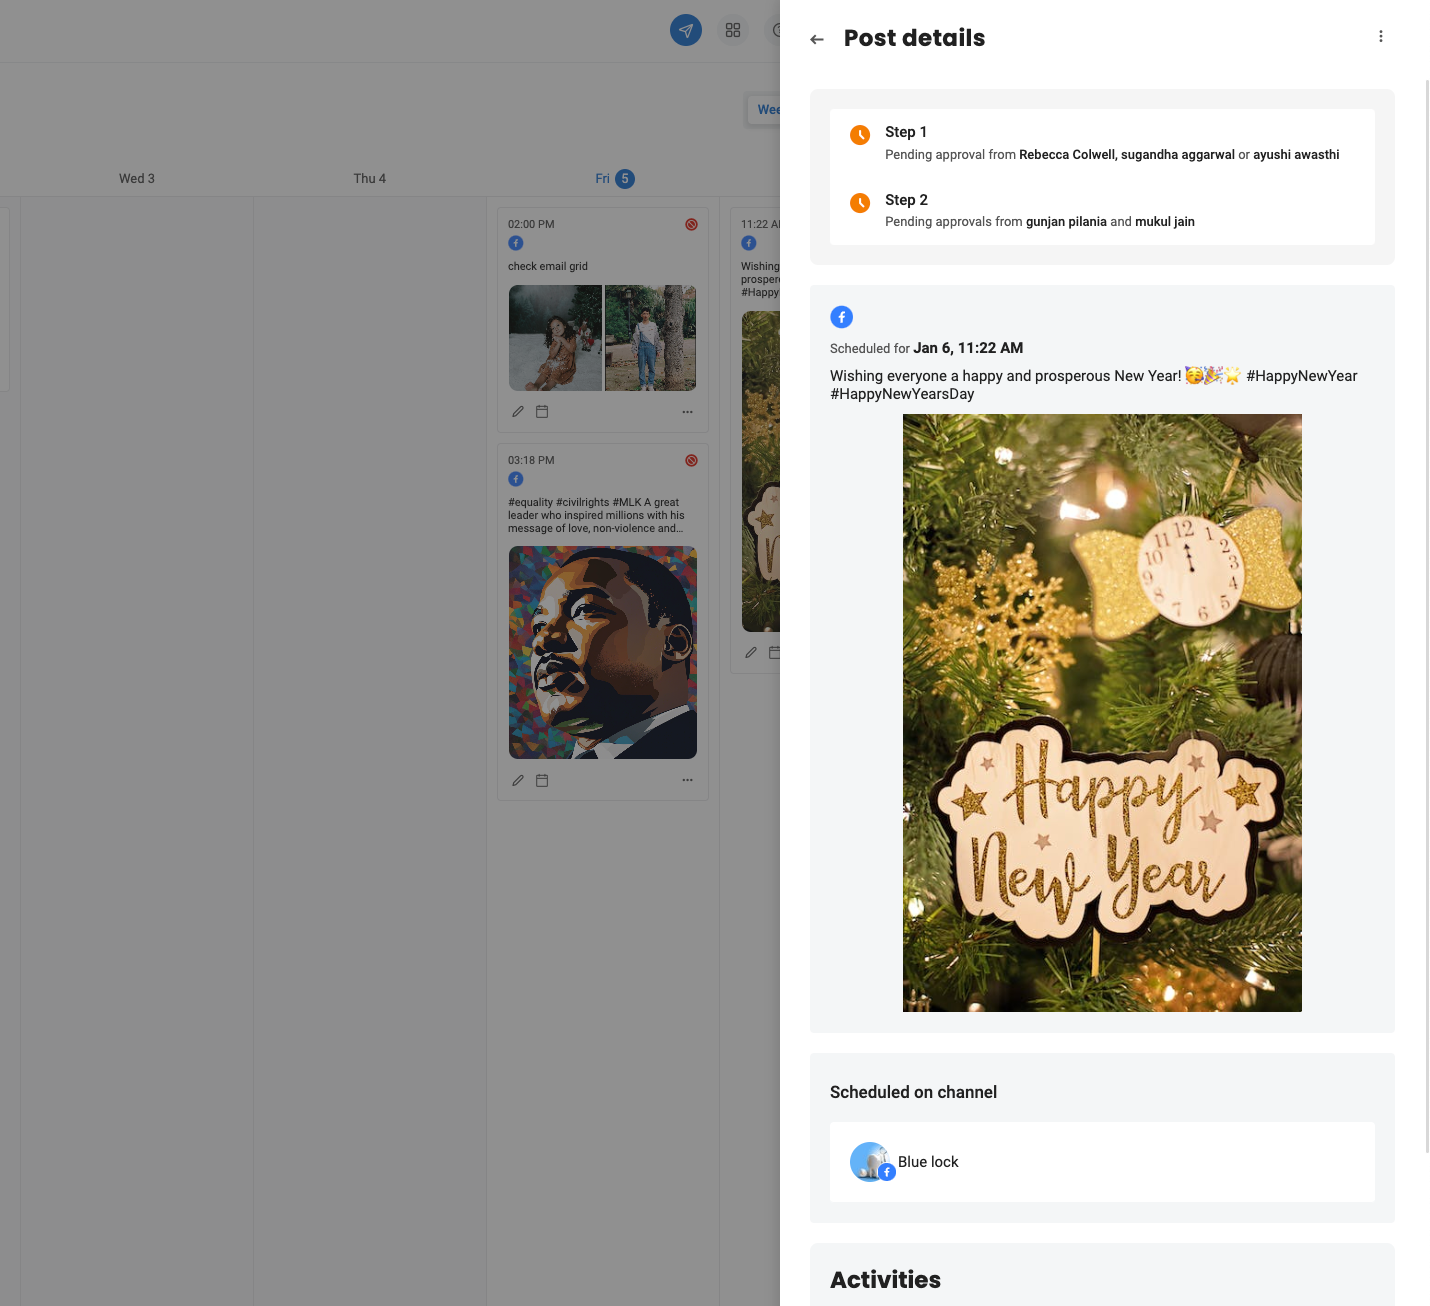
Once the post is scheduled and sent for approval but has not yet been approved by the approvers, it will display the 'Clock status,' indicating that the post is pending approval.
Click on the 'Clock Status,' and a drawer will appear from the right-hand side where you can view the details of the post.
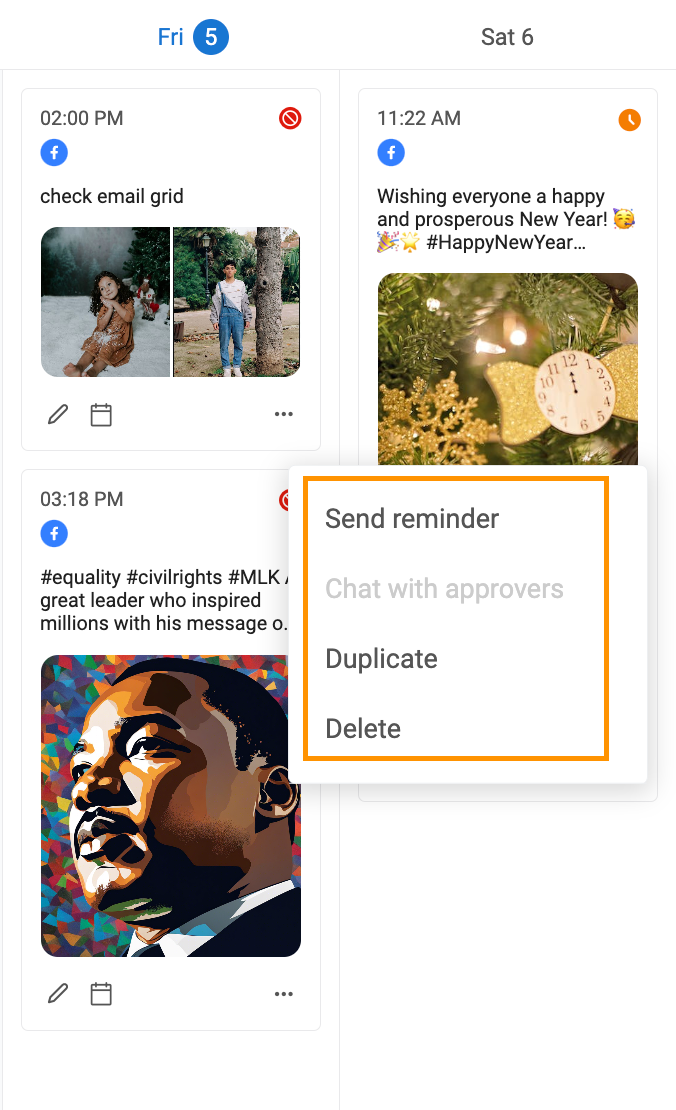
You can send reminders and chat with approvers right from the calendar by simply hovering over the 'three dots.'
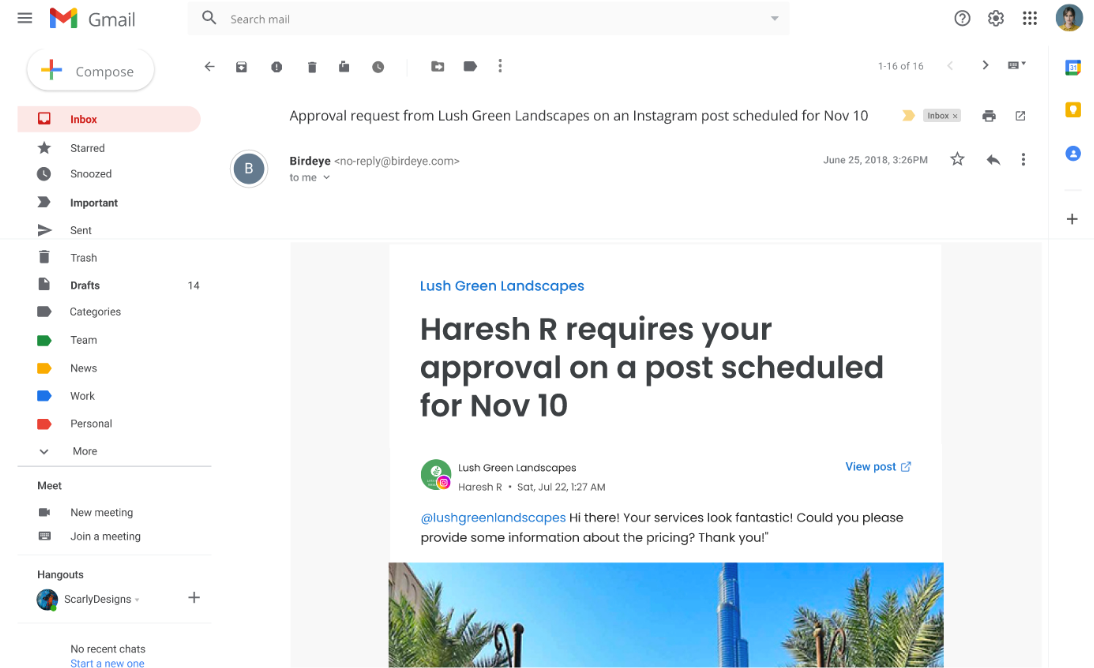
All approvers will receive email notifications to approve or reject posts using the 'Approve' and 'Reject' buttons. Internal users can approve with one click, and they will log in to provide a reason for rejection.
External users can approve or reject directly from email, and for any changes, you can click 'View Post.' and land on the post on your Birdeye app to make the necessary changes or chat with your team.
