How to create and publish Google Business Profile (GBP) posts and Google offers?
Birdeye allows you to publish or schedule posts on your Google business profiles along with other social channels within your Birdeye account. You can post announcements to your Google Business Profile to engage and inform your audience.
Create specialized Google Posts for tailored offers and discounts. Businesses can highlight promotional sales and offers on Google Business Profile. Attract, engage, and ultimately transform visitors into leads.
Before you create and publish a post or offer on your Google business profile, you must have your business profile integrated with your Birdeye account.
To integrate your Google business profile with Birdeye, you can refer to the help center article: How to integrate Google My Business listings with Birdeye - Multi-location Account
Set up Google Business Post
Step 1 - Go to the ‘Social’ tab.
Step 2 - Click the 'Create Post' button.
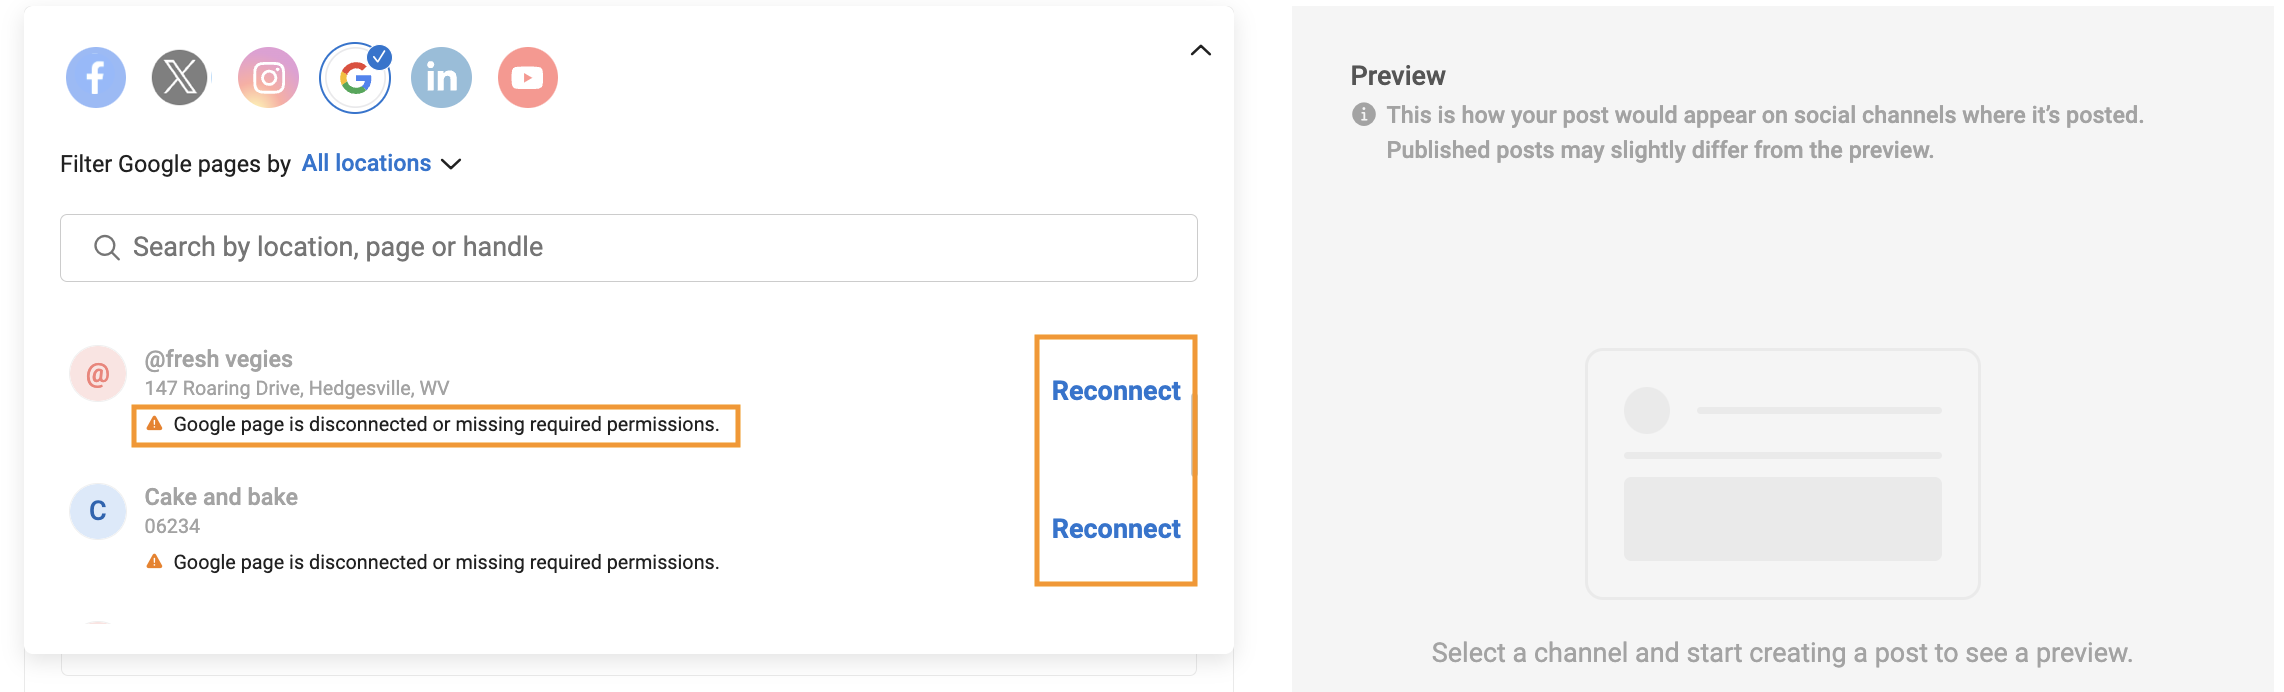
Step 3 - Select Google from the channels section and then select the pages where you want to publish the posts.

If you do not have a page mapped to the selected location or missing required permissions, click 'Reconnect' and you will be redirected to integrate GBP to desired locations.
Step 4 - Once you have selected the pages you want to post on, add the content you want to post in the text box.
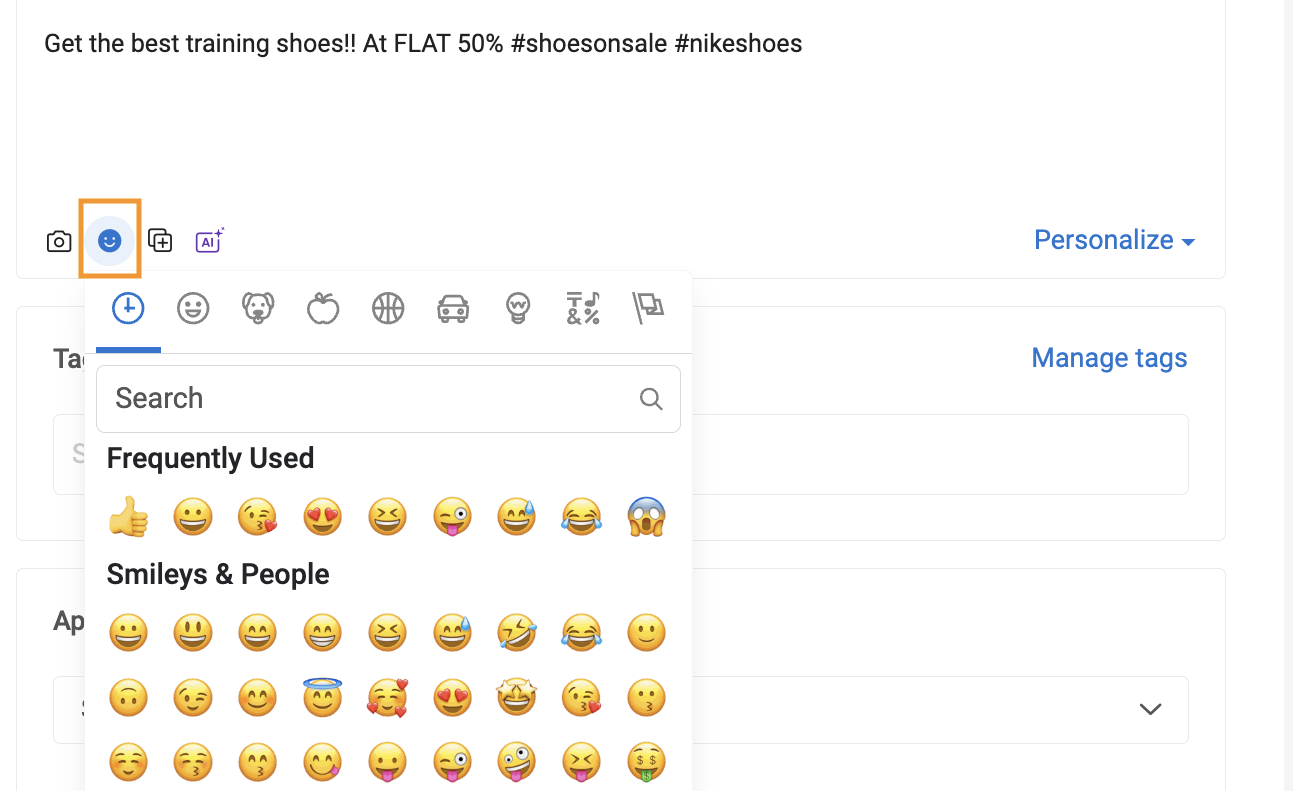
Step 5 - Click on the ‘emoji’ icon to add emojis to your post.
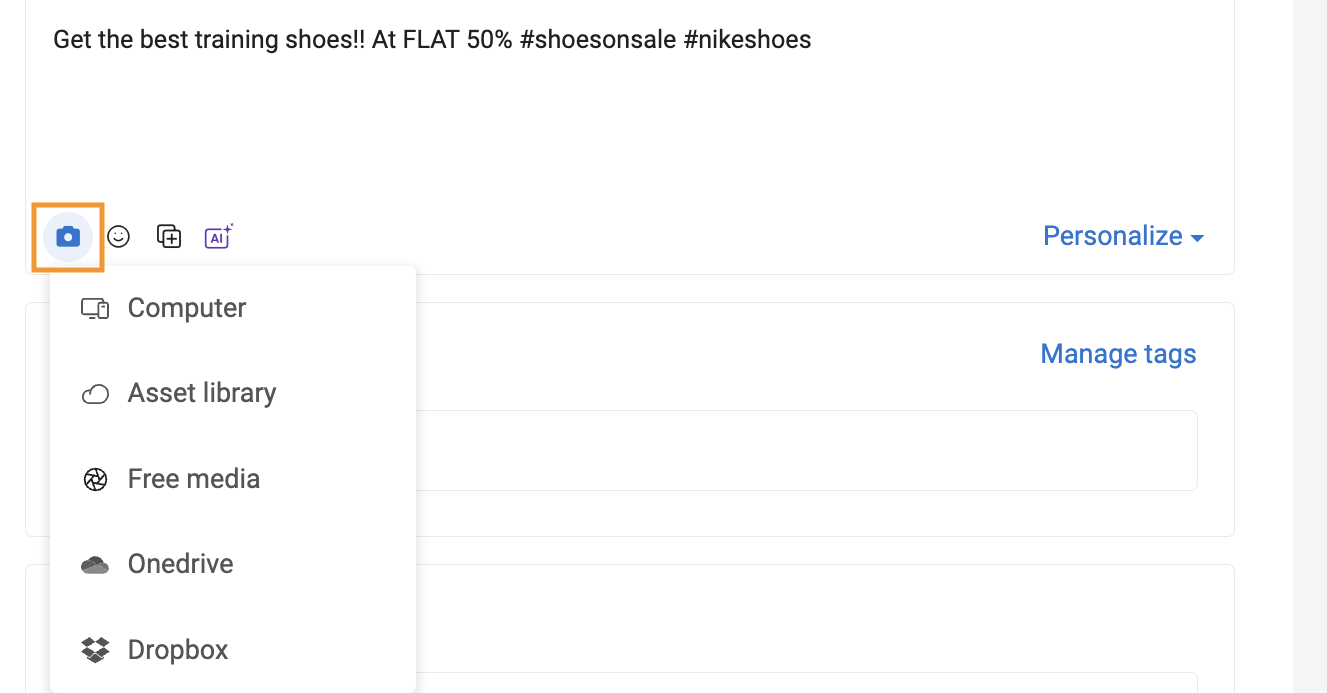
Step 6—Click the 'Camera' icon and select whether you want to upload an image/video or design to add media to your post. You can upload images saved on your computer, asset library, free media, or cloud-based applications like OneDrive and Dropbox.
To understand the usage of the asset library, refer to this help center article - How do you use the Asset Library in Social?
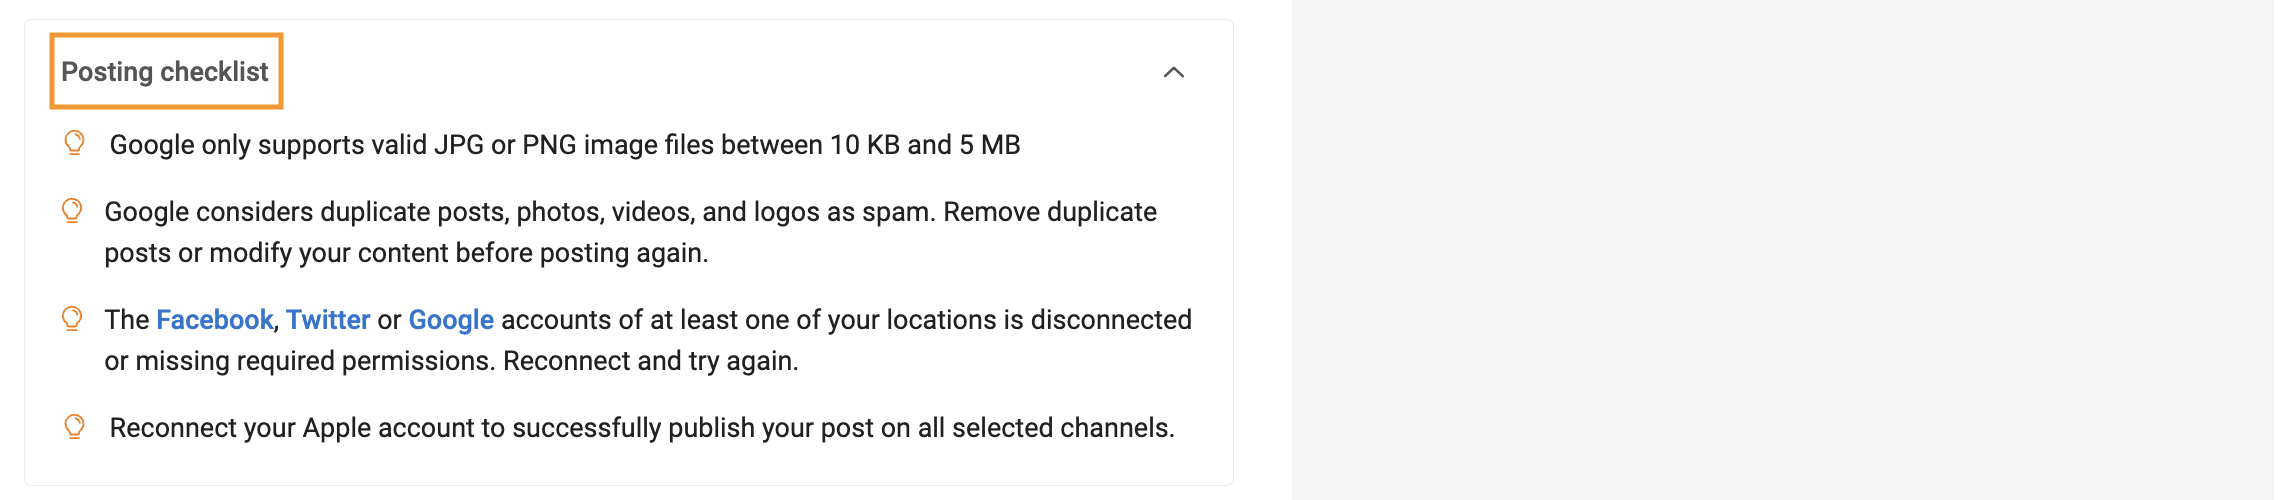
Explore the checklist for posting on GBP.
Step 7 - Click on the 'Post Library' icon to add content from the post library.
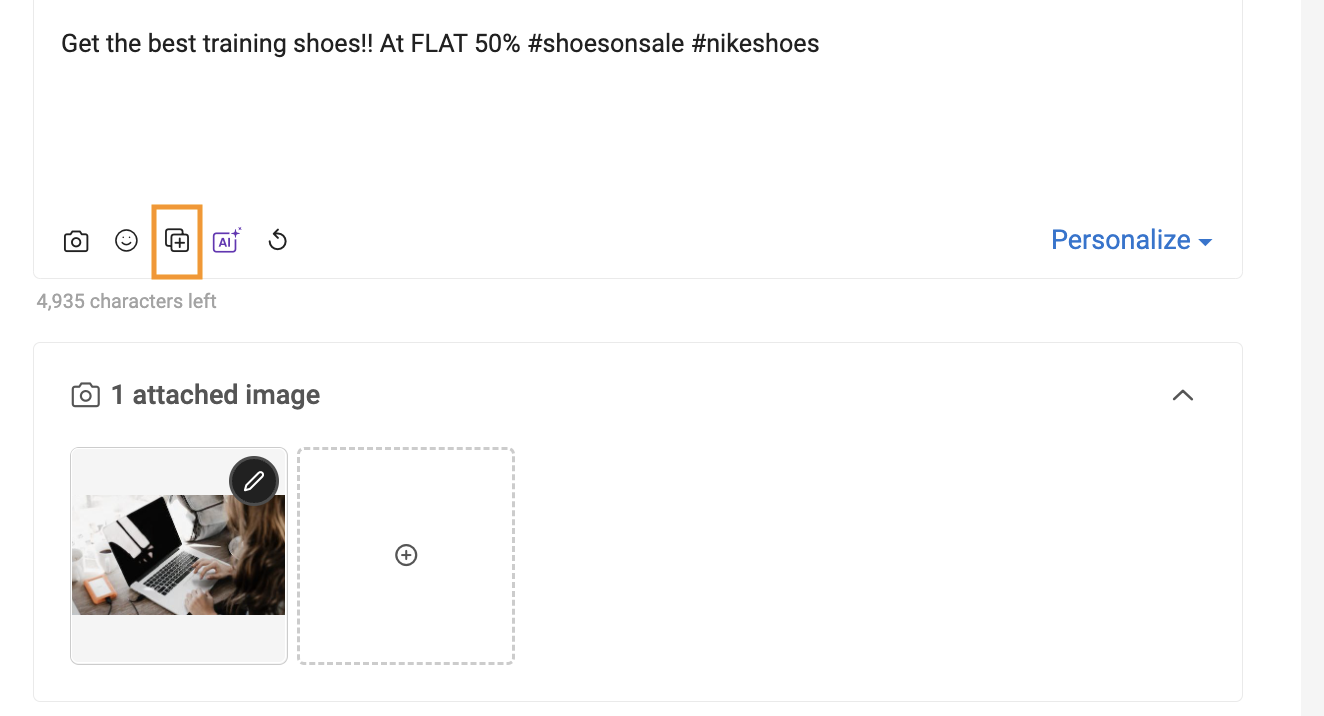
All published posts are automatically added to the post library for you to repurpose top-performing content to boost engagement and speed up the publishing process. Simply pick an existing post from the library, edit it, or schedule it straightaway.
To learn more about the post library, refer to the article - How to Make the Most of Birdeye's Post Library Feature?

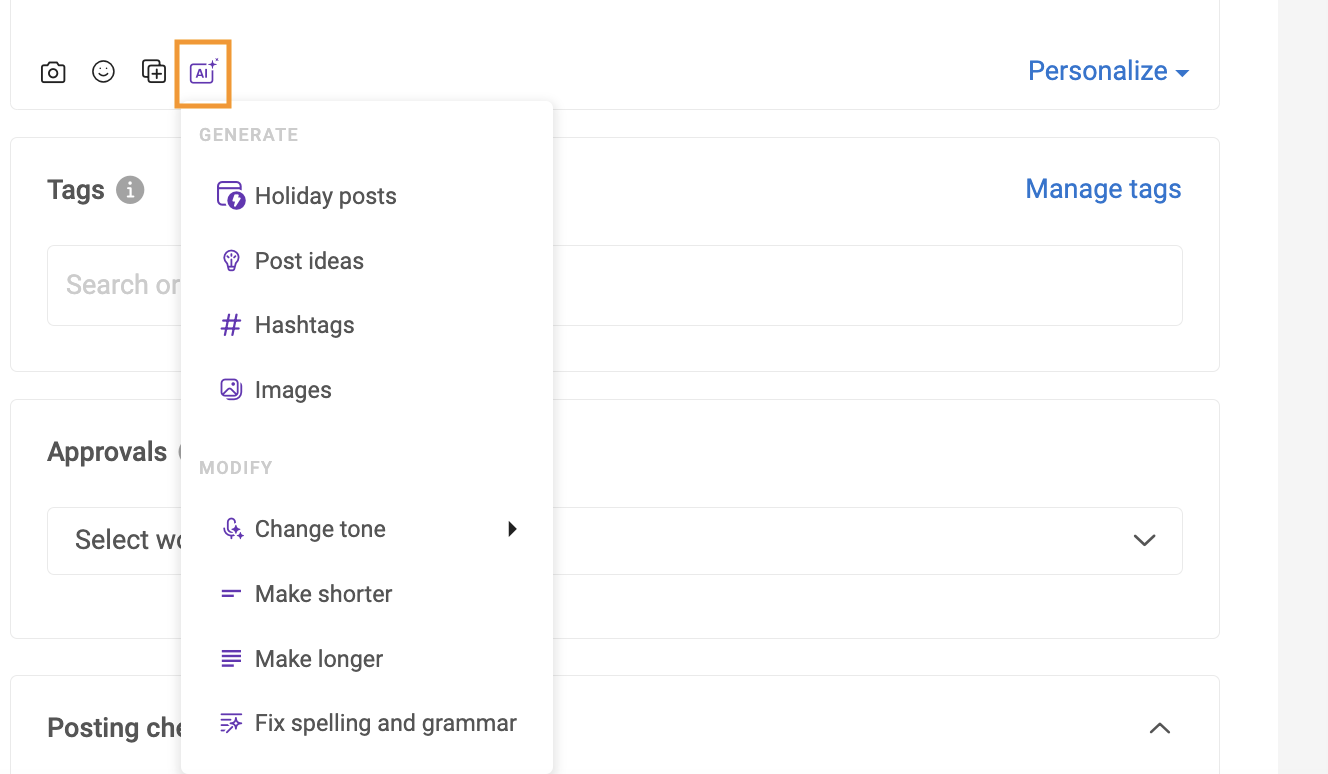
Step 8 - Click the 'AI icon' to generate holiday posts, convert your ideas into posts, automate hashtags, use AI-based images, change the tone, make shorter or longer sentences, and fix spelling and grammar.
To learn more about using AI in Social, refer to the articles - How do I auto-create social posts and images using BirdAI?
How do I rephrase social posts using BirdAI?
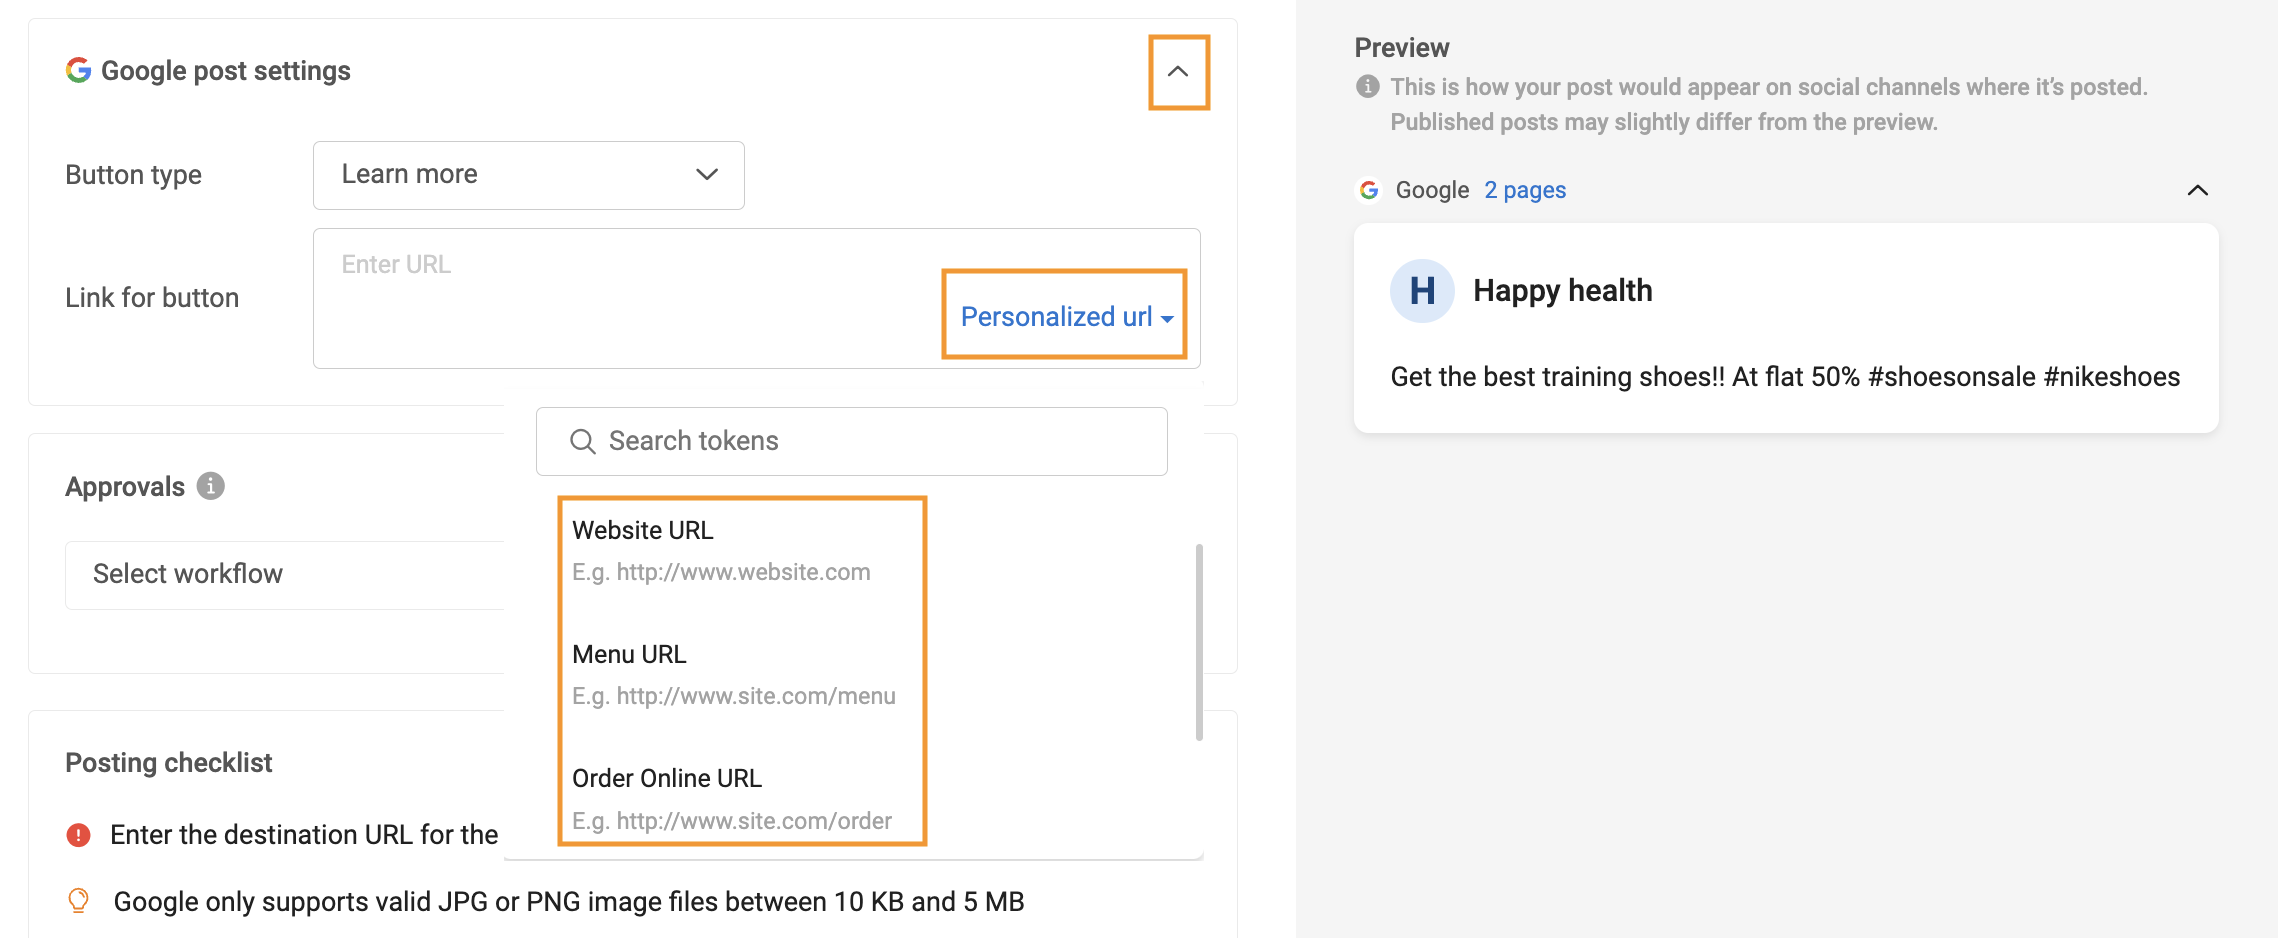
Step 9 - (Optional) Click the dropdown button on 'Google post settings,' choose the button type from the drop-down menu. The CTA will be ‘Learn More.’ Further, enter the URL for the button in the link for the button box.
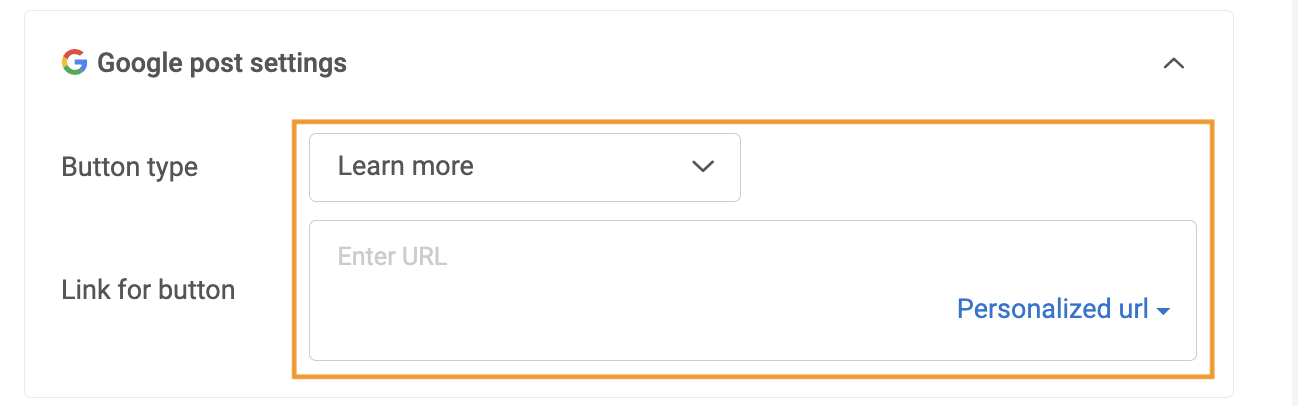
Click on ‘Personalize’ to select a customized URL. The CTA URL is customizable by location using tokens corresponding to each location.
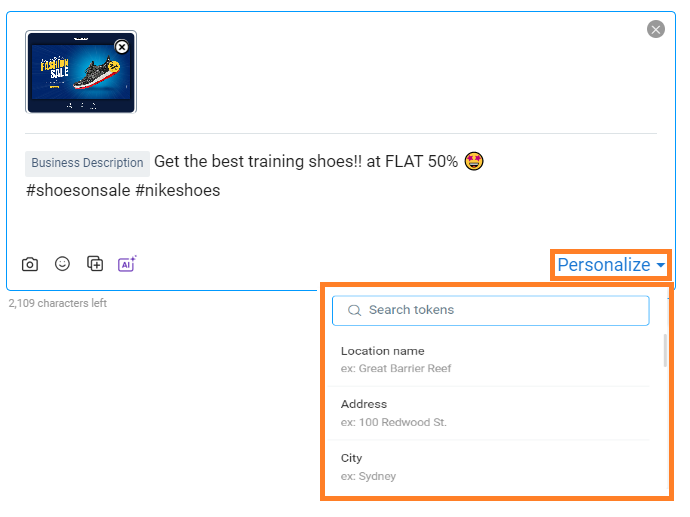
Step 9 (Optional)- Click on ‘Personalize’ in the text box section to give a personalized touch to the message by adding location name/address/state, etc., in the post.
Step 10 - Once you have set the post, click ‘Schedule post’ to publish the post on the date and time of your choice. Further, click ‘Schedule post’ at the bottom of the calendar to publish the post on selected social channels.

To learn more about scheduling a post, please refer to this help center article- How do I schedule a post to be published at a later date and time?
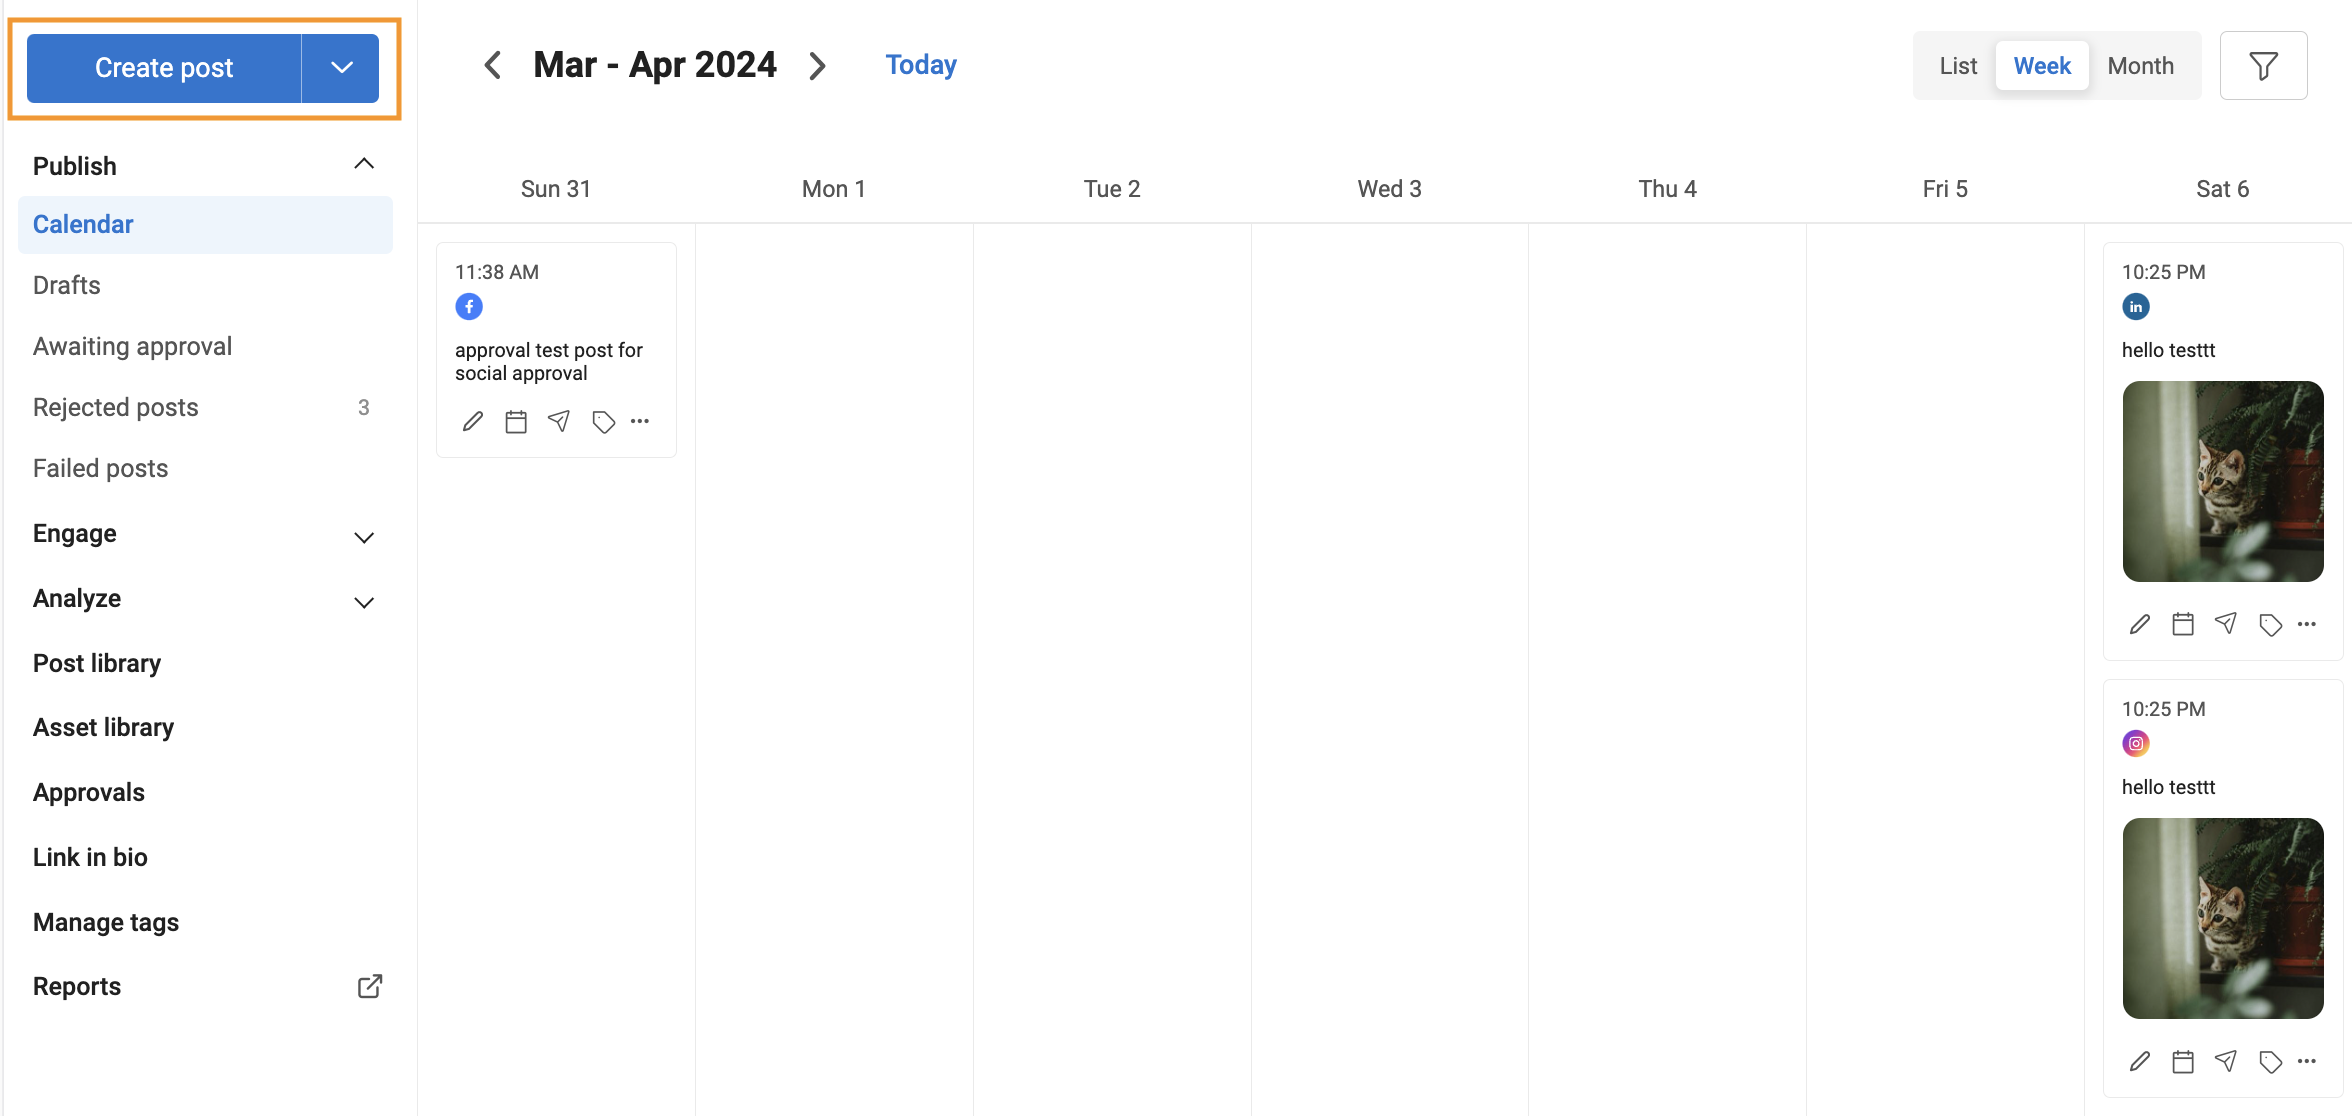
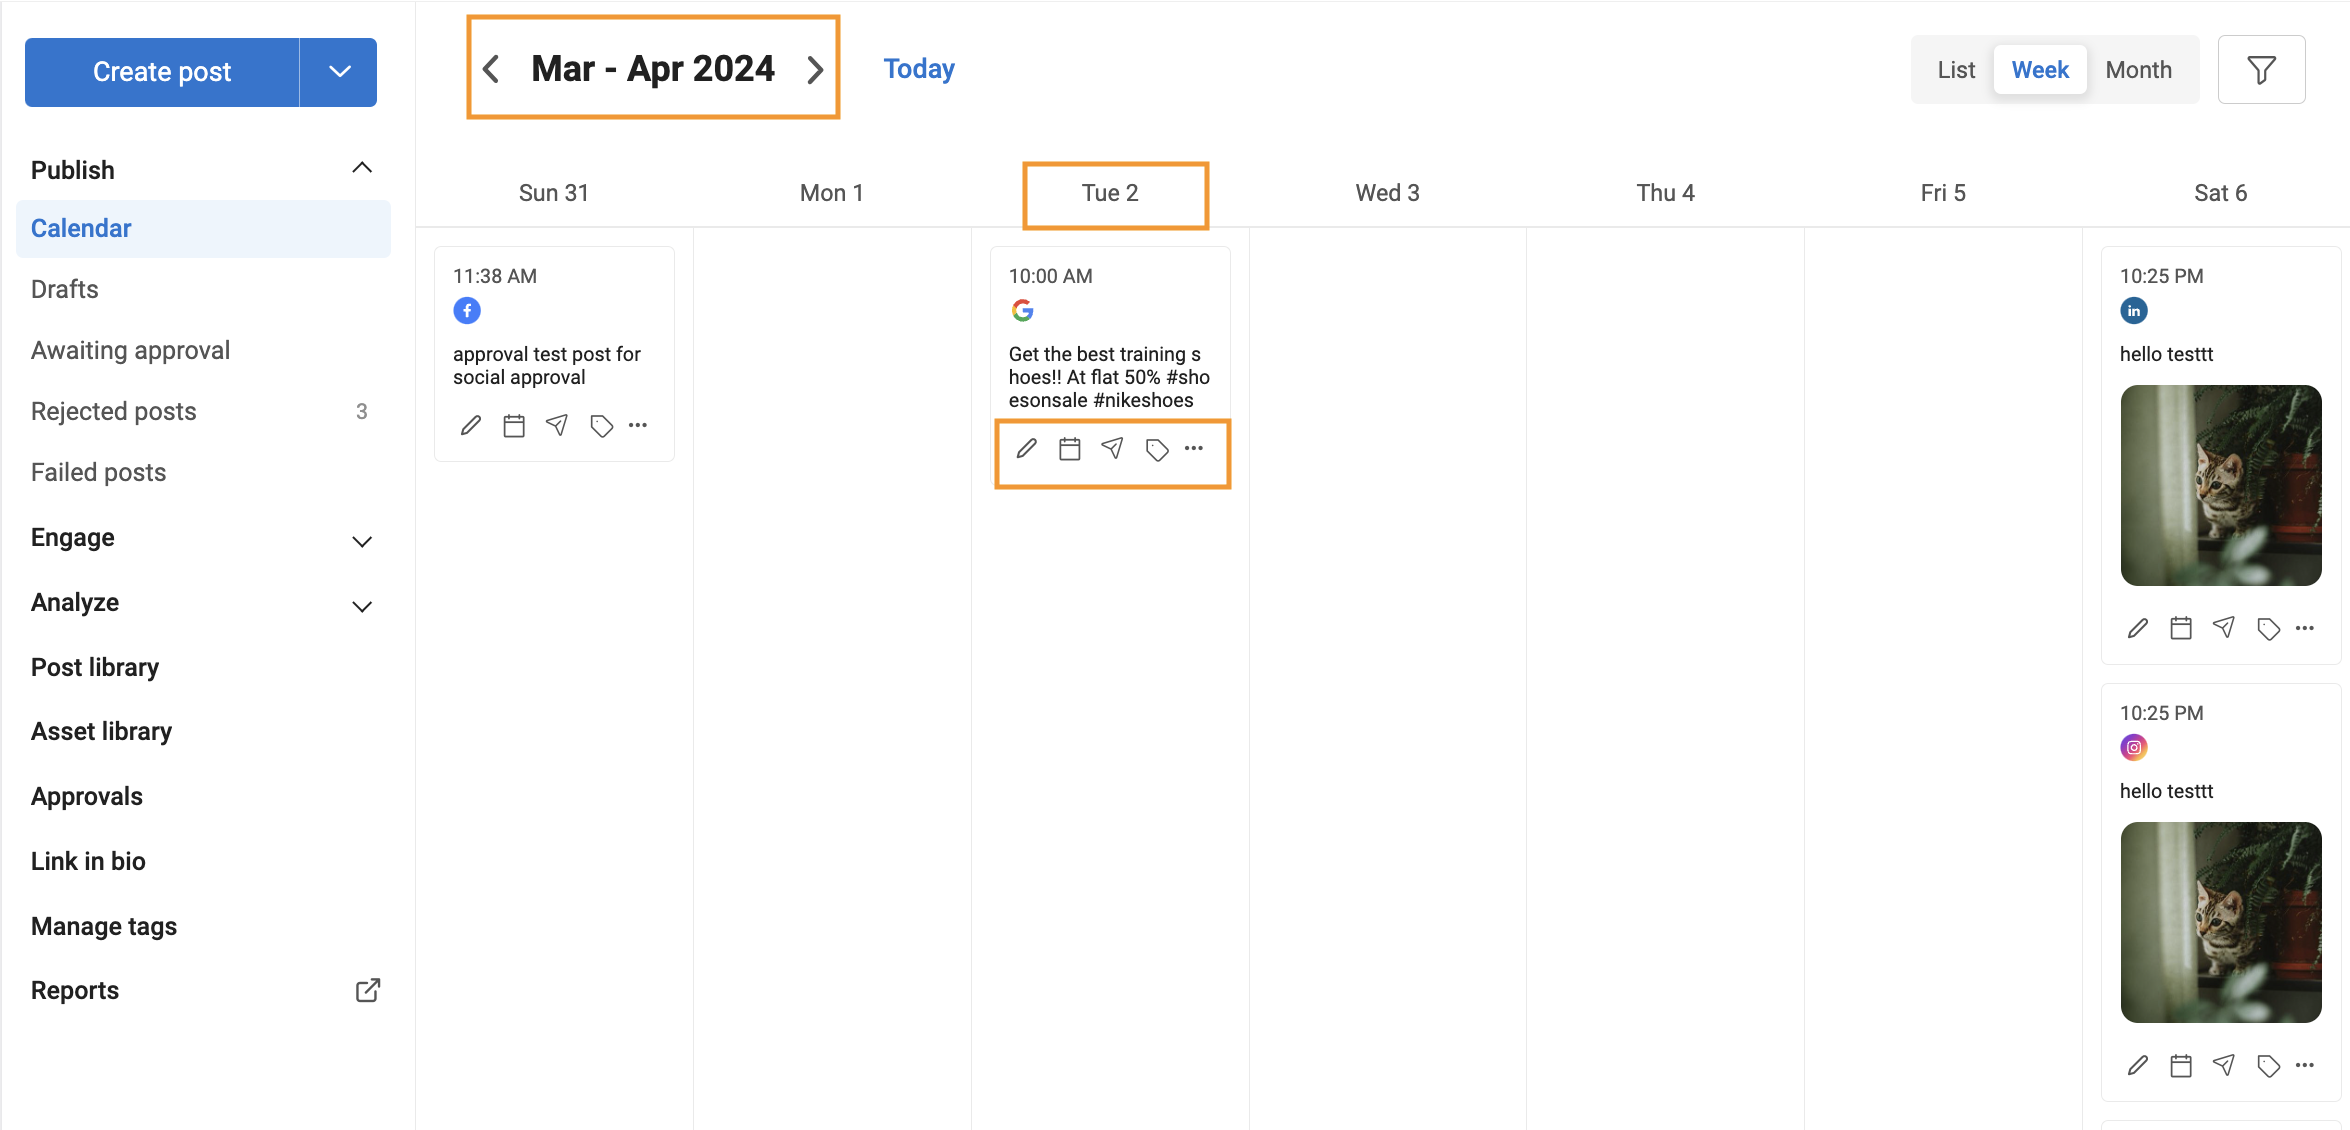
Simplified Calendar View
The published/scheduled posts will appear on the 'Publish' tab with the timestamp and the social channels on which they were published/scheduled. After landing on the Publish tab, the default view will be Calendar Week View with the current week selected.
The calendar view would be divided into timelines. Calendar Month view displays the posts in month view with just a banner. Social channels are visible for each post and the time when the post was posted or scheduled to be posted.
You can 'edit,' 'reschedule,' 'post now,' 'view the tags,' and click on the menu icon (three horizontal dots) to 'duplicate,' 'delete the post,' and 'chat with approvers.'
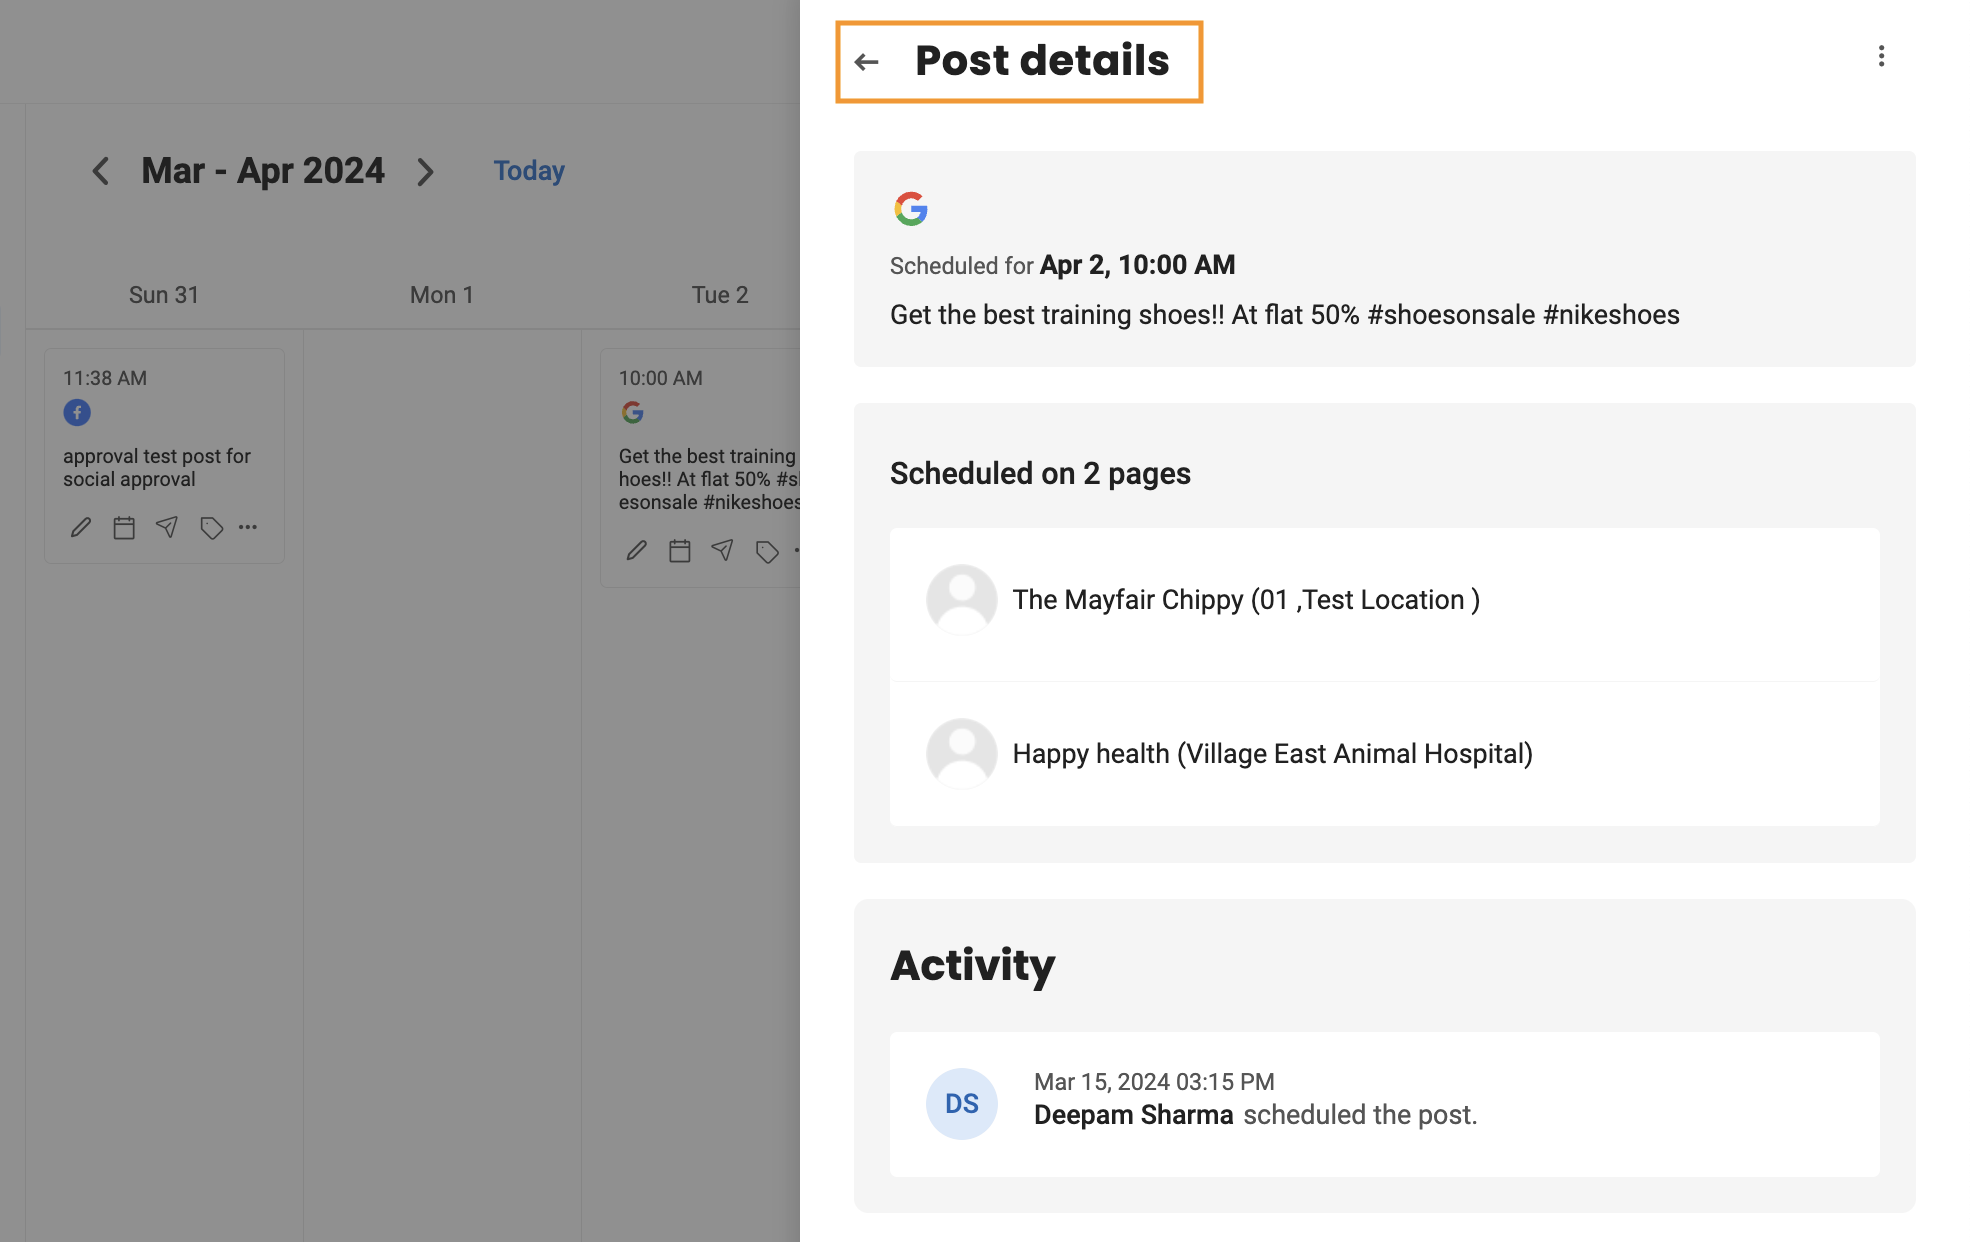
Click on the post to view the post details.
Create Google Offers
Select ‘Google’ as a social channel and then select the ‘Google page(s)’ where you want to promote the offer.

Click ‘Google’ and enter the ‘Offer content’ you want to post.

Image specifications for Google offers.
- Aspect ratio: 4:3
- Photo size: Ideally a 720px X 540px; the minimum size is 480px X 270px
- Photos will display as 187px X 140px on the Google Business Profile
- Photos will display as 365px X 106px in the expanded view

Go to the ‘Google post settings’ section, and select ‘Google offers.’

Enter the ‘Title,’ which is mandatory. The title limit should not go beyond 58 characters.

Enter the duration of the offer by choosing ‘Start and end date with time.’ It is mandatory to enter the ‘Duration.’

Once the duration is selected, click ‘Apply.’

Enter the valid ‘Coupon code.’ Show this code at the shop to avail the discount. Entering ‘Coupon code and the rest of the fields’ are optional, except for the ‘Title and Duration.’ (Mandatory). The limit for entering coupon code is up to 58 characters.

Users can enter the website 'Link' or an alternative link to direct visitors to a desired webpage.

Users can enter ‘Terms & Conditions’ if applicable. The character limit of terms & conditions is up to 5000.

Schedule the post by clicking the ‘Schedule post’ button.

As soon as the Google offer is scheduled, it will redirect you to the Social calendar tab to view the post under the date you scheduled for.

You will view an orange clock on the post If the post is pending approval.

You will view a block icon if the post is rejected.

You will view a red-colored round icon if the post fails to be published.
