Understanding Appointments Calendar
Birdeye Appointments is an all-in-one platform to help you streamline appointments. Birdeye calendar makes schedule management effective and the much necessary planning smooth. Attract more customers with digital scheduling options and a frictionless appointment booking process.
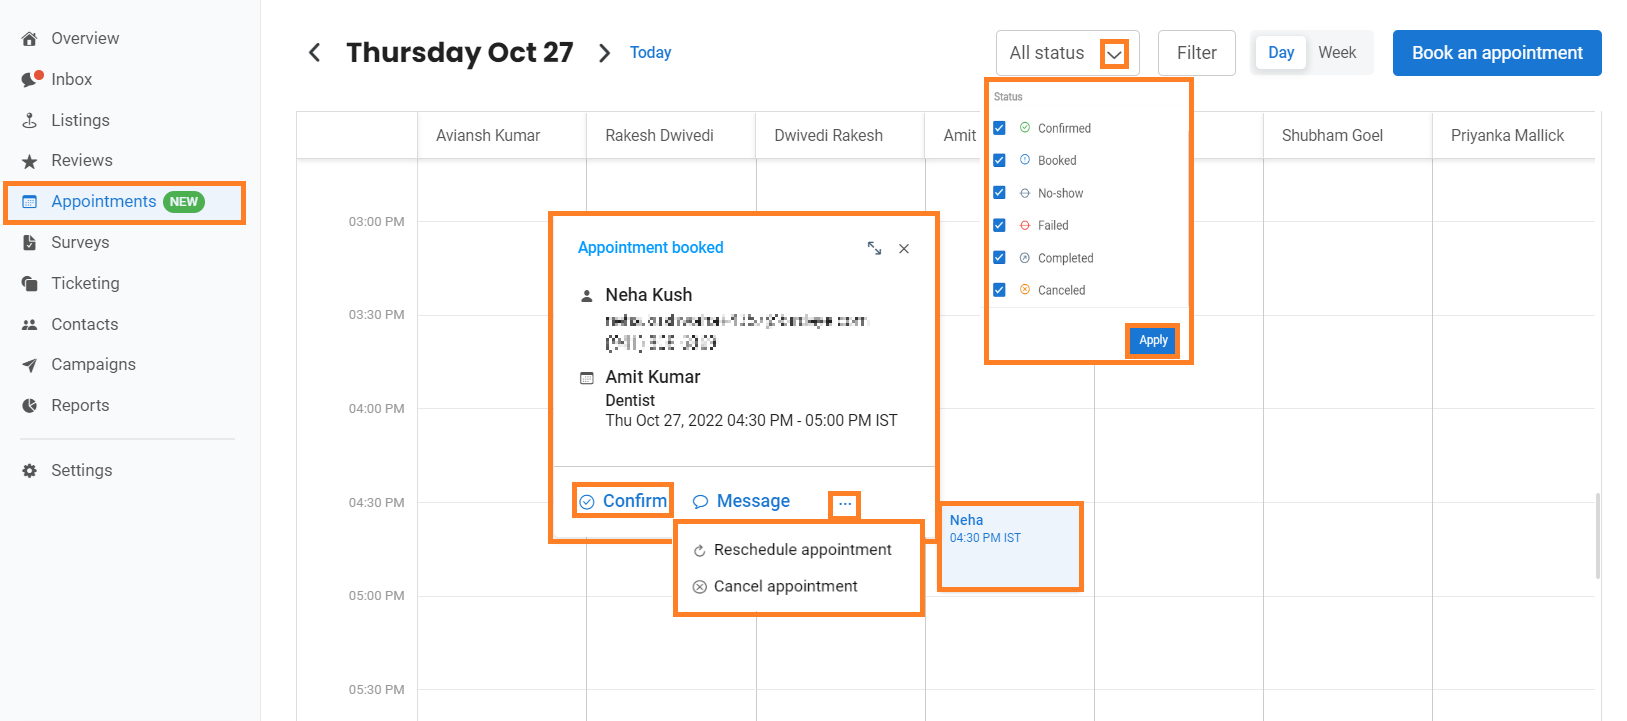
To check your appointments, go to the ‘Appointments’ tab on the left navigation rail. The appointments booked would show up in the calendar in the browser timezone.
We support two-way integration with both the Google & Outlook calendars. Any appointments scheduled via Birdeye will show up on Google/ Outlook, or any edits made on the calendar will show on the Birdeye appointments calendar too. The setup will have to be done as an integration.
You can filter your calendar view based on appointment status, day/week, or other filters such as location, services, etc., from the top right ‘Status,’ ‘Filter,’ ‘Day/Week’ menu.
Click the ‘All status’ button and select the appointment status you want to view on your calendar. After selecting, click on ‘Apply’ to filter out the selection.
On the appointments tab, if you click on ‘Day,’ you will see the Day view of the calendar with appointments of each doctor coming as a separate column. If you click on ‘Week,’ you will see the Week view of the calendar with appointments of all the doctors.
You can confirm, reschedule and cancel an appointment from the calendar itself. Click on the appointment card, then click ‘Confirm’ to book the appointment. Click on ‘three dots’ and click on either ‘Reschedule appointment’ to reschedule or ‘Cancel appointment’ to cancel the appointment.

Once you confirm the appointment, the appointment tile turns green; you can now reschedule the appointment by clicking on the ‘Reschedule’ button or cancel the appointment by clicking on ‘three dots’ and further clicking on ‘Cancel appointment.’

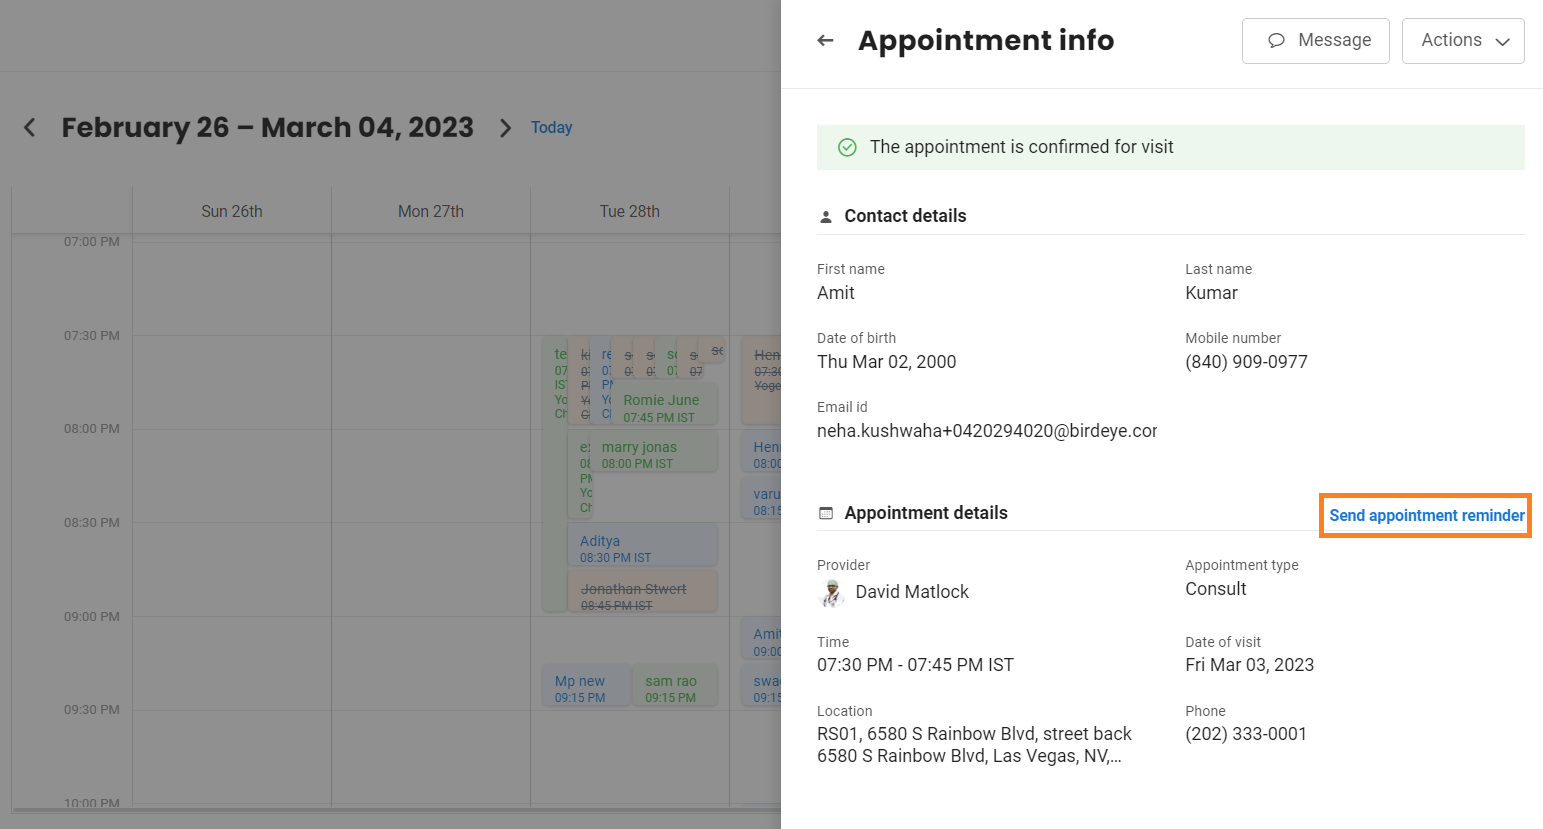
On expanding the appointment tile, you can send a reminder to the customers who have booked/confirmed appointments by clicking the ‘Send appointment reminder’ button.

Click on ‘Message’ to send a direct message which will also be reflected in your Birdeye Inbox. Type your message in the text box and hit ‘Send’ to send the message.

In the ‘Schedule’ section of the appointments calendar view, every appointment would show up as a row here with details of Booked for, Provider, Appointment type, Status, Appointment time, and Reminder.
You have the option to download the list shown in the dashboard with the filters selected by clicking on the ‘Download’ button. The file downloaded would be in XLS format. You can also book an appointment by clicking on ‘Book new.’
On hovering over the row in the table, you would see additional options.
- The ‘Message’ icon opens the inbox conversation thread for the contact.
- The ‘Quick Send’ icon lets you send out review requests, surveys, and custom notifications to the user.
- The ‘Actions’ drop-down provides options - Send Reminder, Reschedule, Cancel, Confirm, and View details.