What are the steps involved in setting up social publishing/posting?
Birdeye allows you to publish or schedule posts on your Facebook pages, X (Twitter) profiles, Instagram accounts, LinkedIn pages, Google business profiles, and YouTube channels within your Birdeye account. Before you create and publish a post on one or more of your social media pages, you must have all your social channels integrated with your Birdeye account.
To integrate your social media pages with Birdeye, you can refer to the help center articles listed below:
How to integrate your social media page(s) with Birdeye - Single-Location Account
How to integrate Facebook pages with Birdeye - Multi-location Account?
How to integrate Google My Business listings with Birdeye - Multi-location Account?
How to integrate a X (Twitter) account with Birdeye - Multi-location Account?
How to integrate LinkedIn company pages with Birdeye - Multi-location account?
To set up social publishing, follow the steps below:
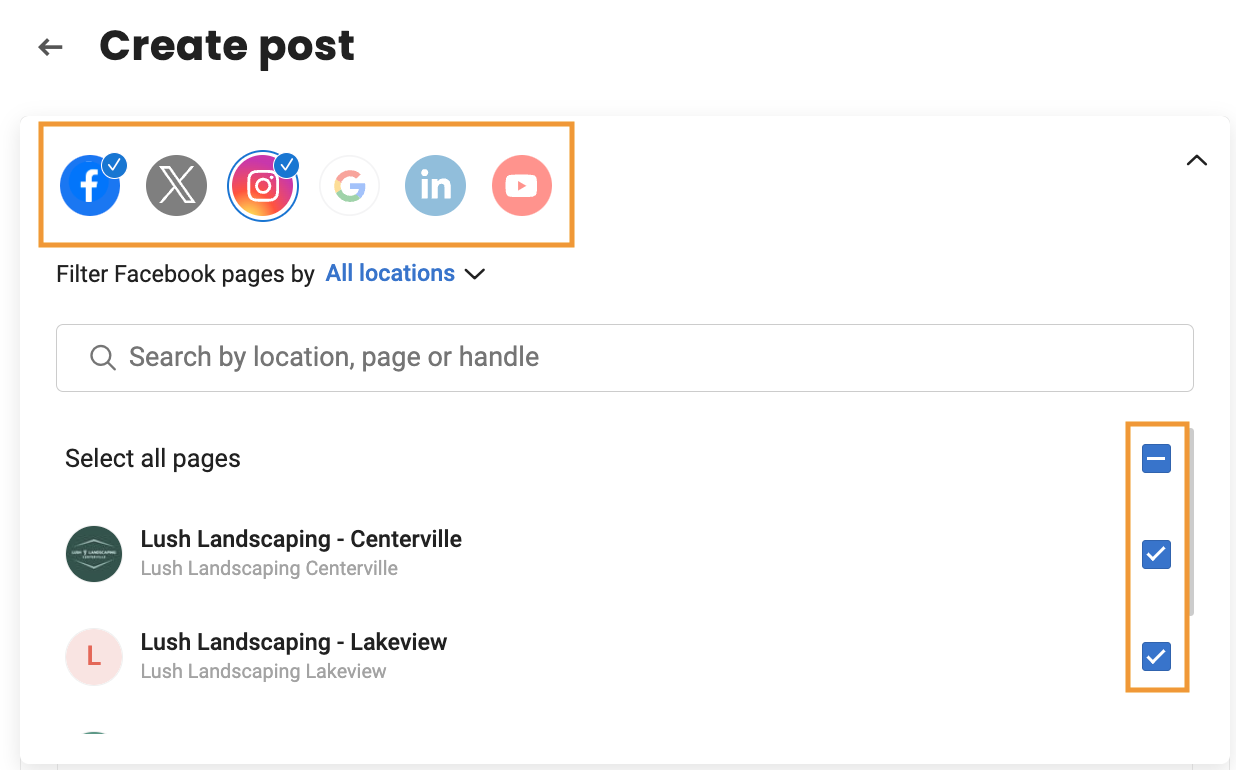
Step 1- Click on the ‘Social’ tab.
Step 2- Click 'Create Post.'
Step 3- Select locations and pages you want to publish the post on from the drop-down menu.
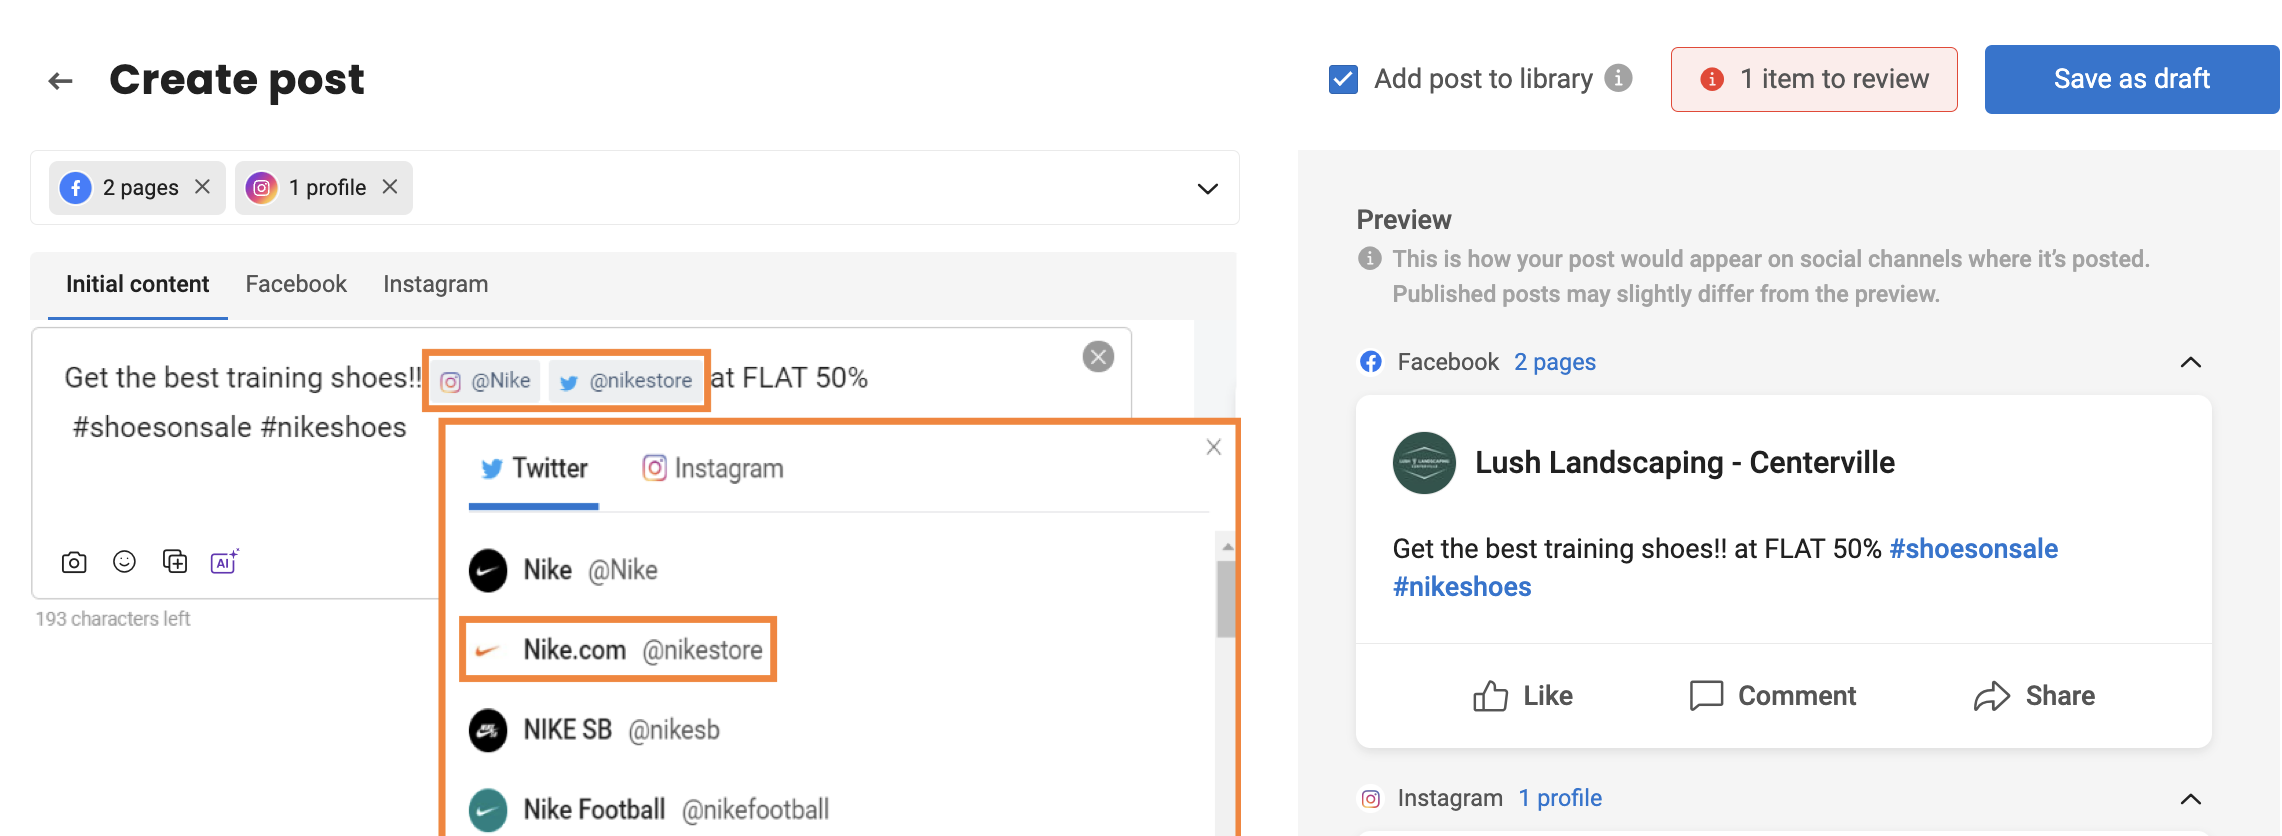
Step 4- Once you have selected the pages you want to post on, add the content you want to post in the text box.
Step 5- Use the ‘@’ character to mention/tag someone in your post. Type the person/brand you want to mention and select it from the menu.
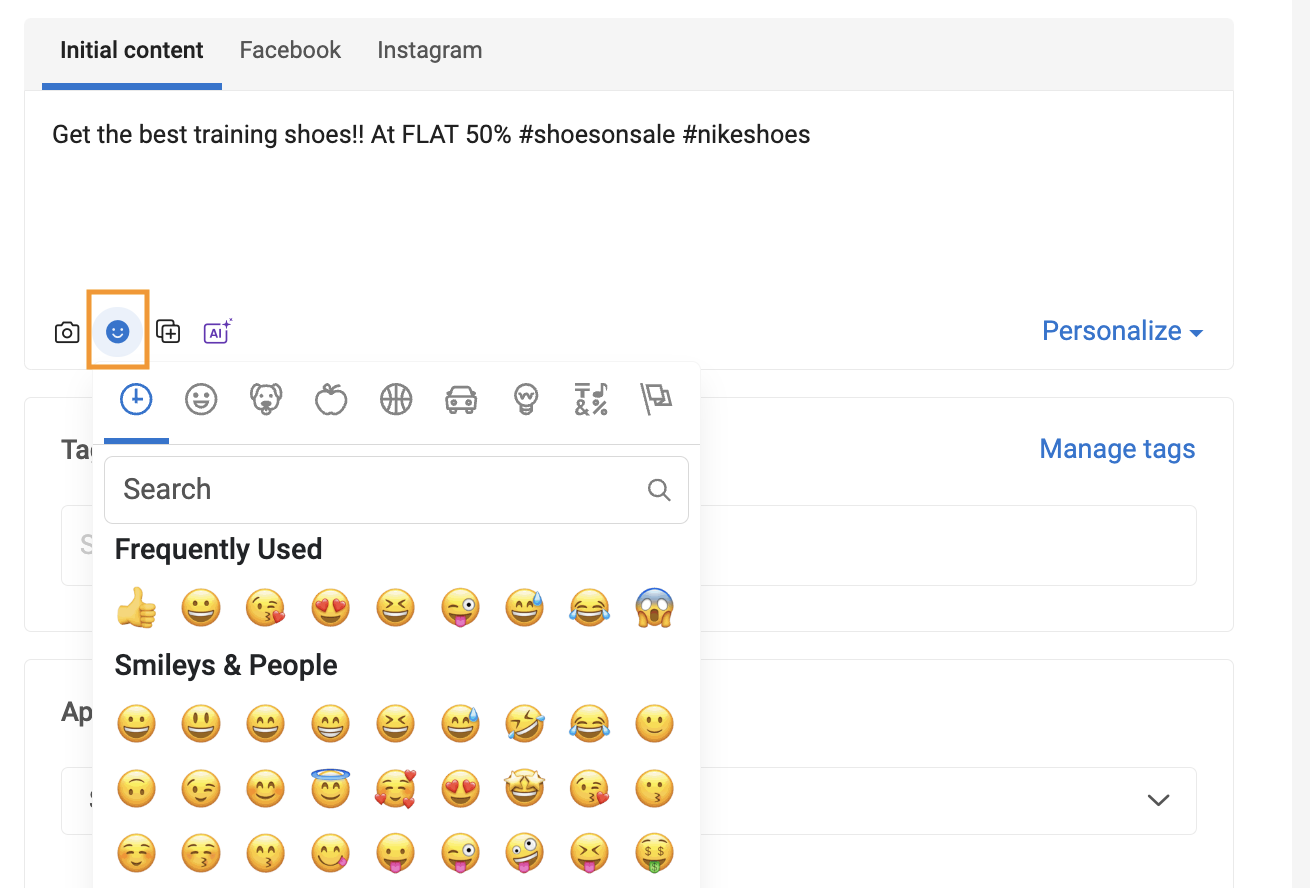
Step 6- Click on the ‘emoji’ icon to add emojis to your post.
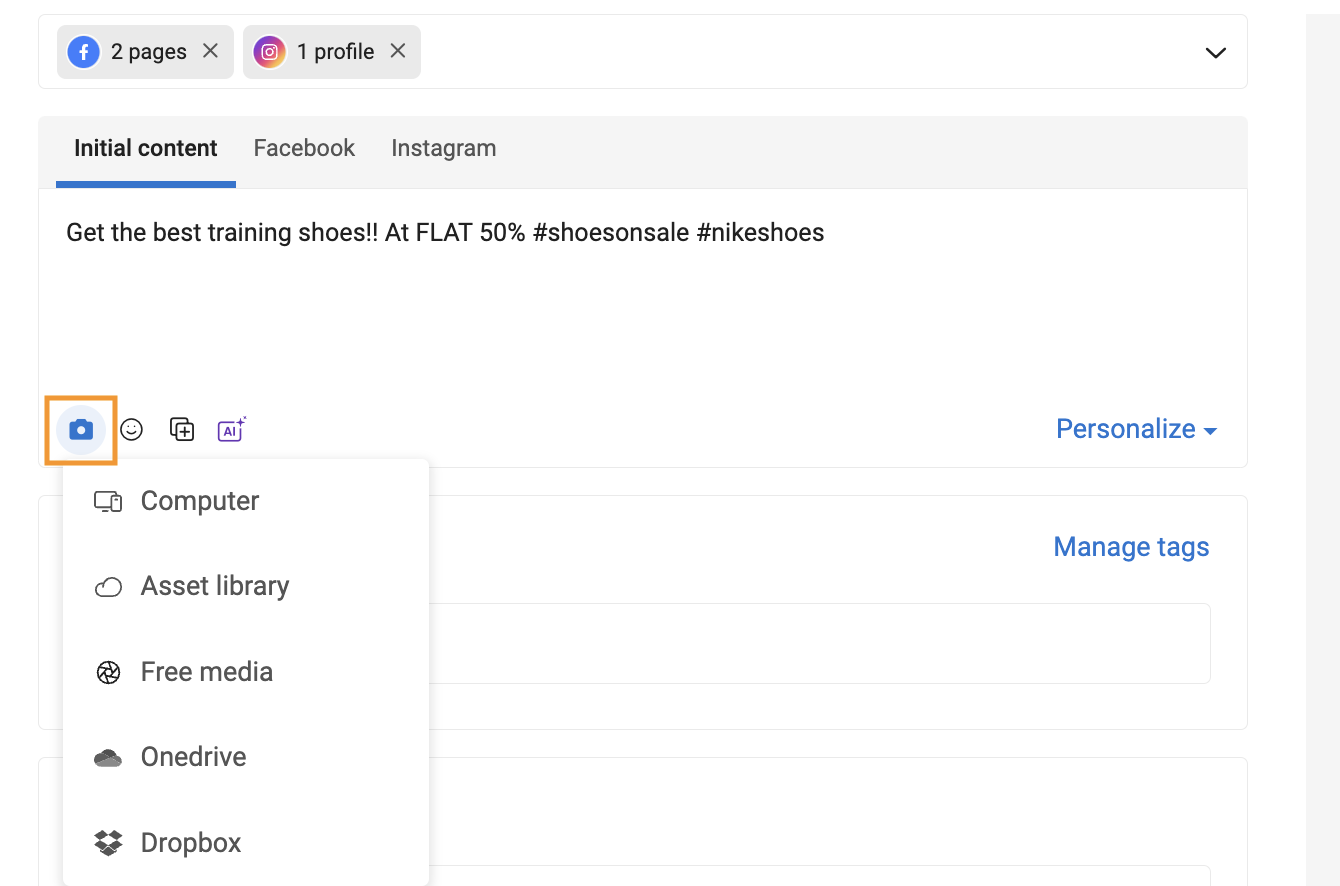
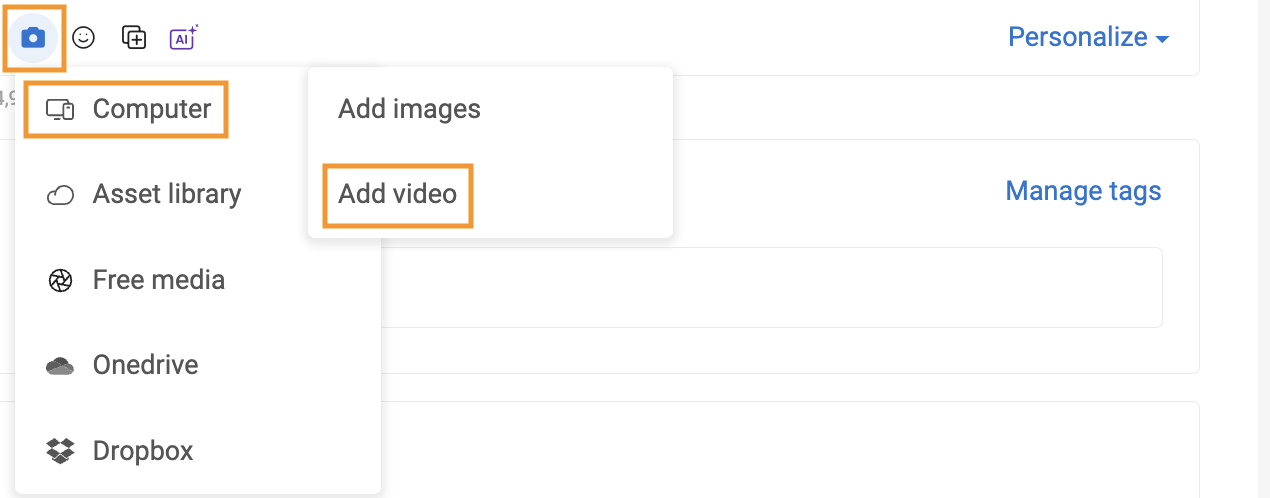
Step 7- Click the 'Camera' icon and select whether you want to upload an image/video or design to add media to your post. You can update images saved in your computer, asset library, free media, or cloud-based applications like Onedrive and Dropbox.
To understand the usage of the asset library, refer to this help center article - How do you use the Asset Library in Social?
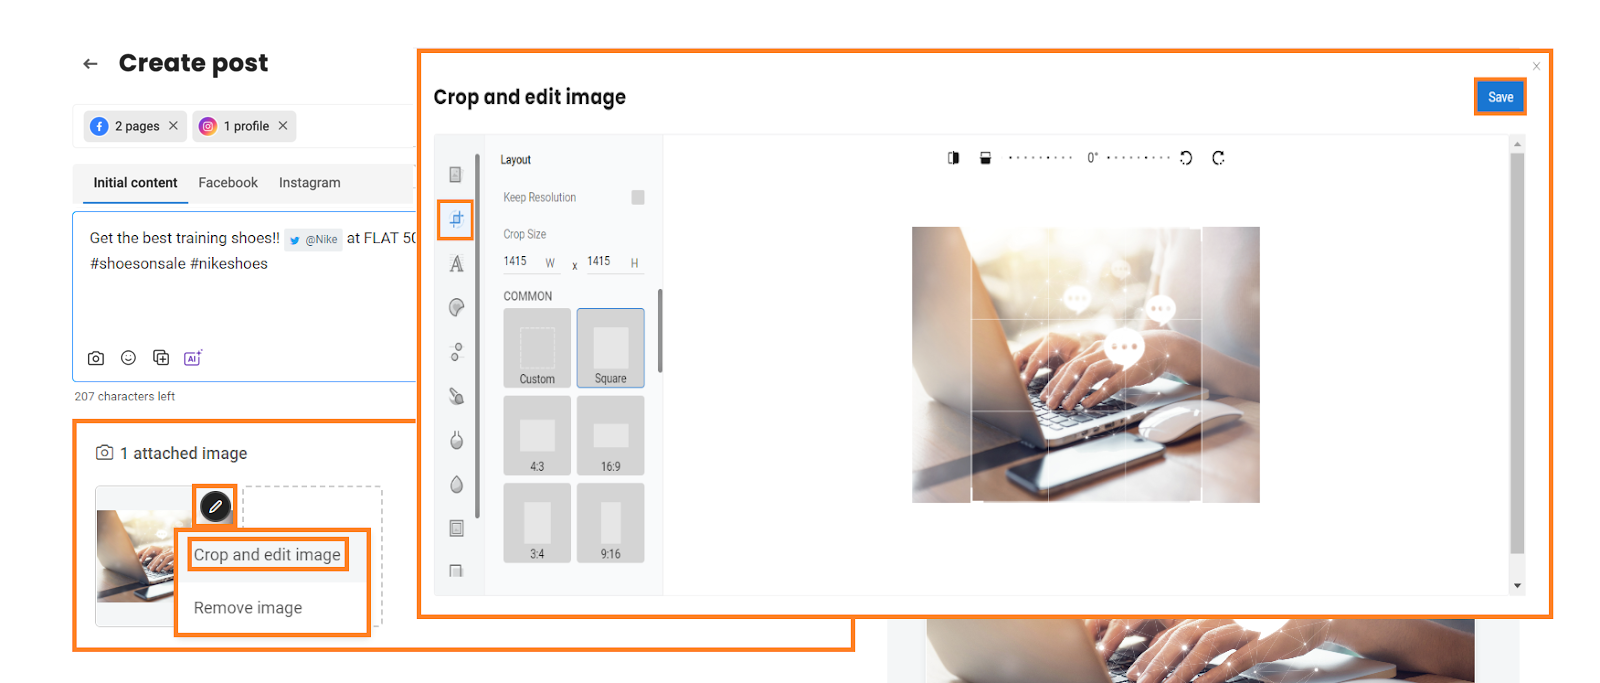
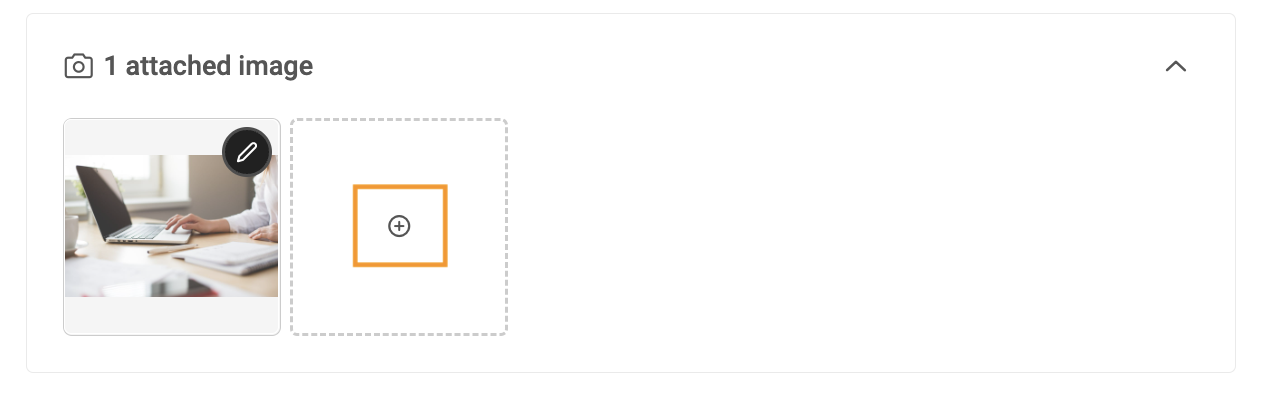
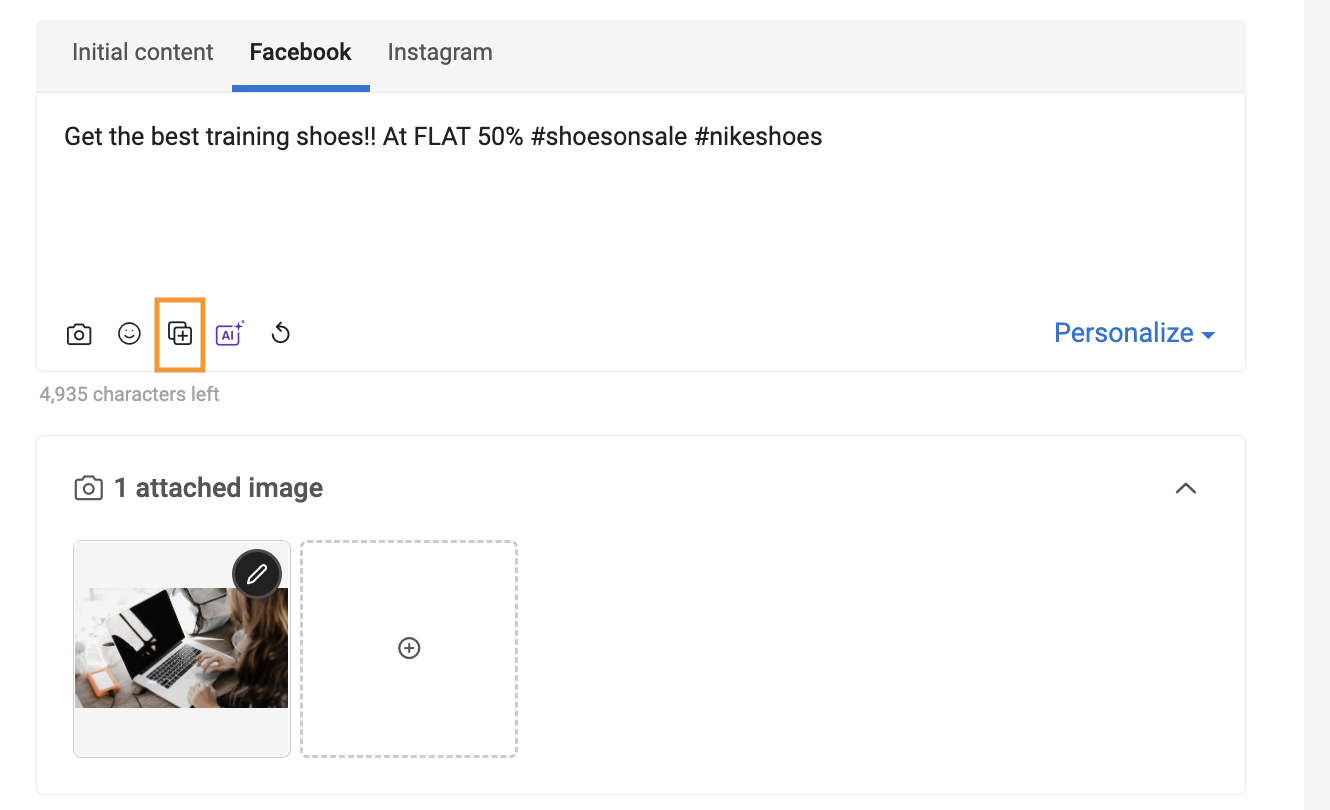
Once the image is attached, click on the ‘Pencil’ icon to either ‘Crop and edit image’ or ‘Remove image.’ Post clicking on ‘Crop and edit image,’ the visual editor will open, where you can crop and edit the image. Click on ‘Save’ to save the edits.
To upload more images, click on the ‘+’ sign and select ‘Upload images’ to upload more images or ‘Design on Visual editor’ to design a graphic.
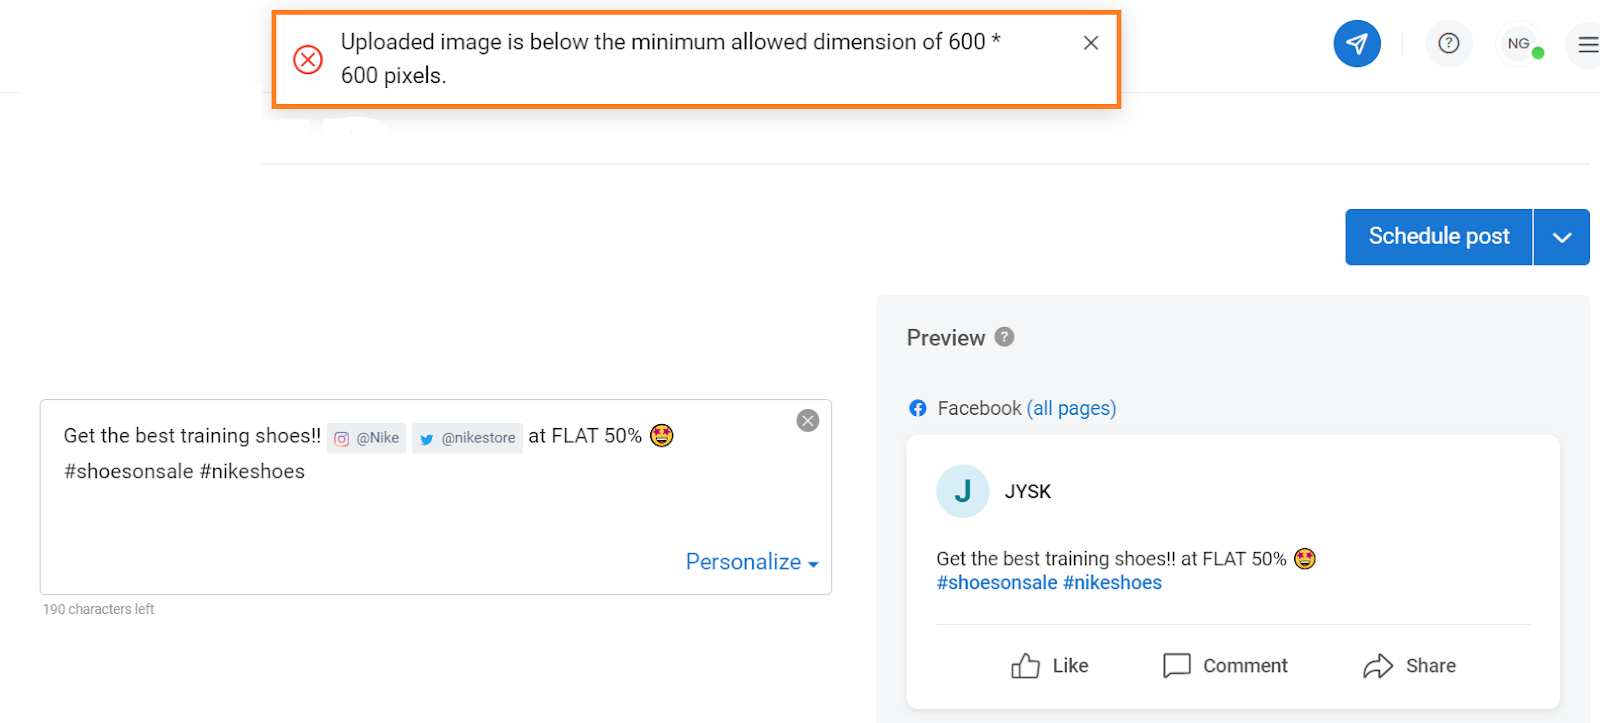
In case the media uploaded does not adhere to the internal specifications of the social channel, an error message will flash on top of the screen.
Step 8- For attaching a video, Click the 'Camera' icon, select ‘Computer,’ and click 'Add video,' you will see the pop-up, which will allow you to browse the video to add from your system, and select the media you want to add to the post.
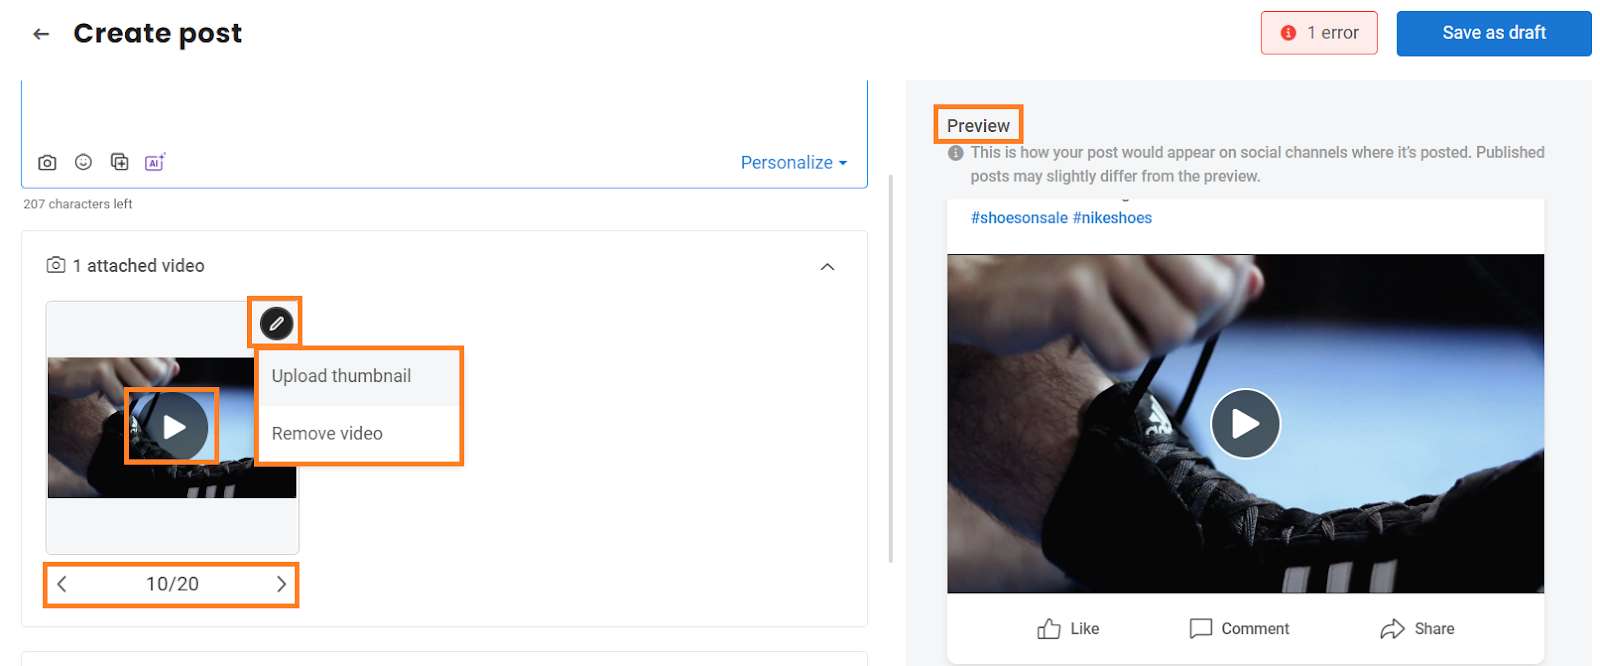
Once the video is uploaded, click on the ‘Pencil’ icon. Here you will get two options: 'Upload thumbnail’ to upload a custom thumbnail for your video from the system. ‘Remove video’ to remove the video.
You can also select the video thumbnail from the carousel.
Also, you can click on the ‘Play’ button to play the video.
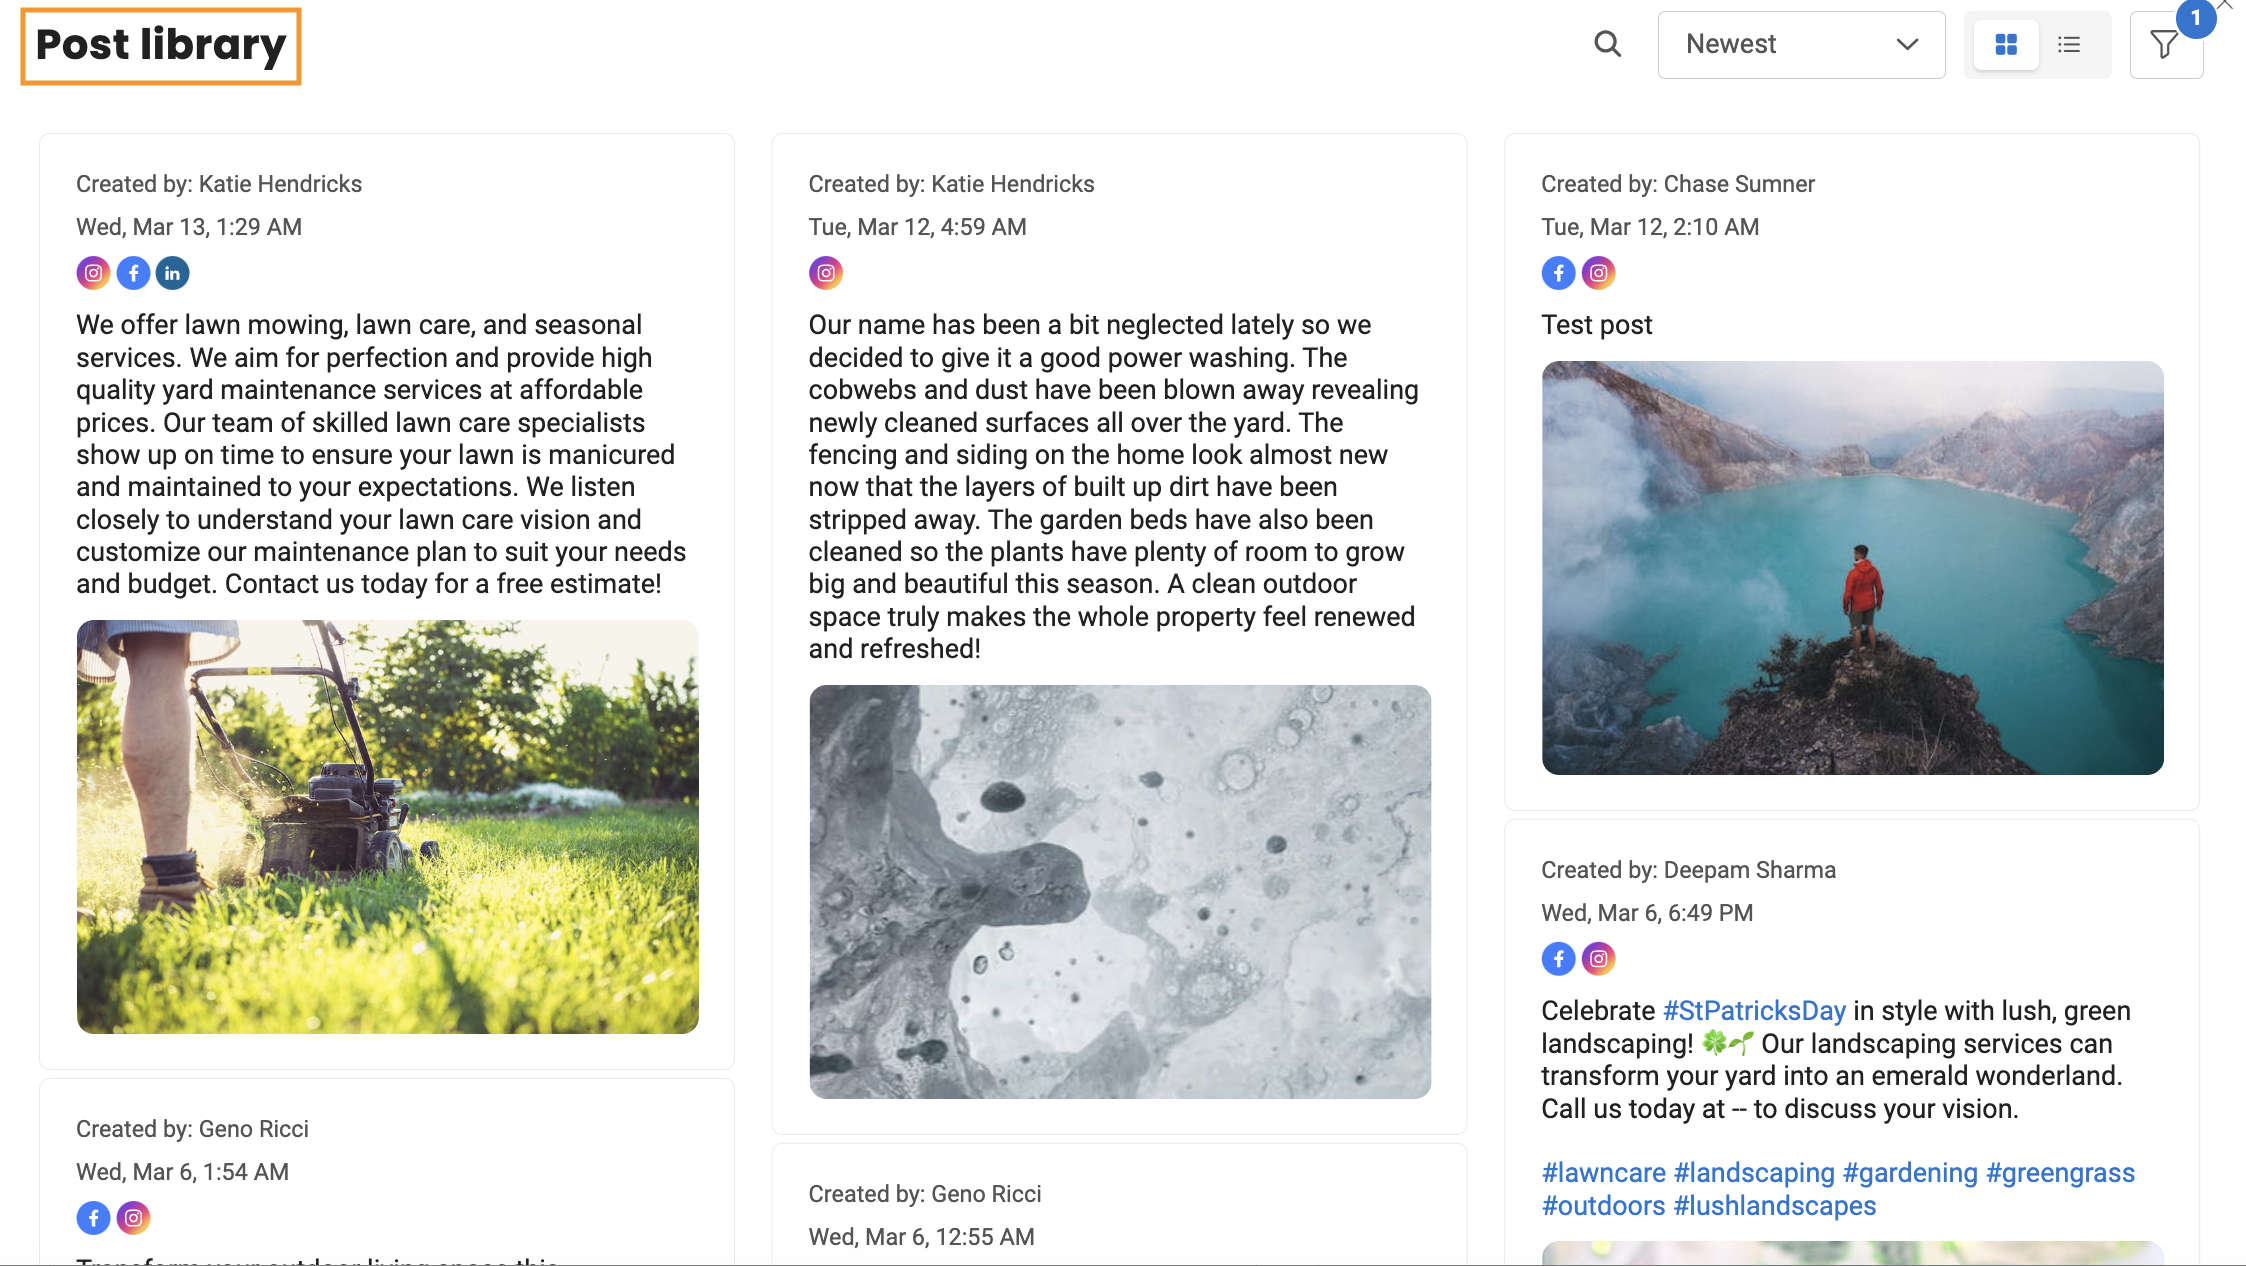
Step 9 - Click on the 'Post Library' icon to add content from the post library.
All published posts are automatically added to the post library for you to repurpose top-performing content to boost engagement and speed up the publishing process. Simply pick an existing post from the library, edit it, or schedule it straightaway.
To learn more about the post library, refer to the article - How to Make the Most of Birdeye's Post Library Feature?
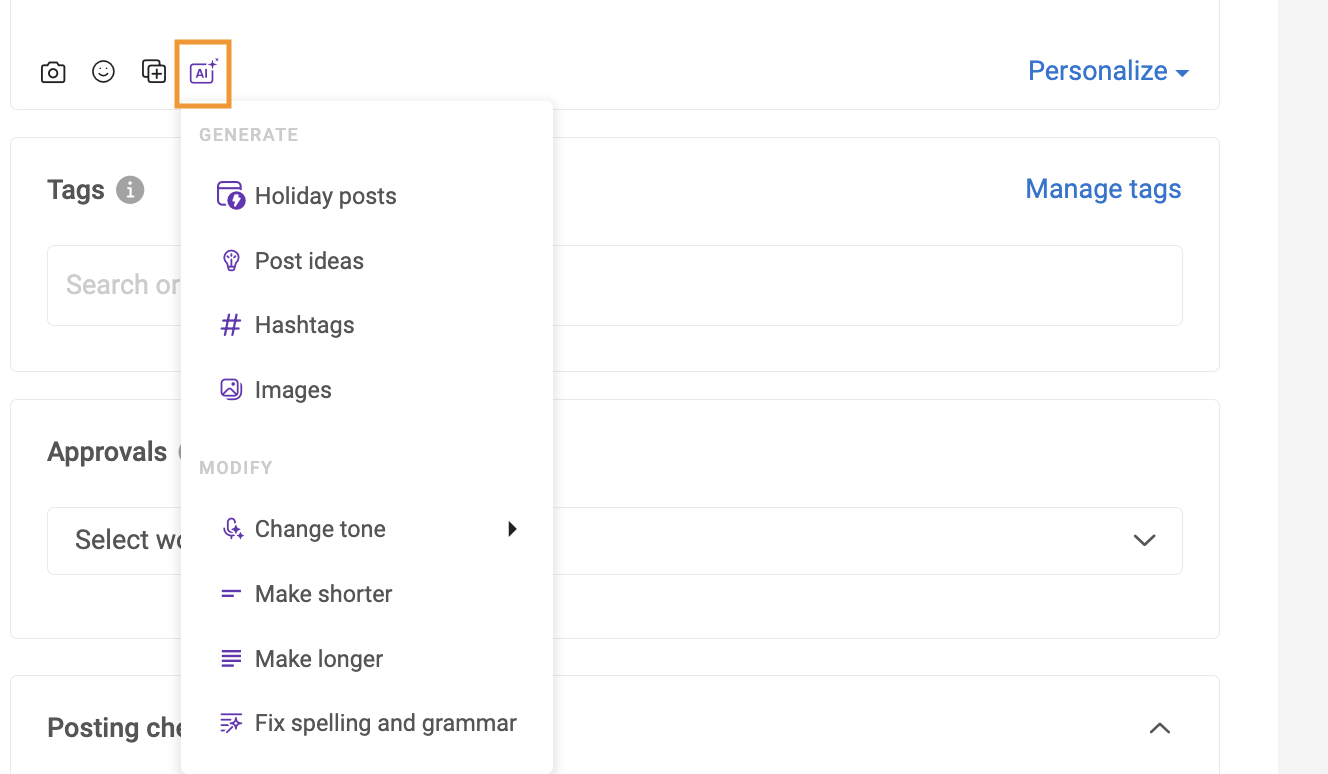
Step 10 - Click the 'AI icon' to generate holiday posts, convert your ideas into posts, automate hashtags, use AI-based images, change the tone, make shorter or longer sentences, and fix spelling and grammar.
To learn more about using AI capabilities in Social, refer to the articles - How do I auto-create social posts and images using BirdAI?
How do I rephrase social posts using BirdAI?
Step 11 - Create new tags for social posts and engagements, allowing social media managers to efficiently locate posts across the dashboard.
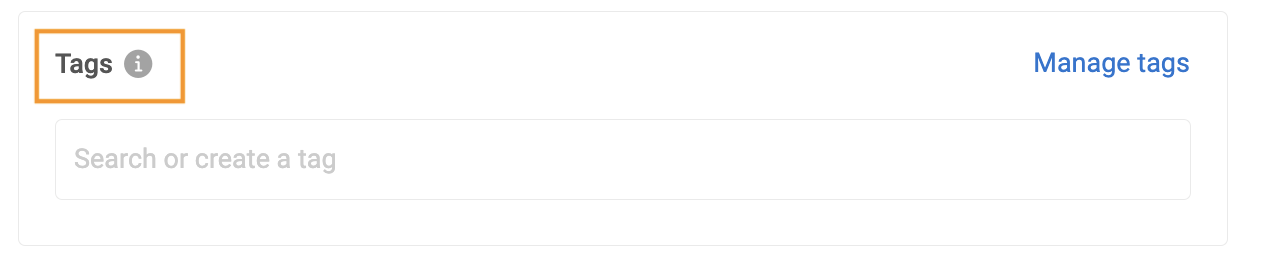
Provide a relevant tag name to the post under the tags section and click 'Create a tag.'
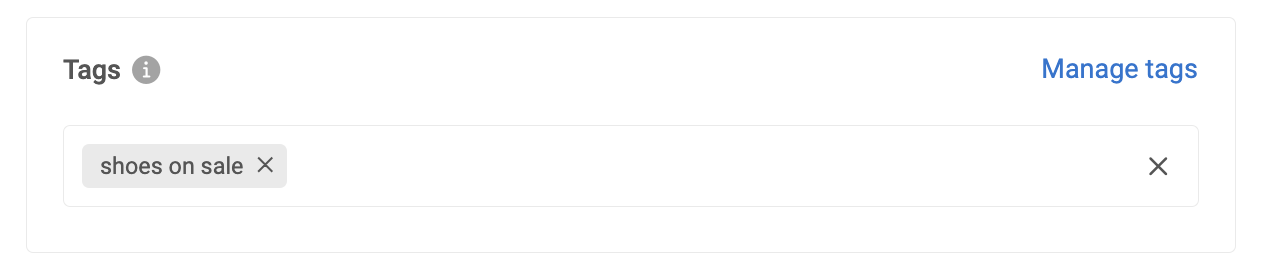
To learn more about the tags, refer to the article - How to create and manage tags in Social?
Step 11- Select an approval workflow to have your post reviewed by stakeholders before it goes live.
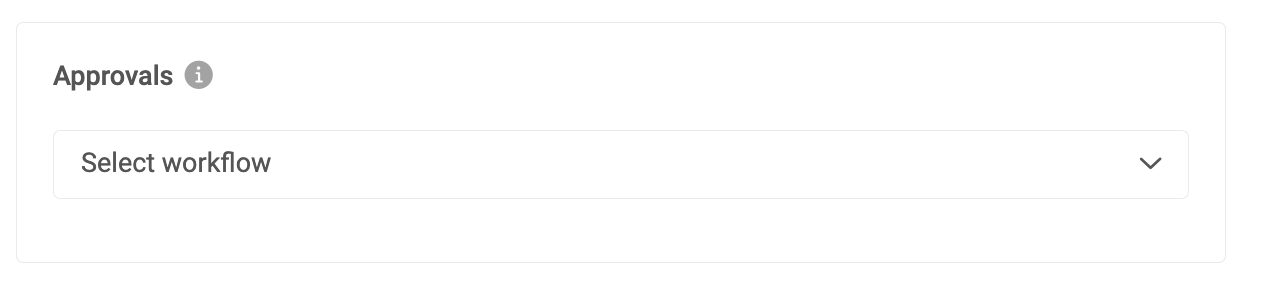
Click the dropdown button and select the team to send your social content to the approval team. Social posts can only go live after obtaining approval from designated approvers.
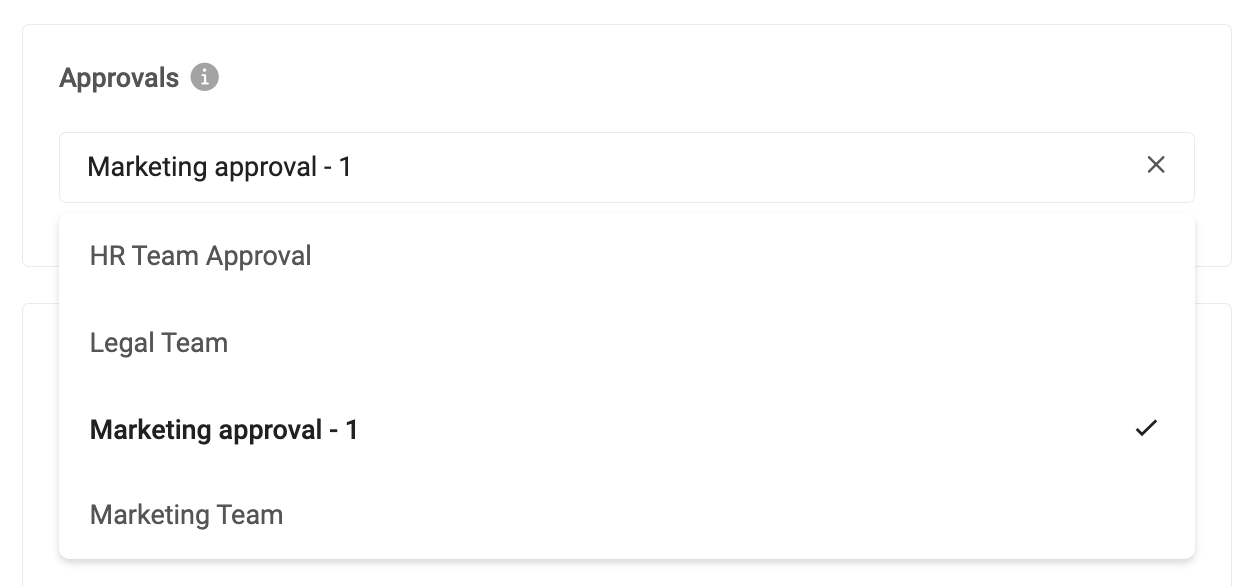
To learn more about the approval workflows, refer to the article - How to streamline the Social content approval process with our robust approval workflow feature?
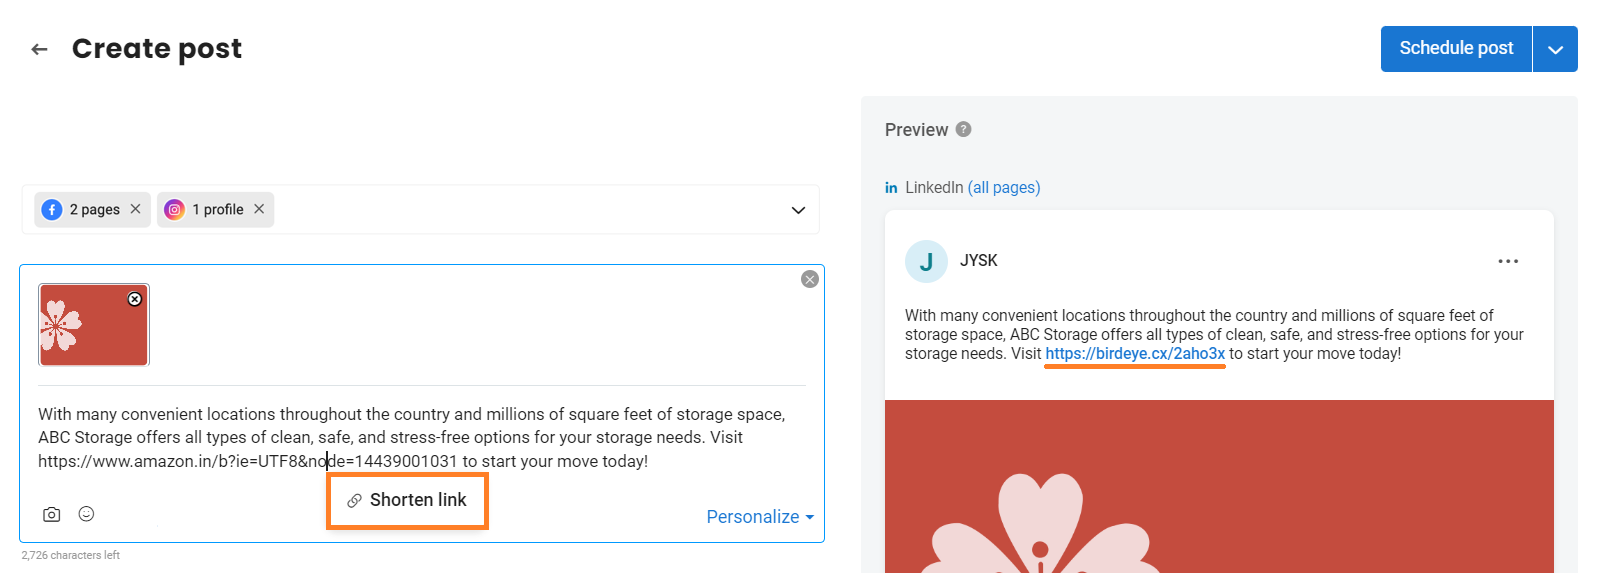
Step 12- Click on the URL and click on 'Shorten link' to shorten the URL.
Step 13- You can add the title and description of the attached link. You can also select the link thumbnail from the carousel.
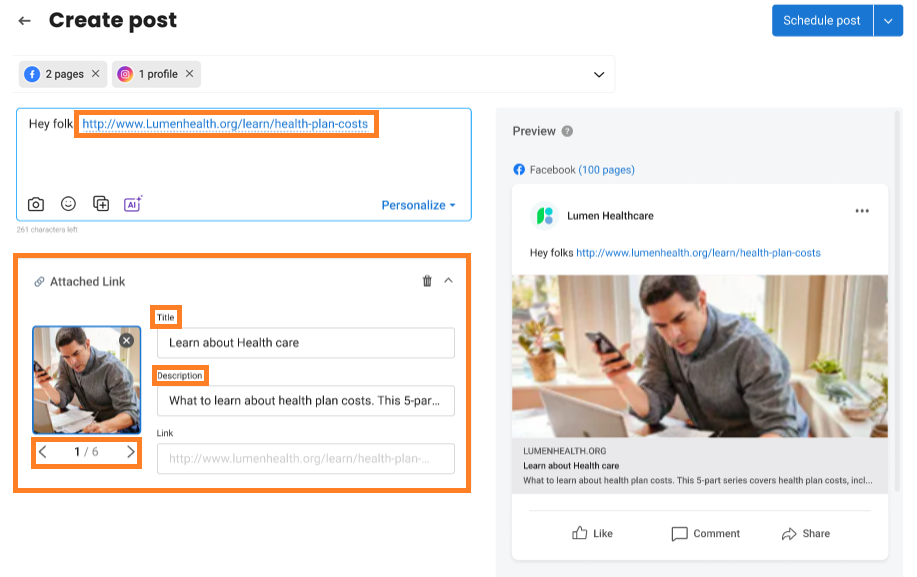
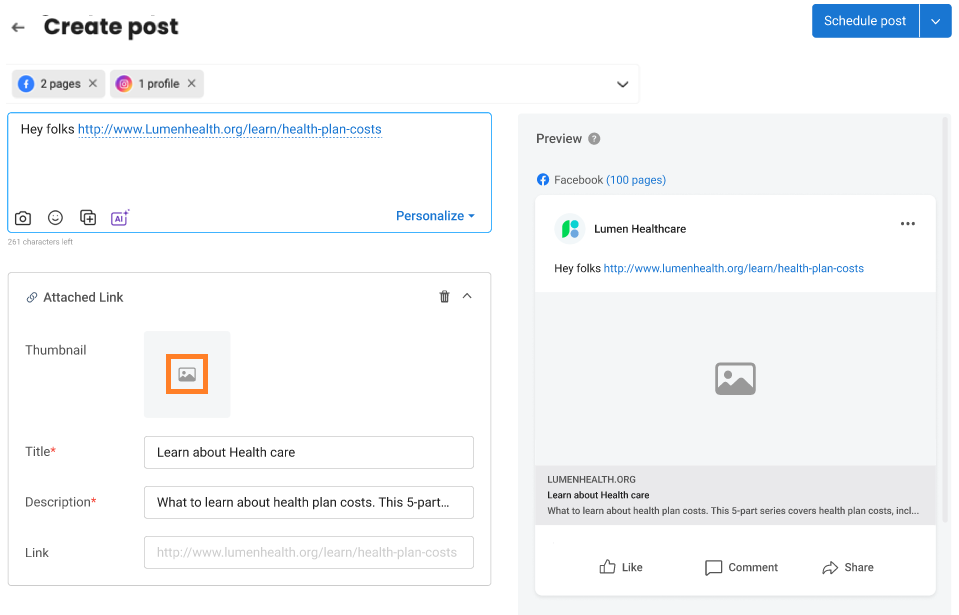
If thumbnail is missing, you can add a new thumbnail from your system by clicking on the ‘Image’ icon.
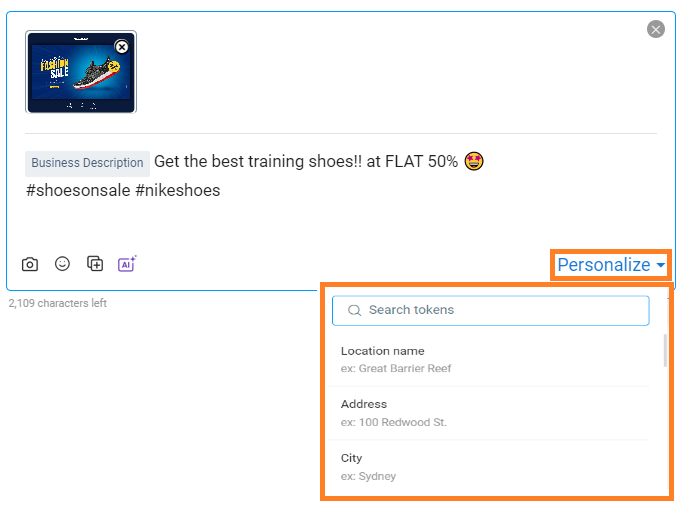
Step 14 (Optional)- Click on ‘Personalize’ in the bottom right of the text box to give a personalized touch to the message by adding location name/address/state etc., in the post.
Step 13- Once you have set the post, go to the drop-down button next to the Schedule post button. Click ’Post now’ to post on the selected social media channels. You can save the post for future use by selecting the ‘Save as a draft’ option.
Alternatively, you can schedule your post for a future date and time by clicking the 'Schedule Post' button. To learn more about scheduling a post, refer to this help center article- How do I schedule a post to be published at a later date and time?

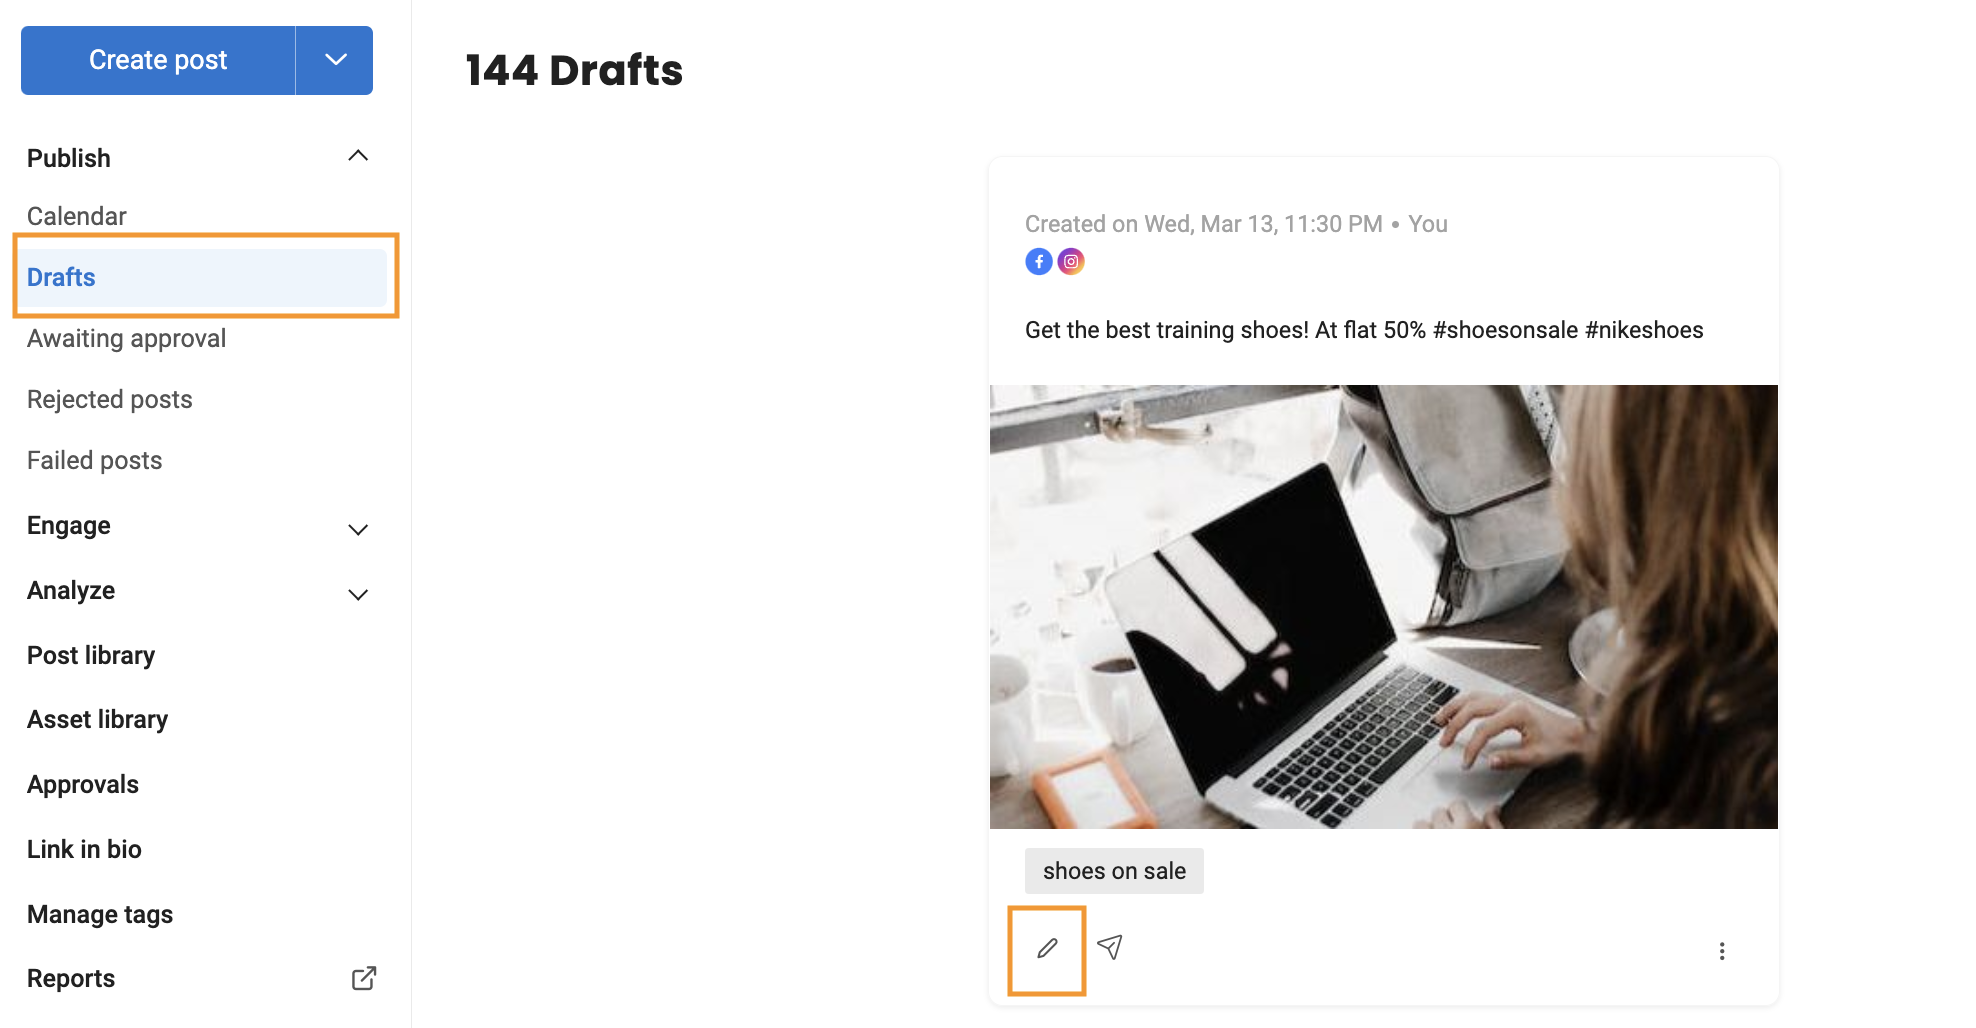
Posts as drafts
If you need to quickly jot down an idea for a piece of content or start working on a message you want to revisit later, save your message as a Draft.
A draft can be accessed at any point, will never expire, and can always be edited and preserved with the objective of future publishing. Go to the ‘Drafts’ tab, under the 'Publish' section on the left bar. Click on ‘Edit’ to edit the post.
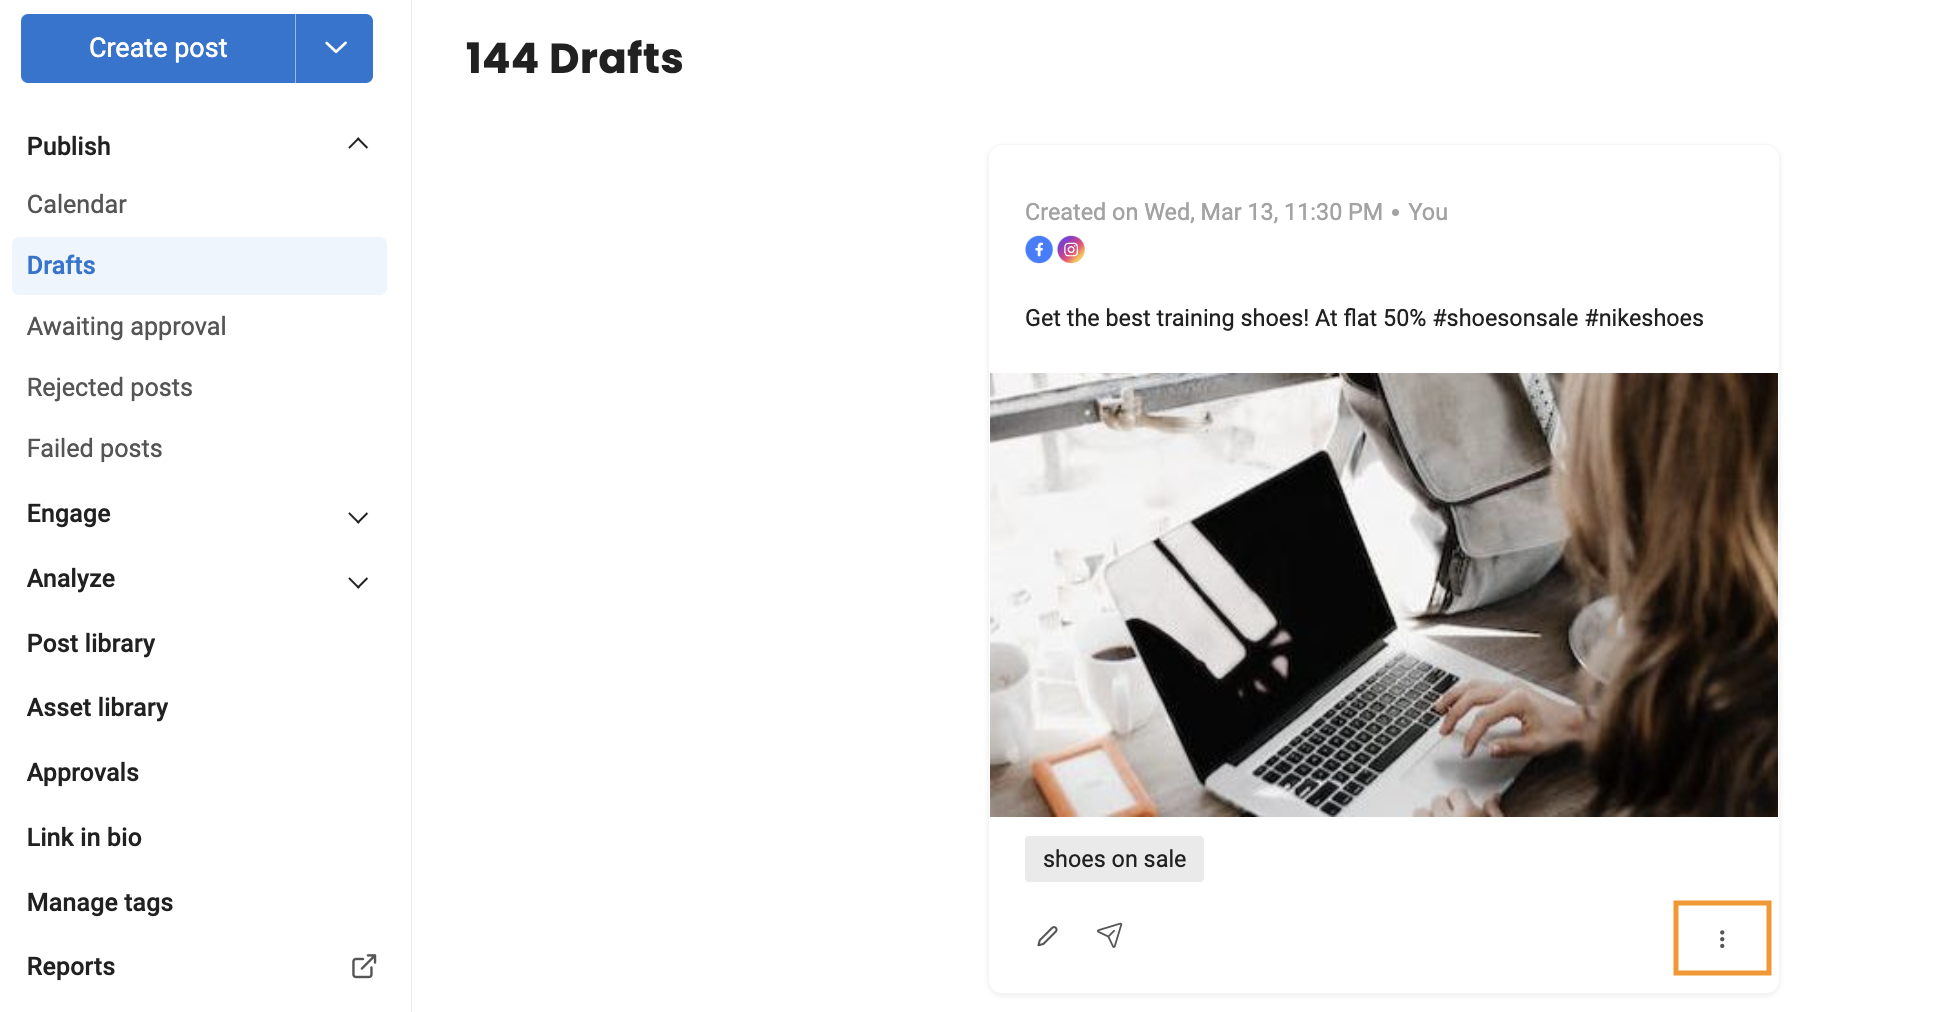
Click the menu icon for further actions.
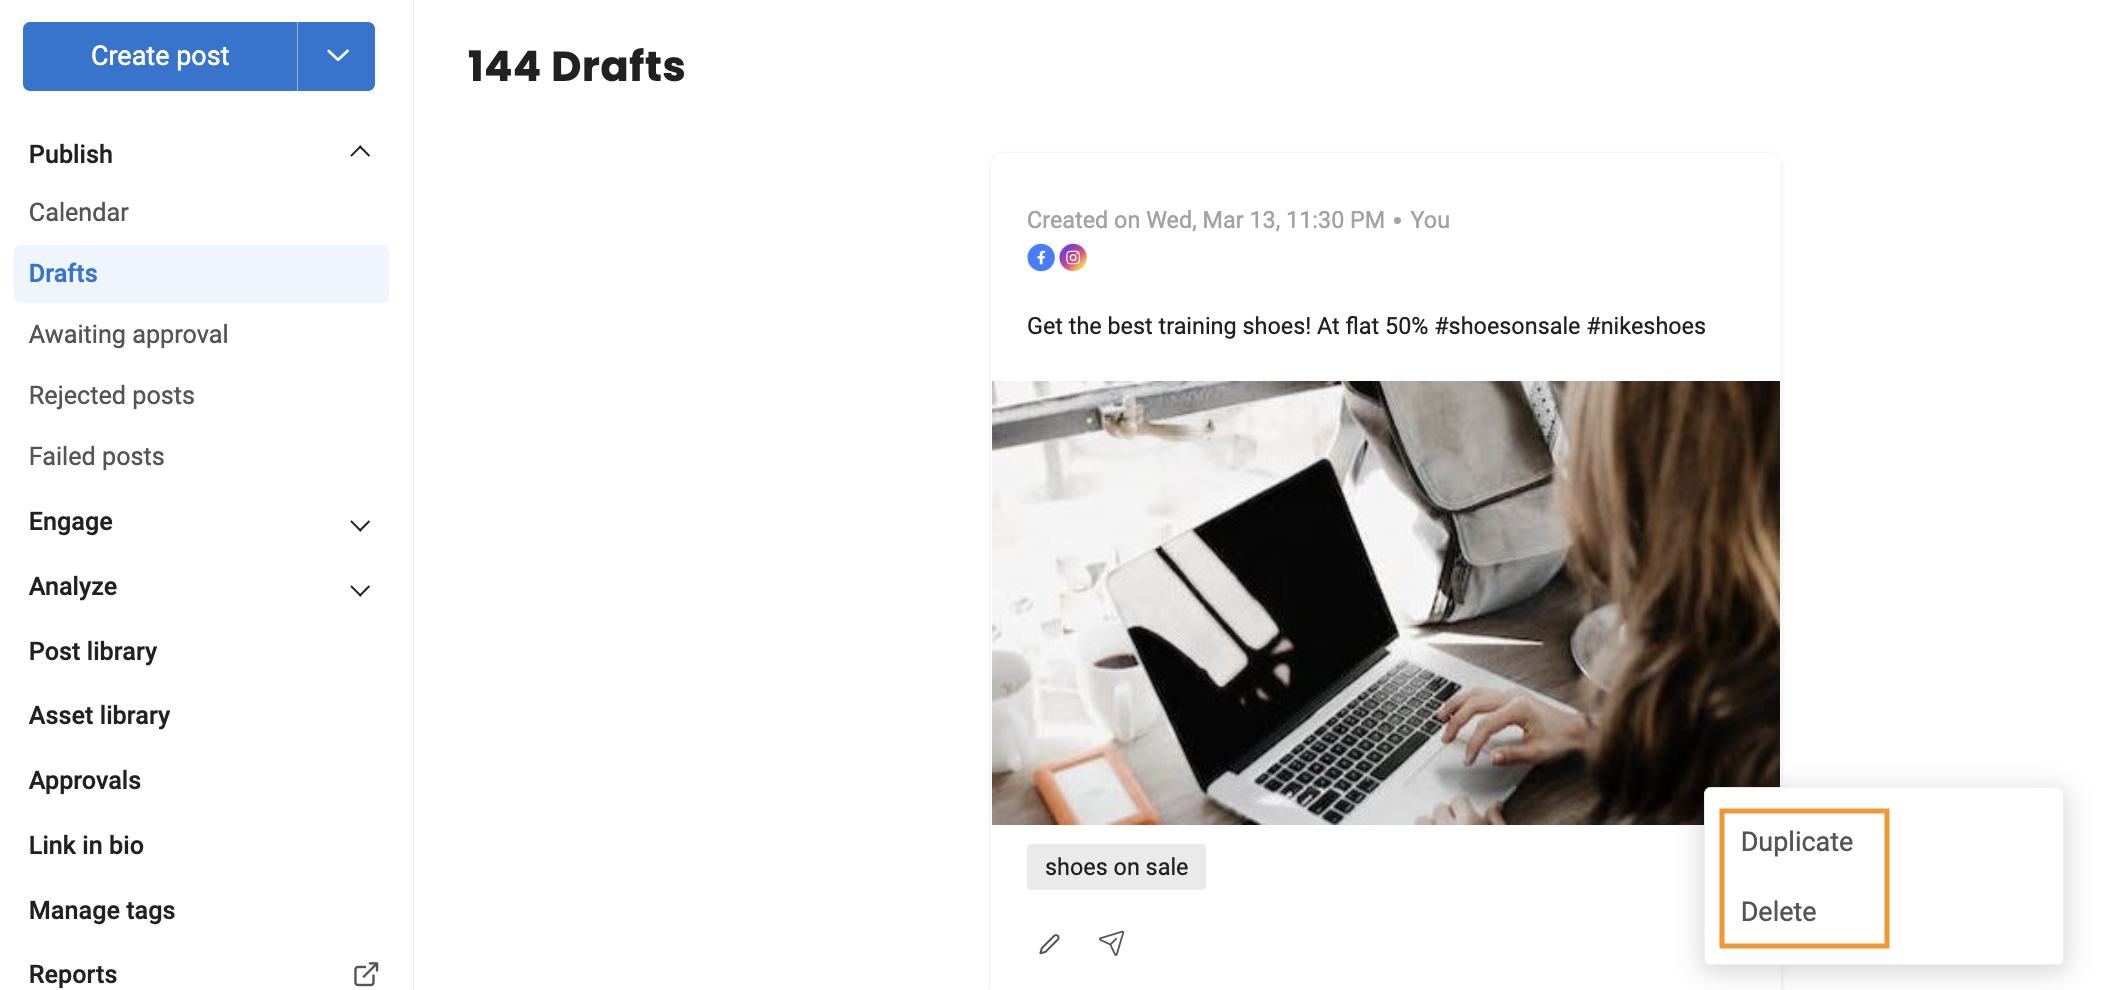
You can duplicate or delete the draft.
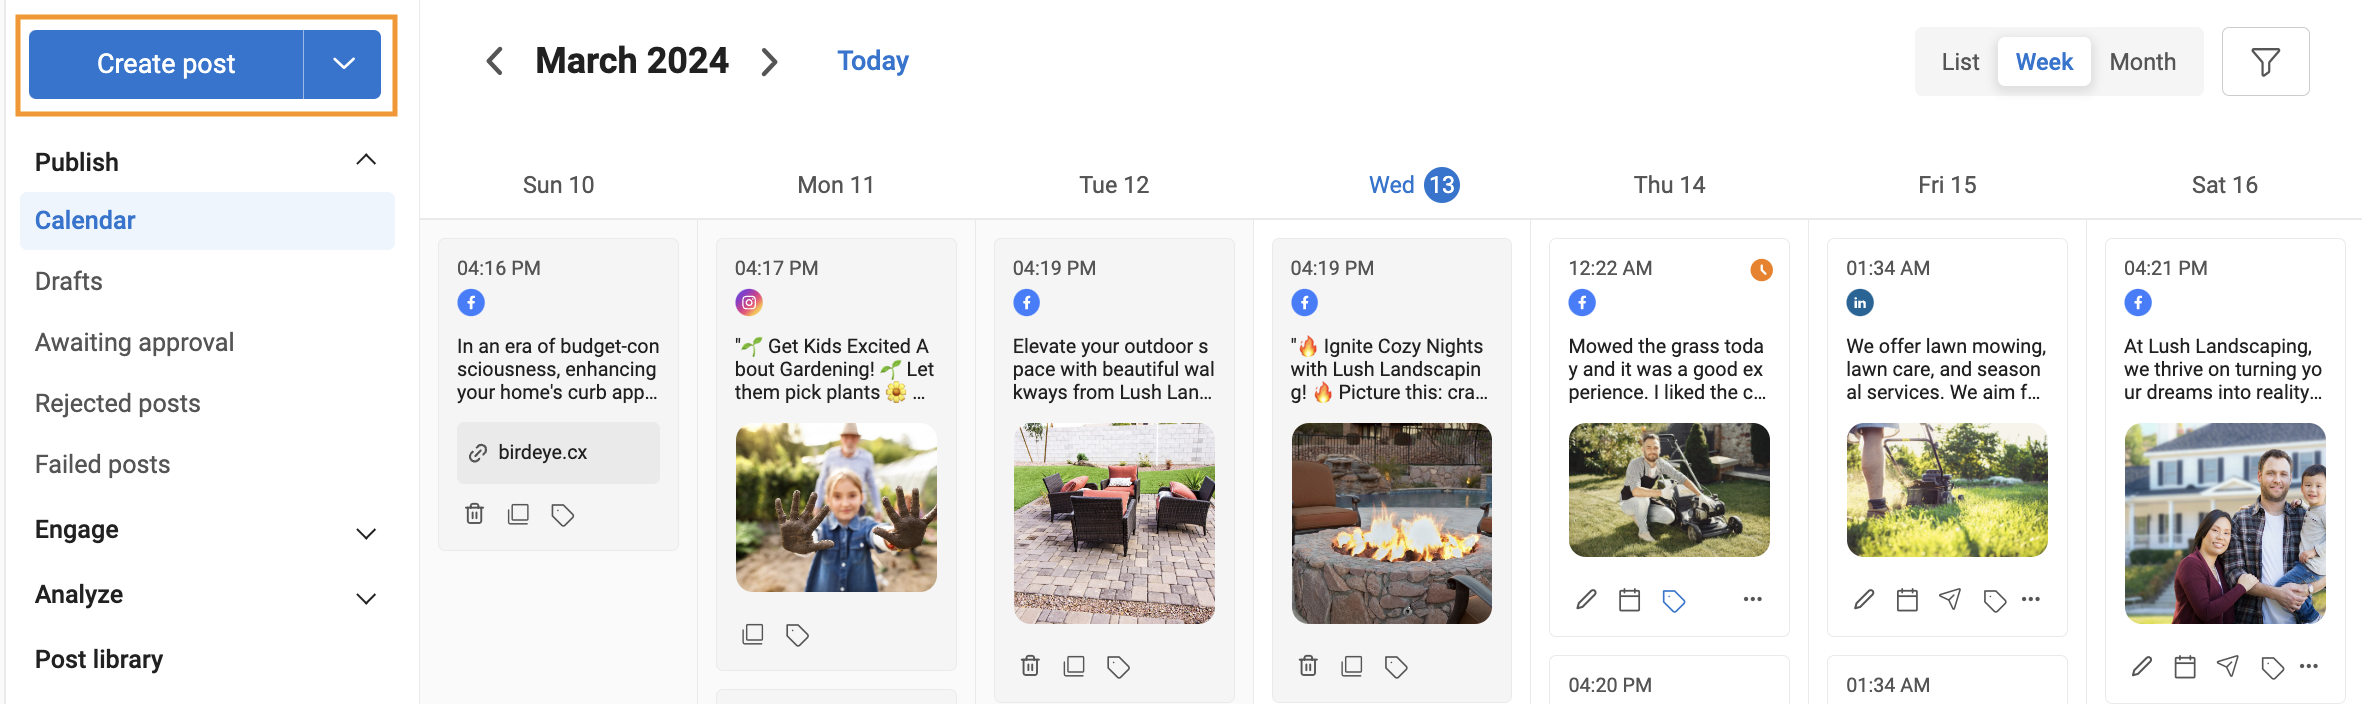
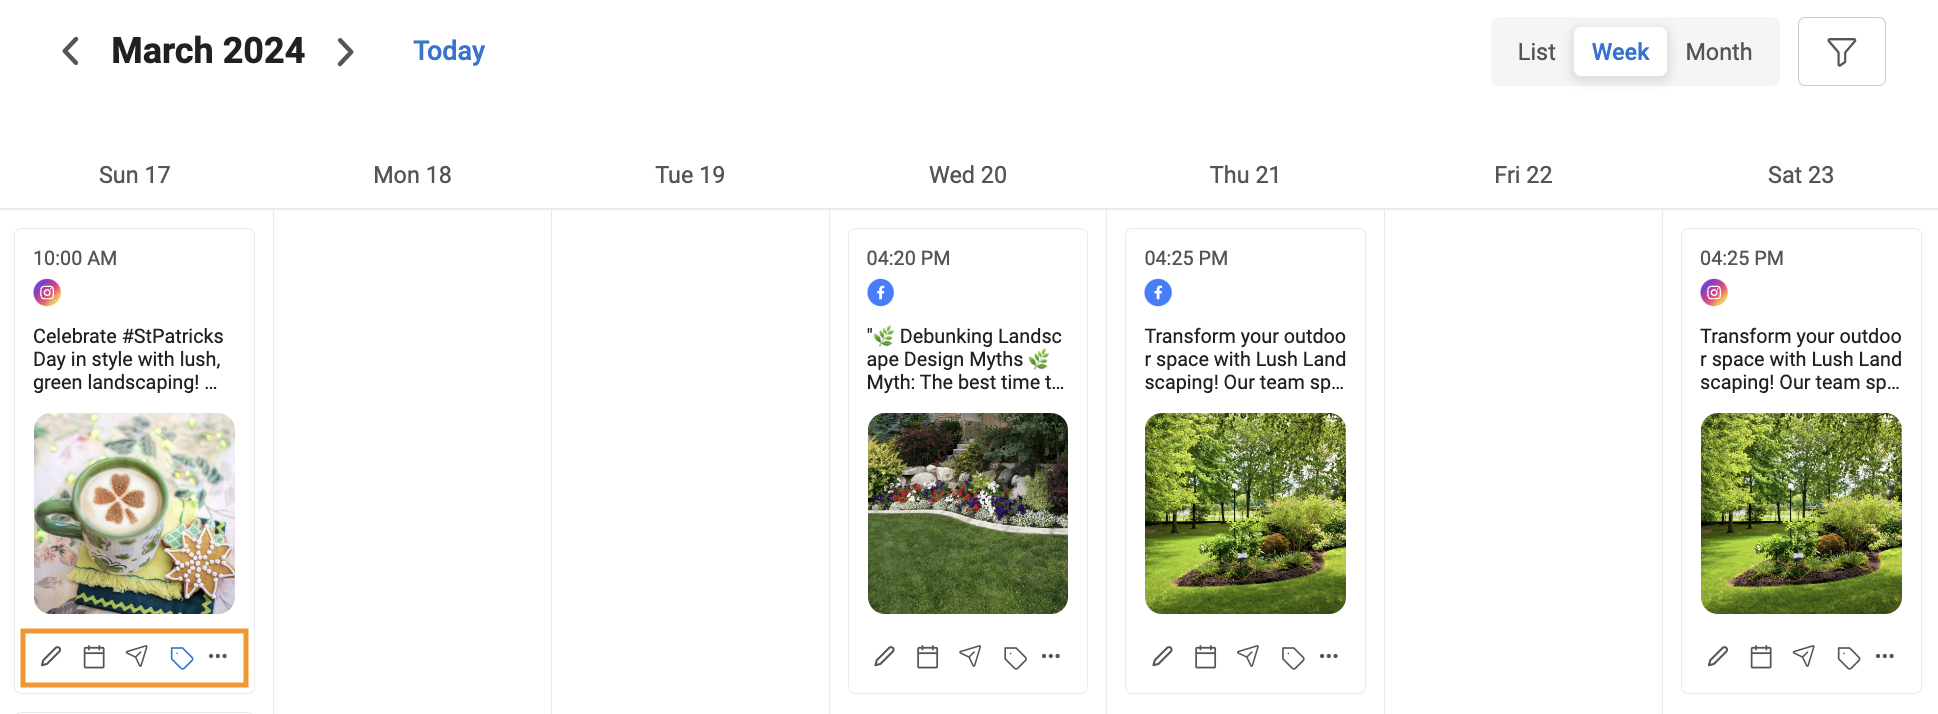
Simplified calendar view for quick catchup on your posts
The published/scheduled posts will appear on the 'Publish' tab with the timestamp and the social channels it was published/scheduled. The default view after landing on the Publish tab would be Calendar Week View with the current week selected.
The calendar view would be divided into timelines. Calendar Month view displays the posts in month view with just a banner with social channels being visible for each post and the time when the post was posted or scheduled to be posted.
You can 'edit,' 'reschedule,' 'post now,' 'view the tags,' and click on the menu icon (three horizontal dots) to 'duplicate,' 'delete the post,' and 'chat with approvers.'
Click on the post to view the post details.
