Where do I add my business information to fix all my review listings?
Birdeye helps businesses fix their business information on their online listings through its online partners. The information that is published on 50+ online directories is fetched from within the Birdeye dashboard.
NOTE:
Since the NAP data is continuously transmitted to the review listings seamlessly, any changes that are made to your business information within the 'Setup Profile' tab will be automatically transmitted to the review listings.
About Listings Category Classification
A streamlined category classification system is available for six major platforms: Uberall, Synup, Google, Apple, Facebook, Bing, and Birdeye. With this system, users only need to input the category in a single field, and it will automatically cross-verify across the remaining fields, ensuring consistency and saving time. A downloadable file and a GET API are also available to help cross-reference each category by directory and vendor for every location.
With the category classification feature, managing categories across platforms like Google, Apple, Bing, Facebook, Microsite, and third-party vendors becomes faster and more consistent. This reduces manual work, improves publishing accuracy, and streamlines category management, while still providing the flexibility to make adjustments when needed.
Using Listings Category Classification
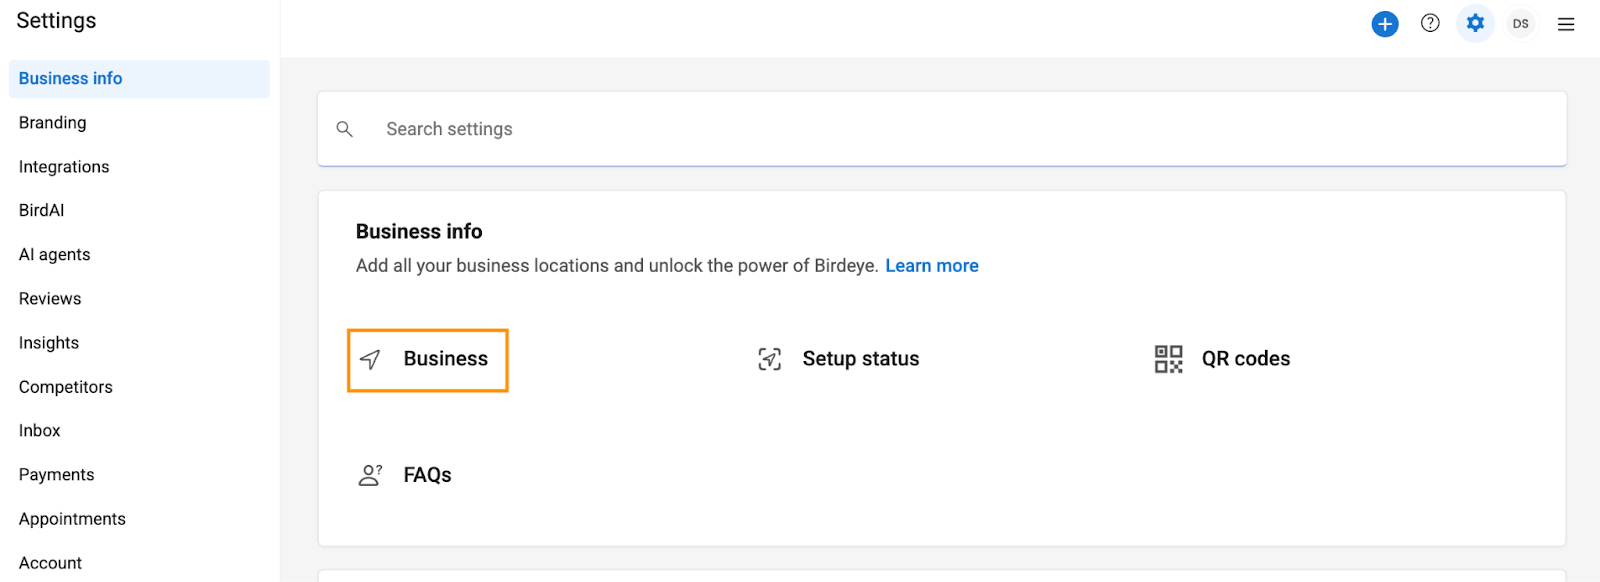
Go to Settings and click ‘Business.’
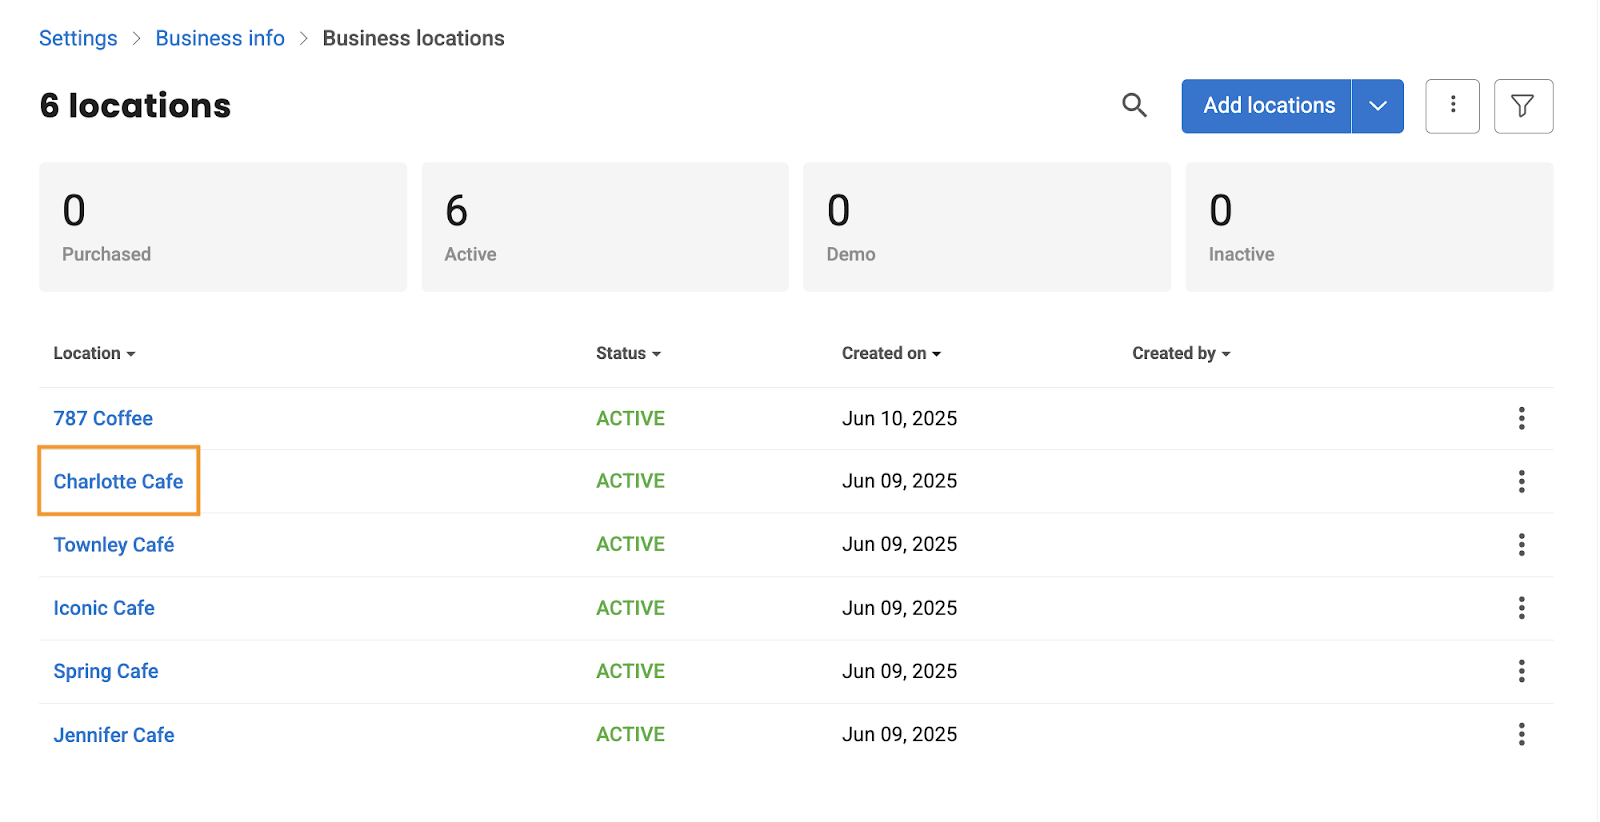
Select the desired business location.
Click the ‘edit’ icon corresponding to the ‘Business information’ section.
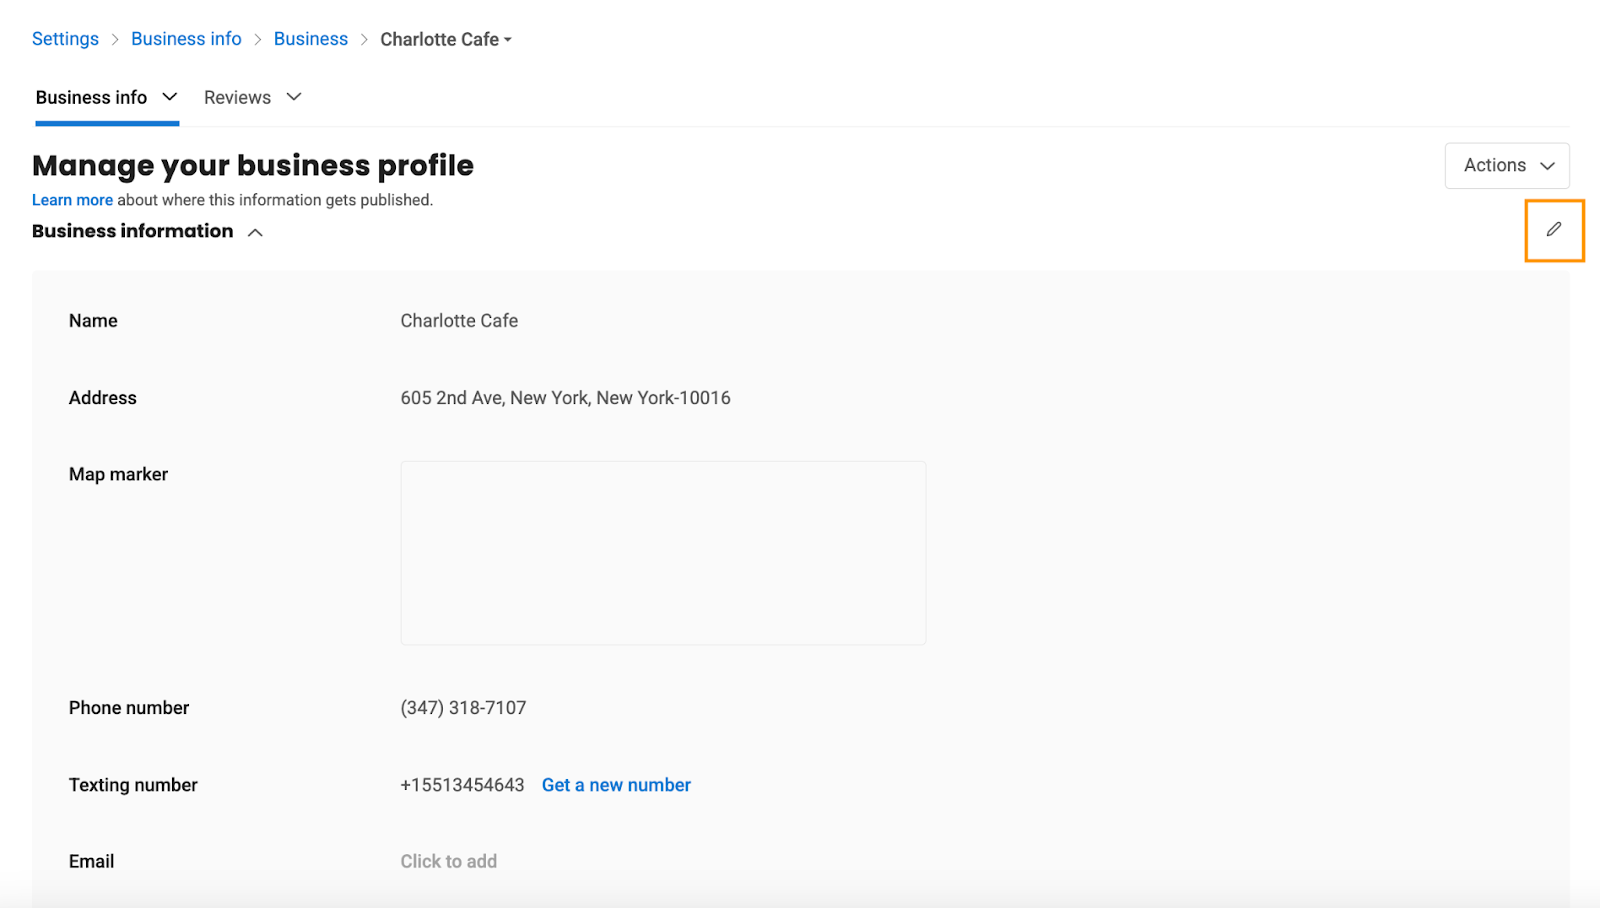
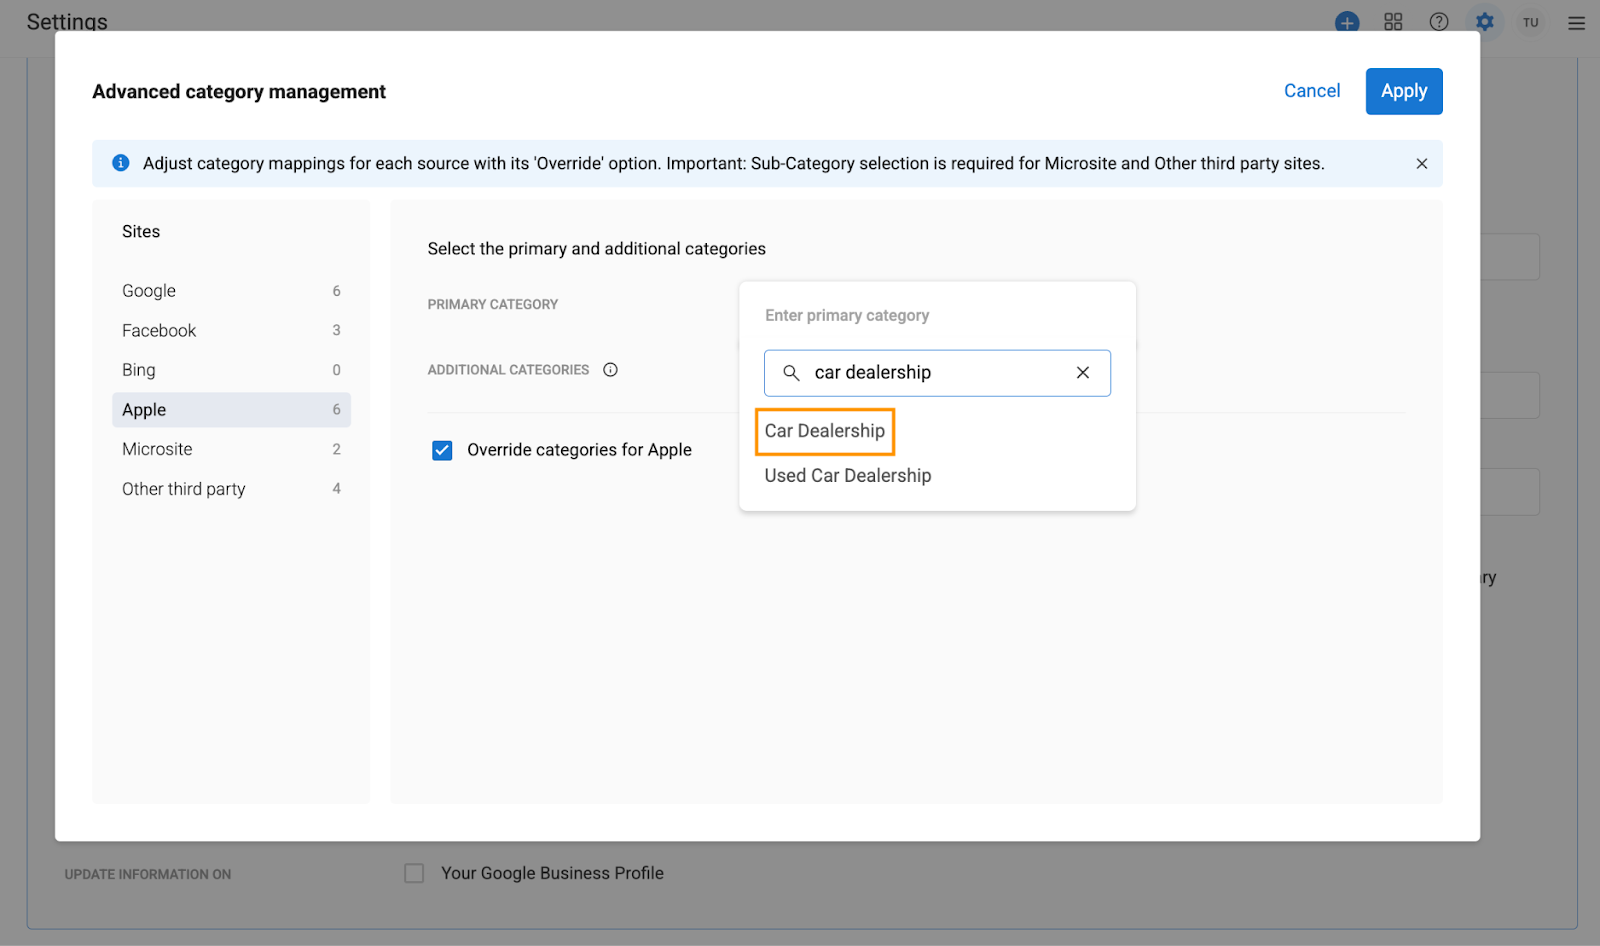
Scroll down to the ‘Primary category’ section and set the primary and additional categories.
NOTE:
By default, the Primary and Additional categories shown here are pulled directly from your Google Business Profile.
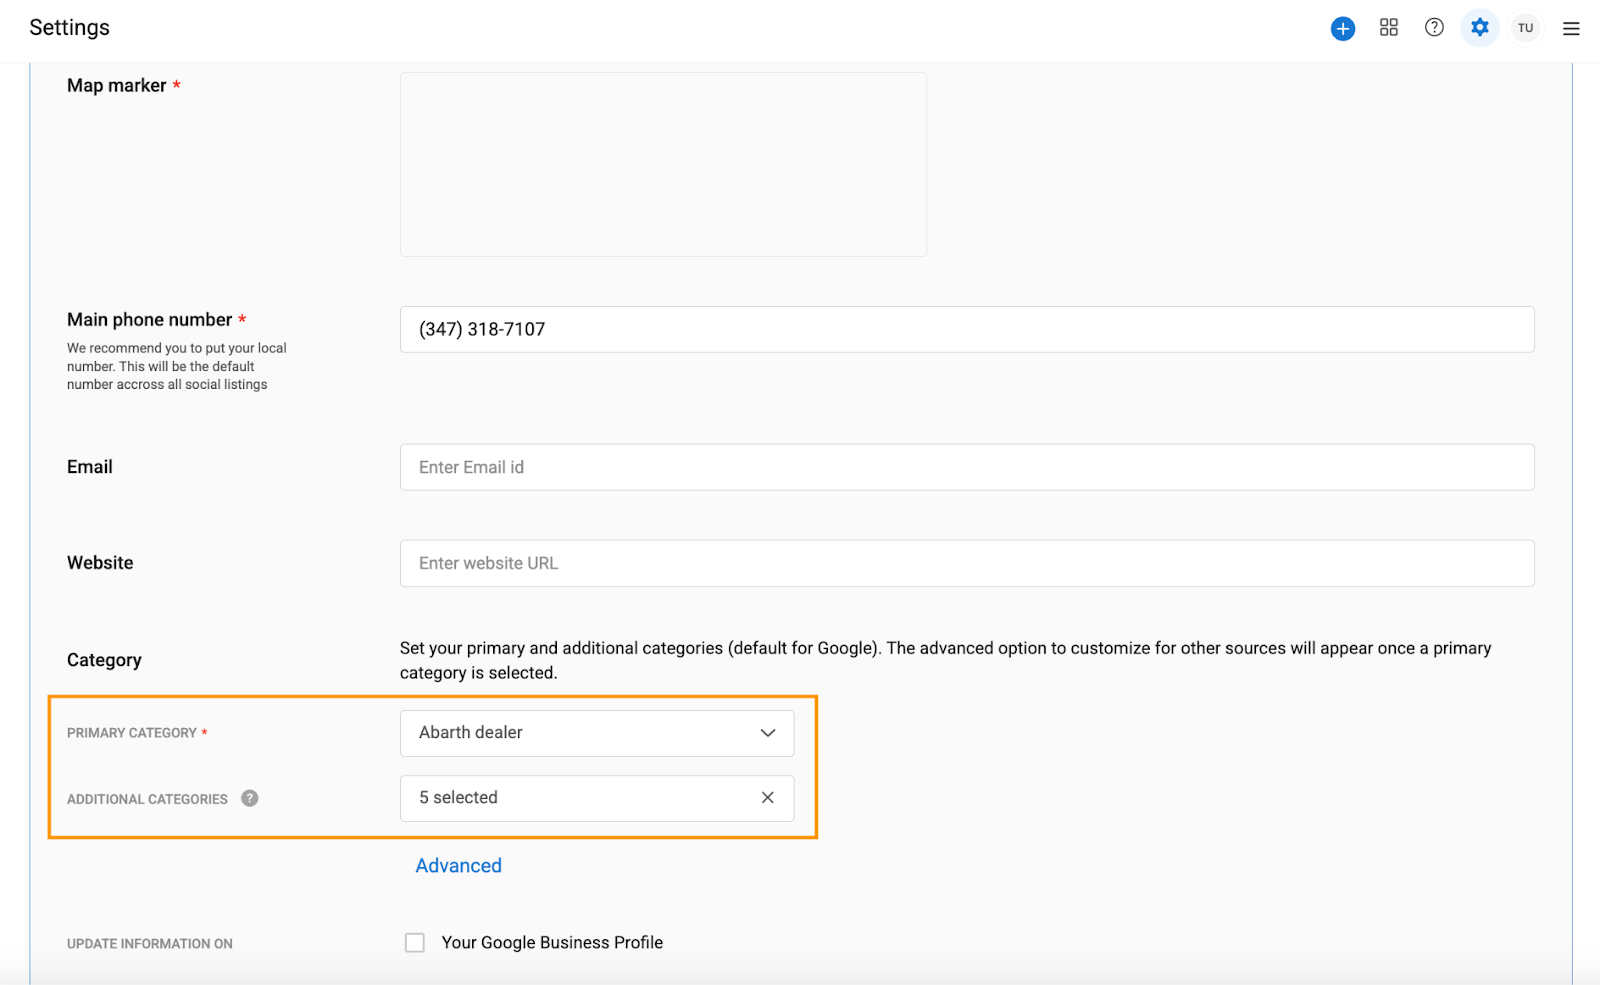
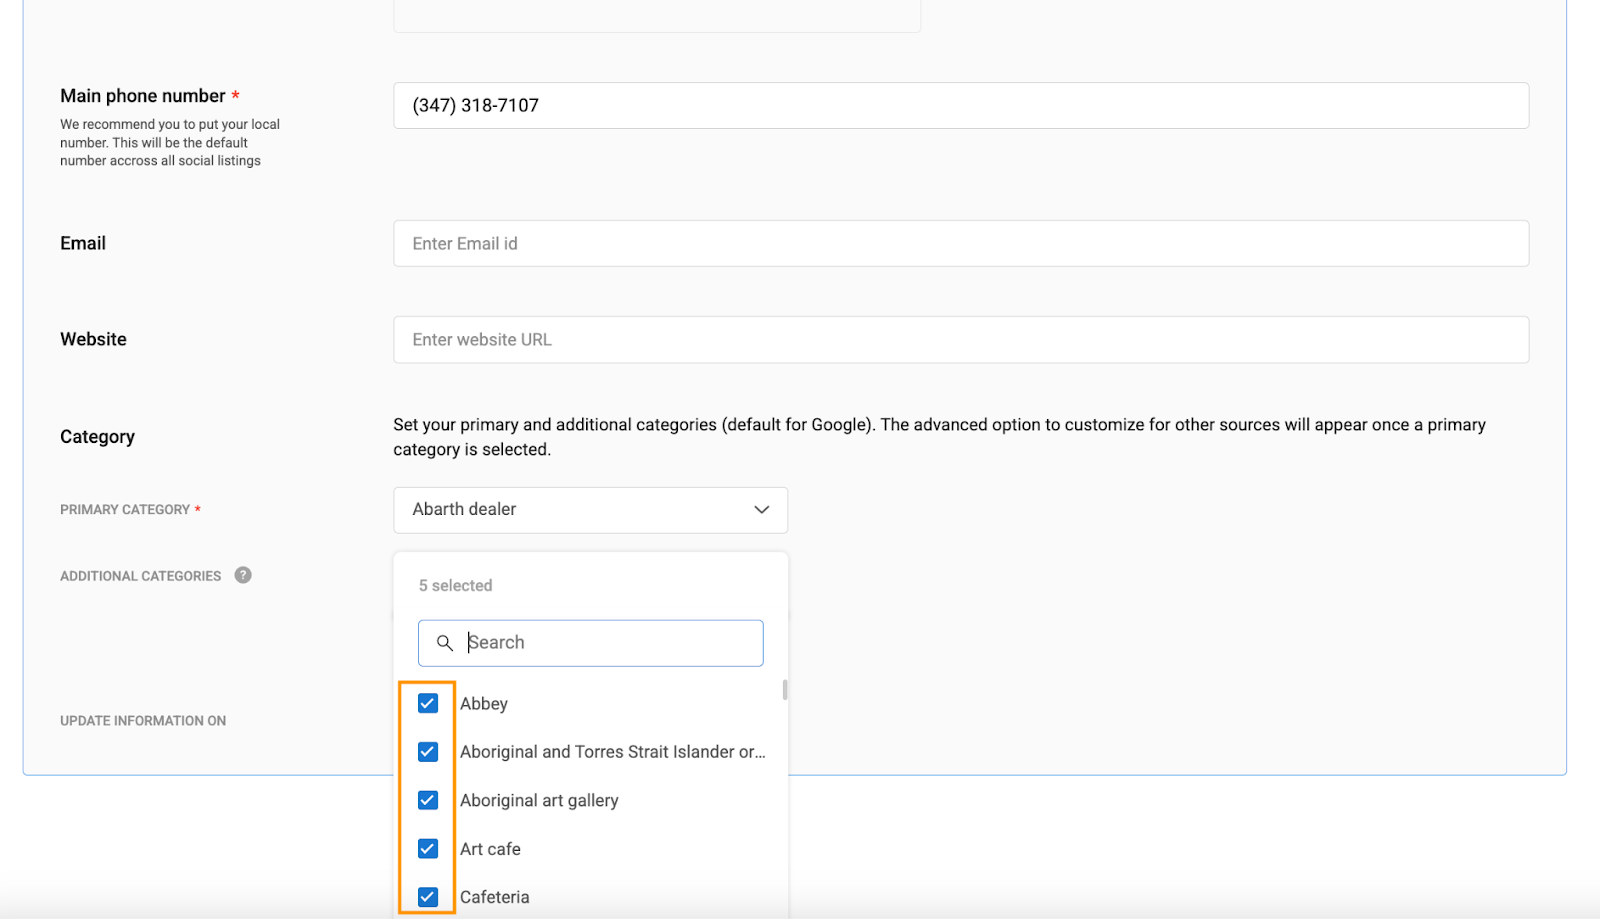
After selecting the Primary category, click on the ‘Additional categories’ field and select the desired categories.
NOTE:
The Primary and Additional categories you set here will automatically apply to your Google Business Profile and will also update the categories for other sources.
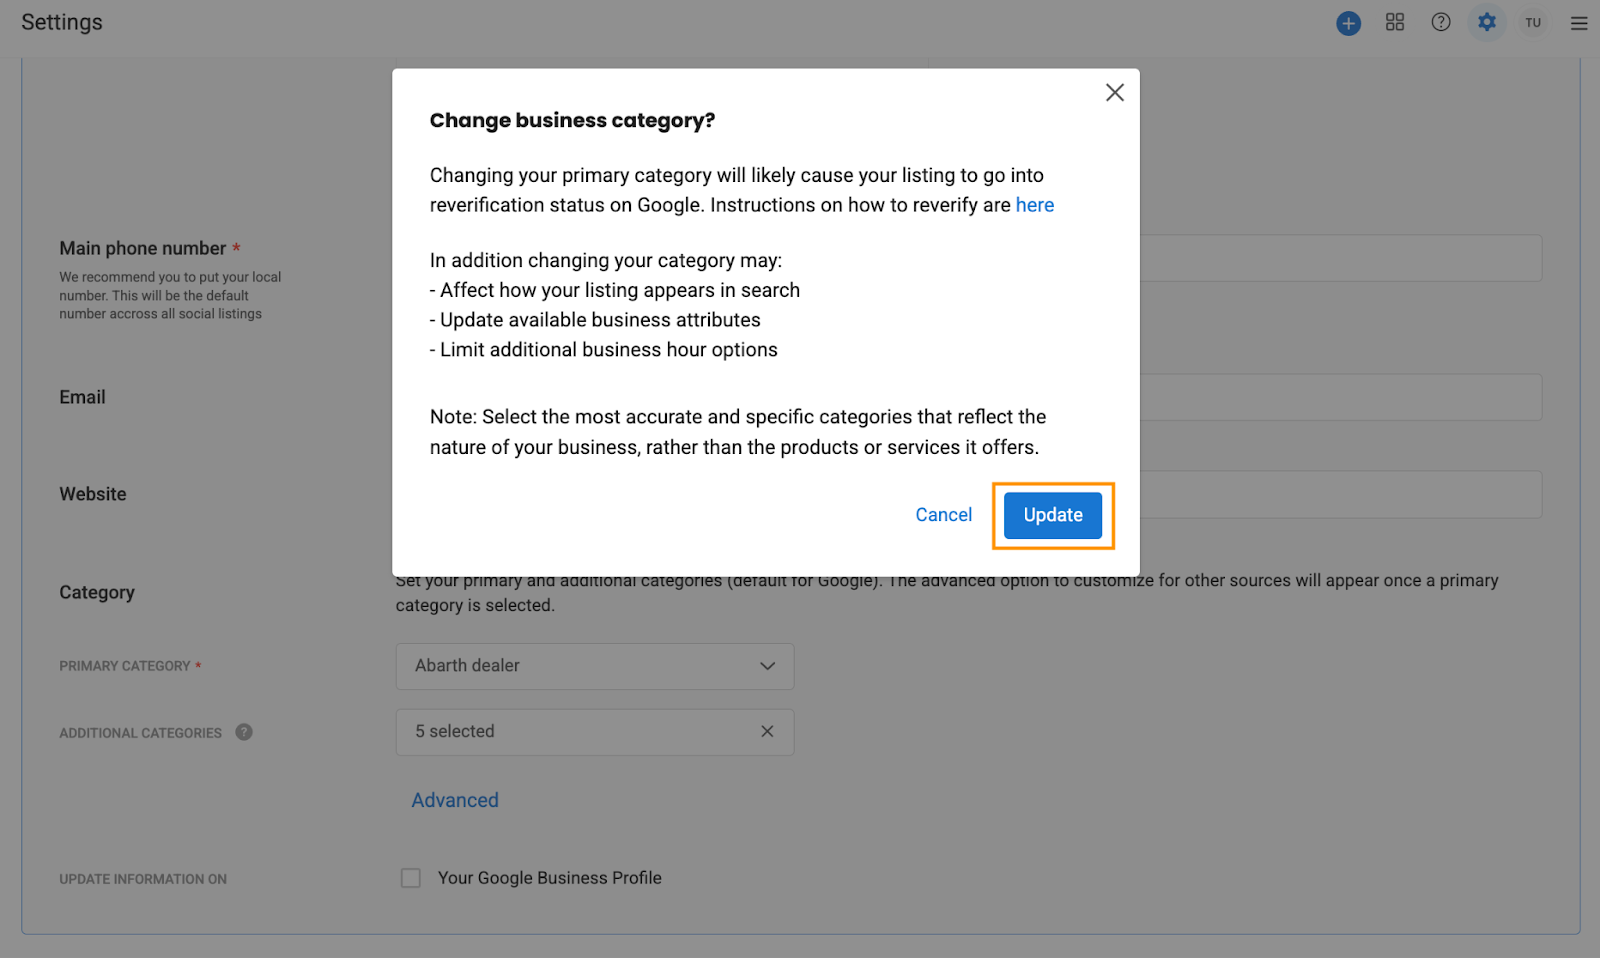
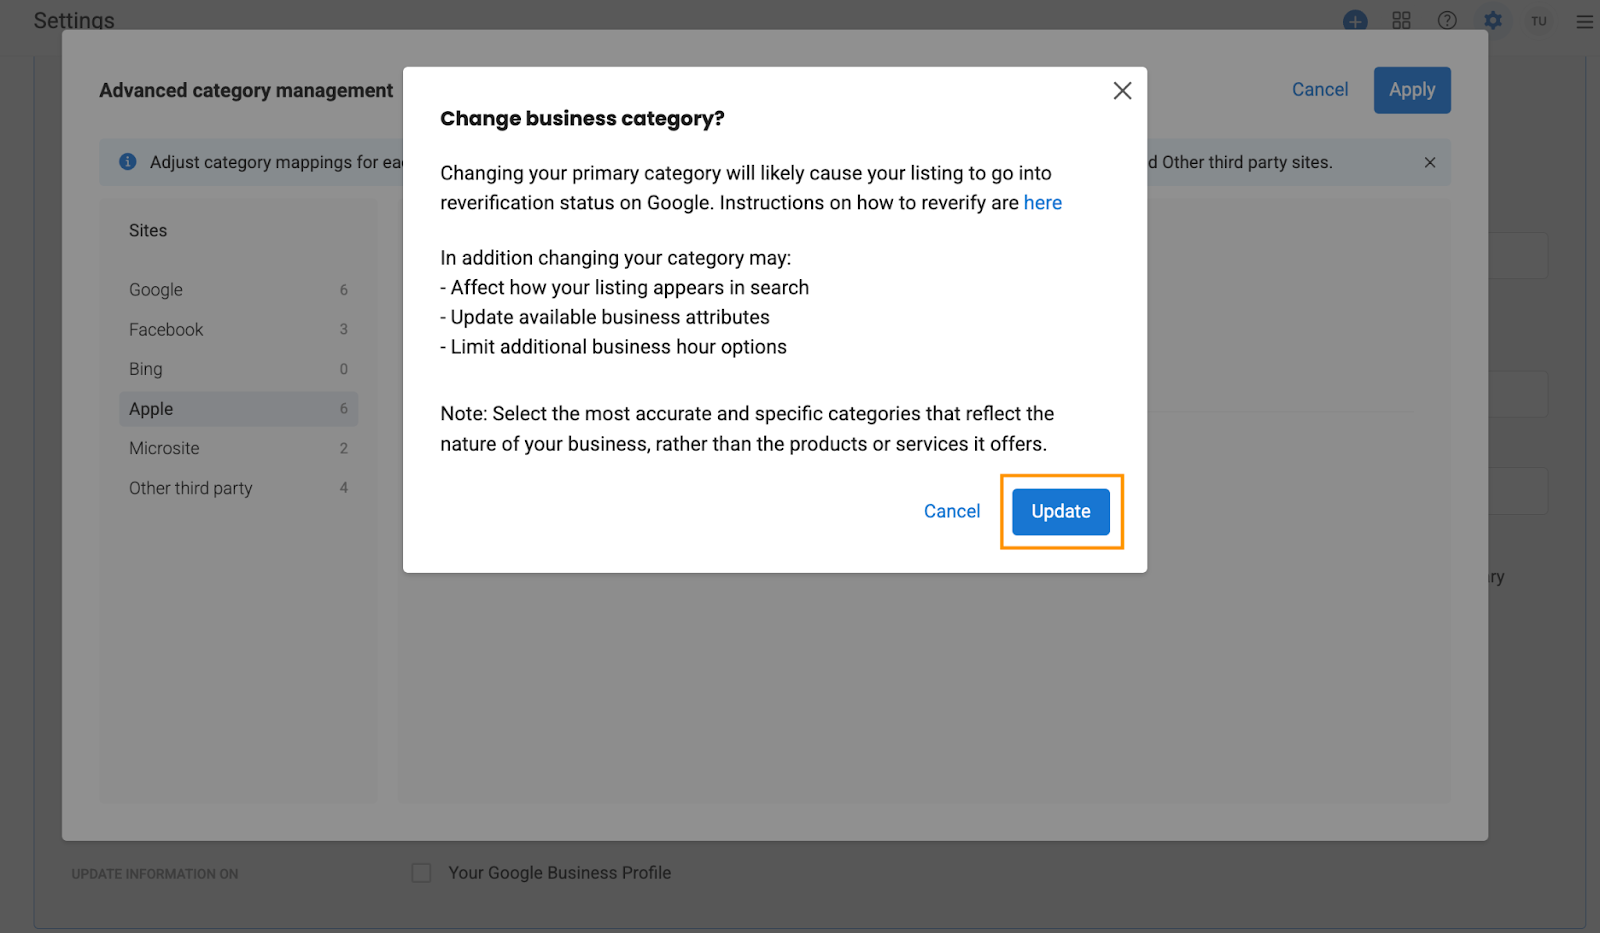
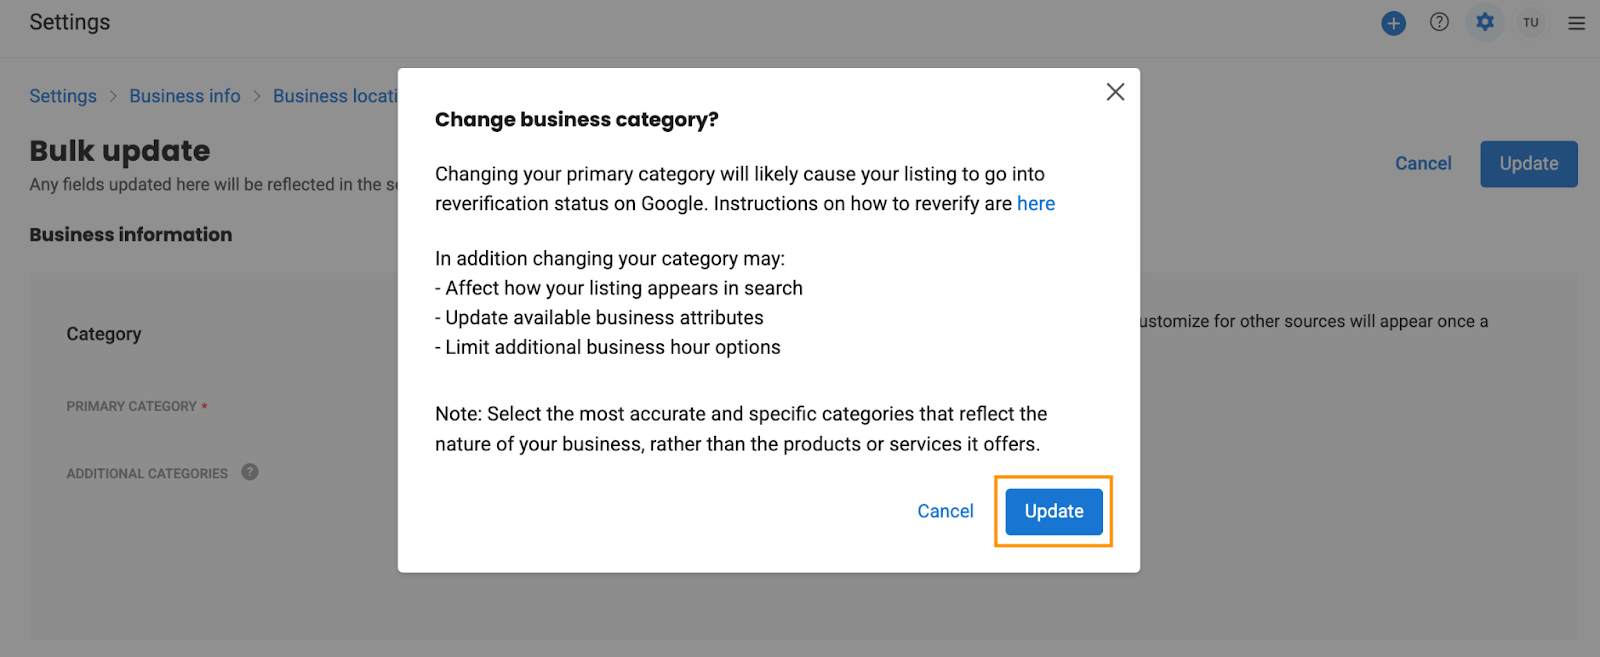
A pop-up window appears confirming the category change. Click ‘Update’ to apply the new category.
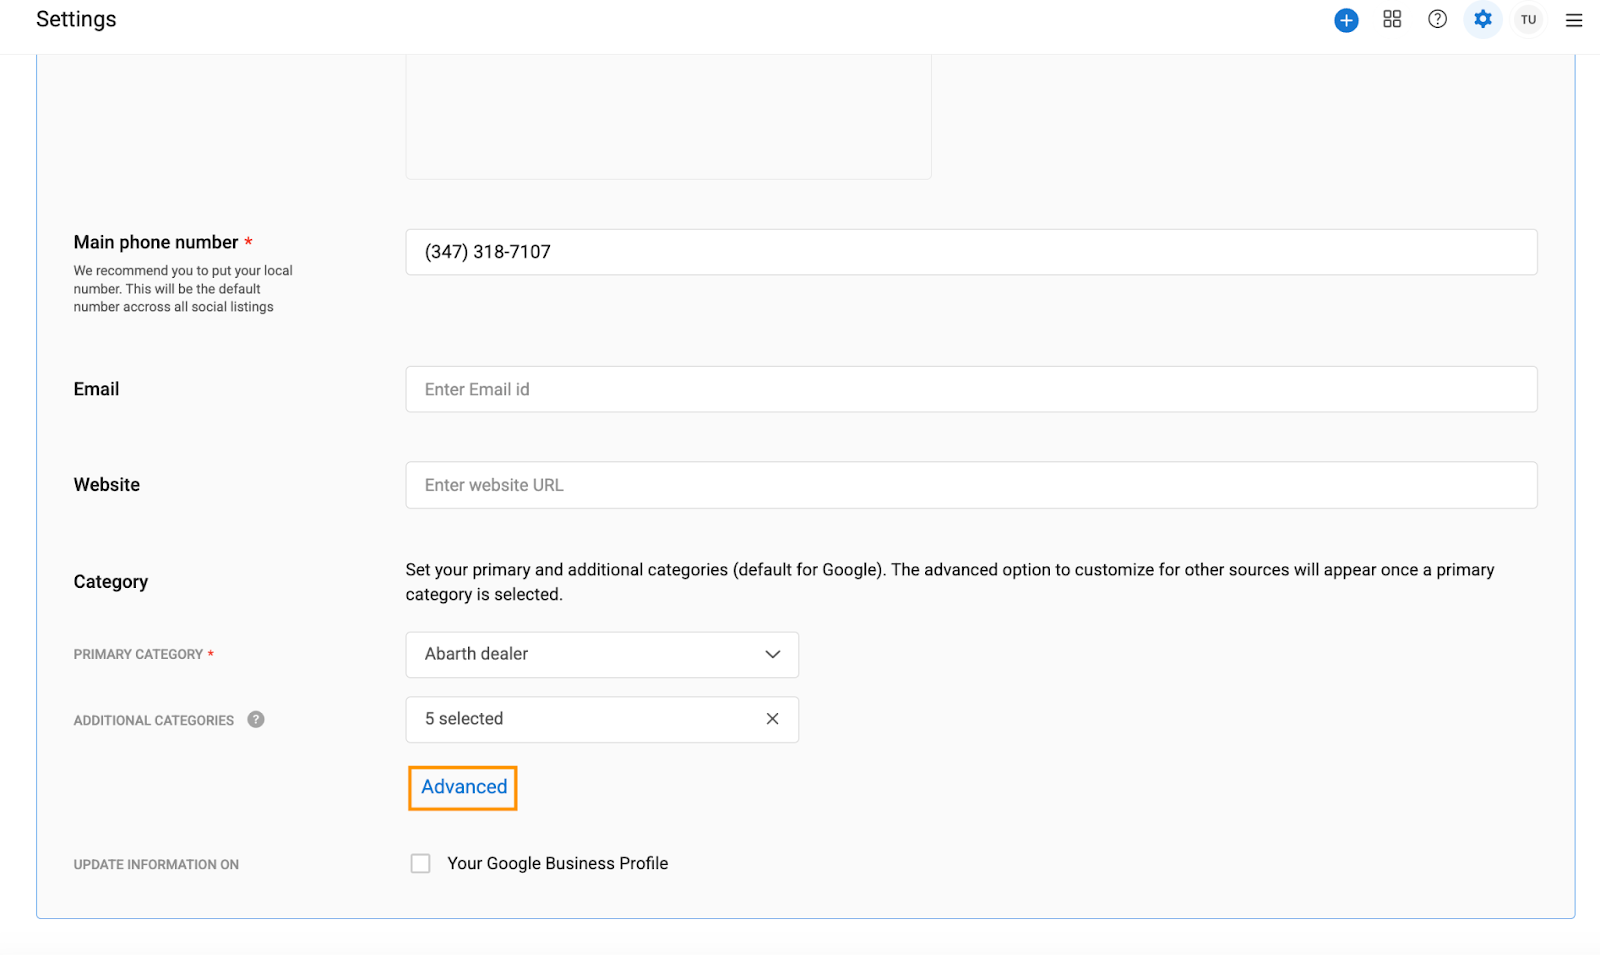
To update categories for other sources, click the 'Advanced' option.
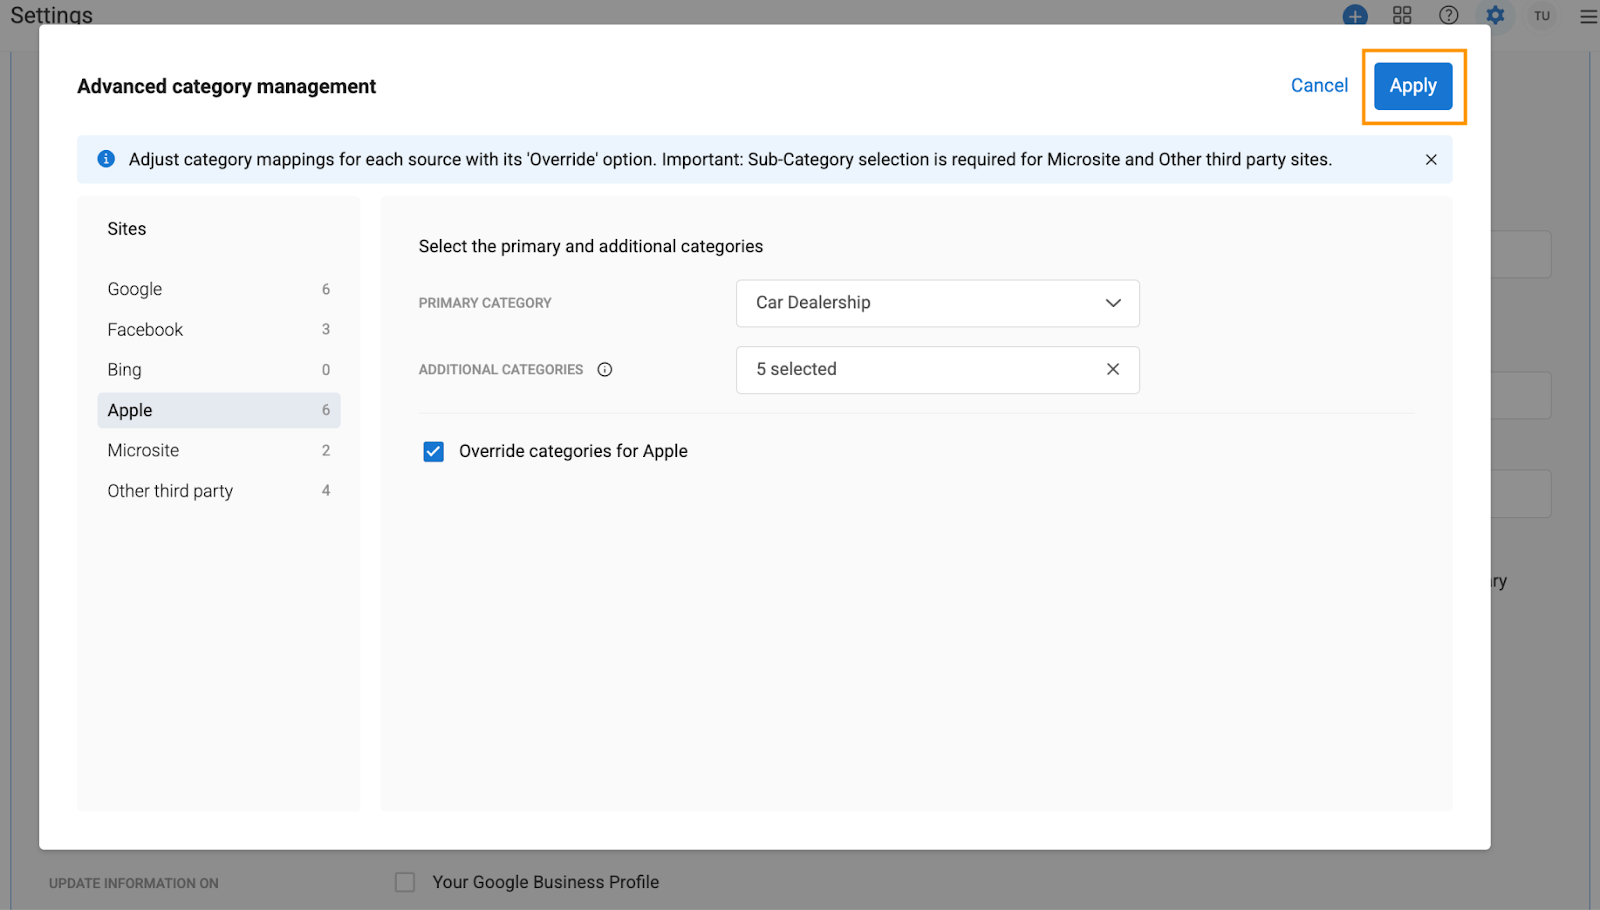
For example, select ‘Apple’ as source, and if you want to override the existing categories, select the ‘Override categories for Apple’ field.

Click the ‘Primary category’ field to update your primary category, or click the ‘Additional categories’ field to update your additional categories.
Click ‘Update.’
Select ‘Apply.’
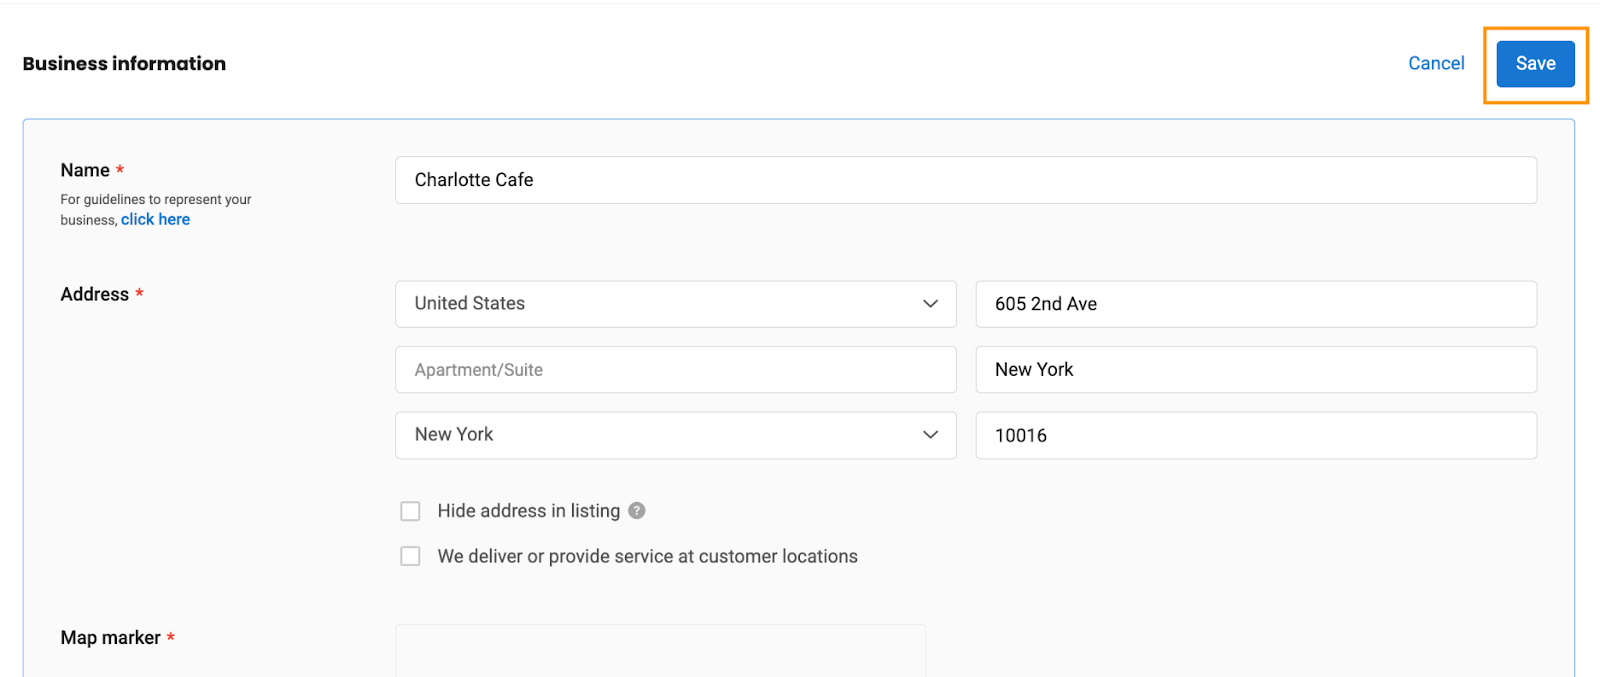
You will be redirected to the ‘Business information’ screen, scroll up, and click ‘Save.’
Bulk Update Via UI
To bulk update the categories across locations, click the three vertical dots and select ‘Bulk update via UI.’

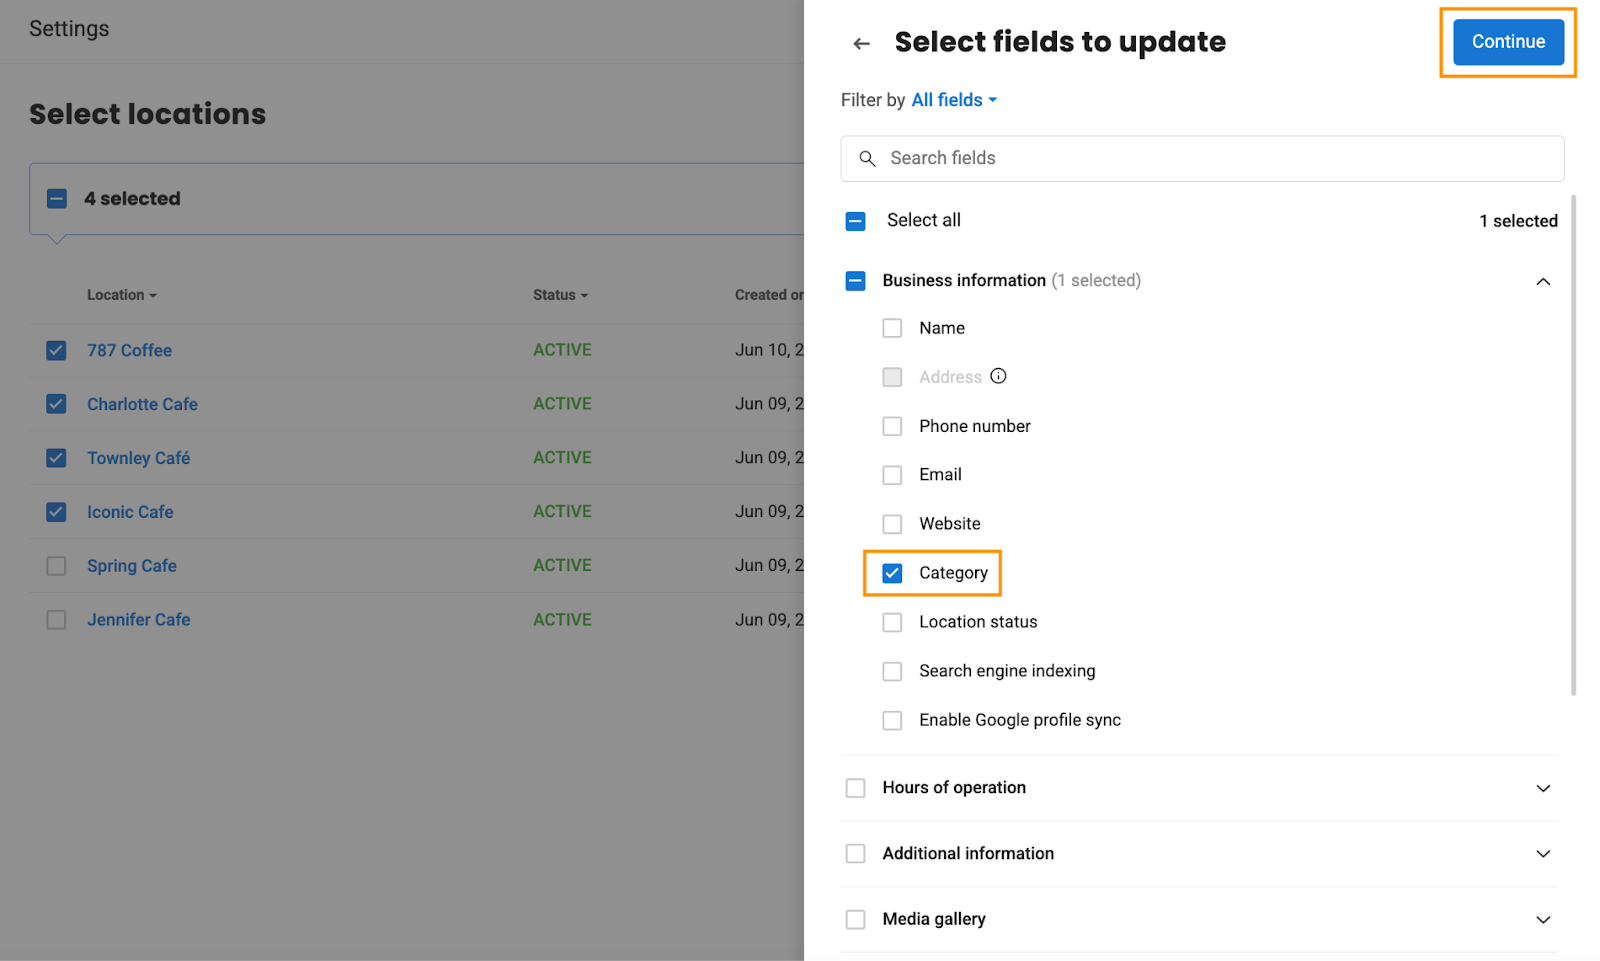
Select the desired locations and click ‘Update via UI.’

Select ‘Category’ in the ‘Business information’ field and click ‘Continue.’
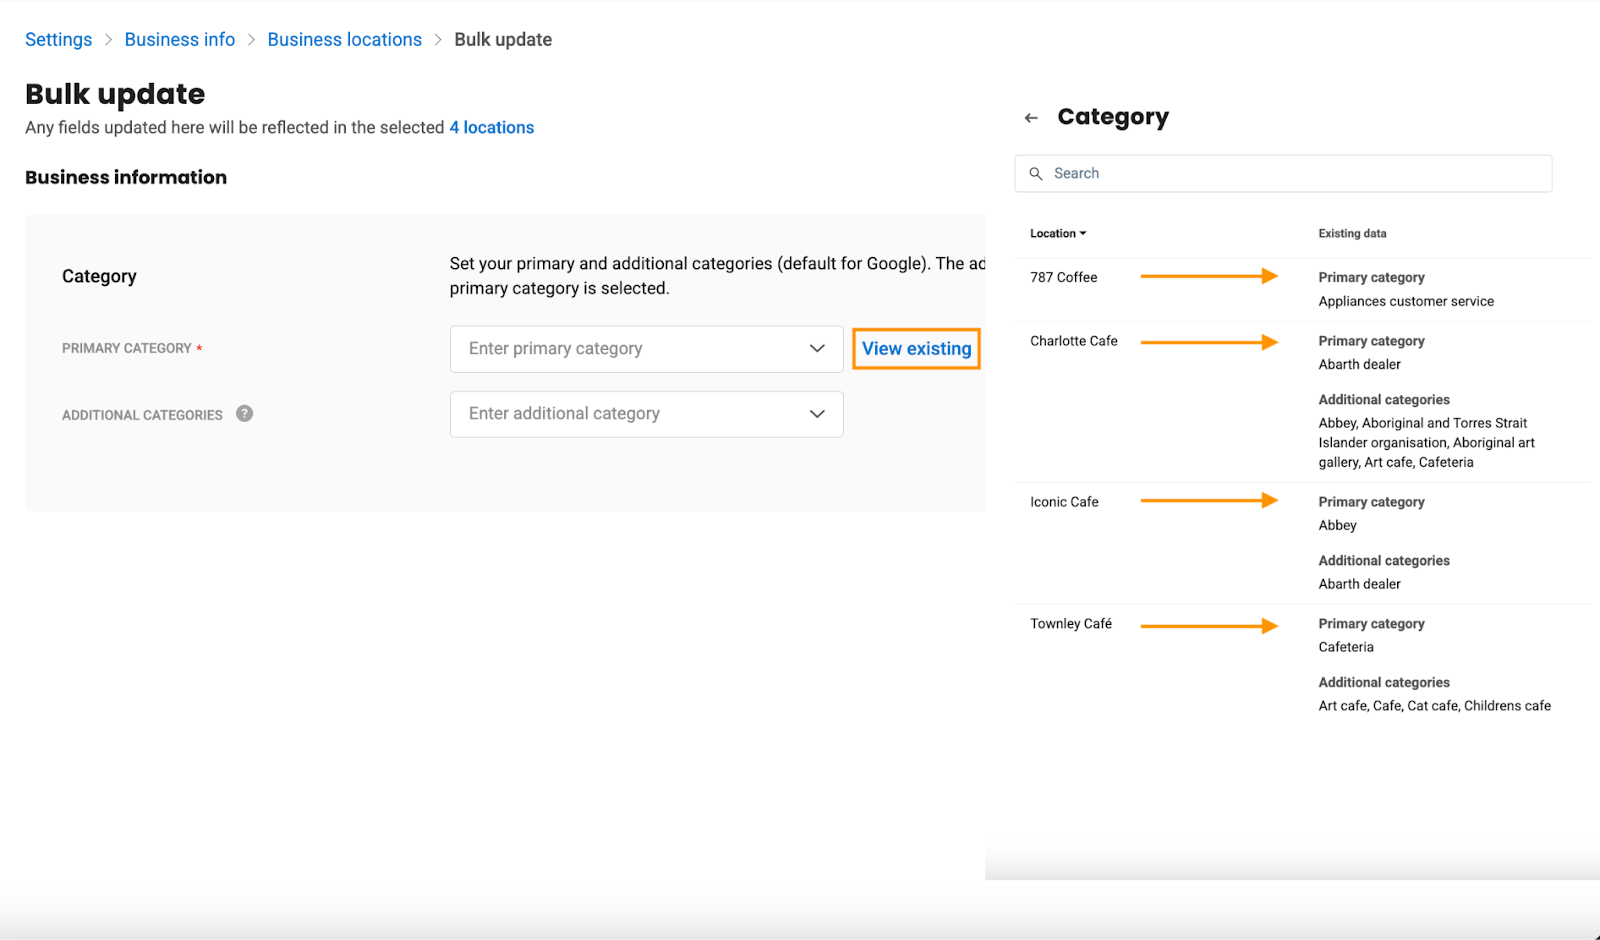
Click ‘View existing’ to see the primary and additional categories for the selected locations.
Update the categories.

Once you select the primary or additional categories, you’ll be prompted to click ‘Update’ to apply your changes.
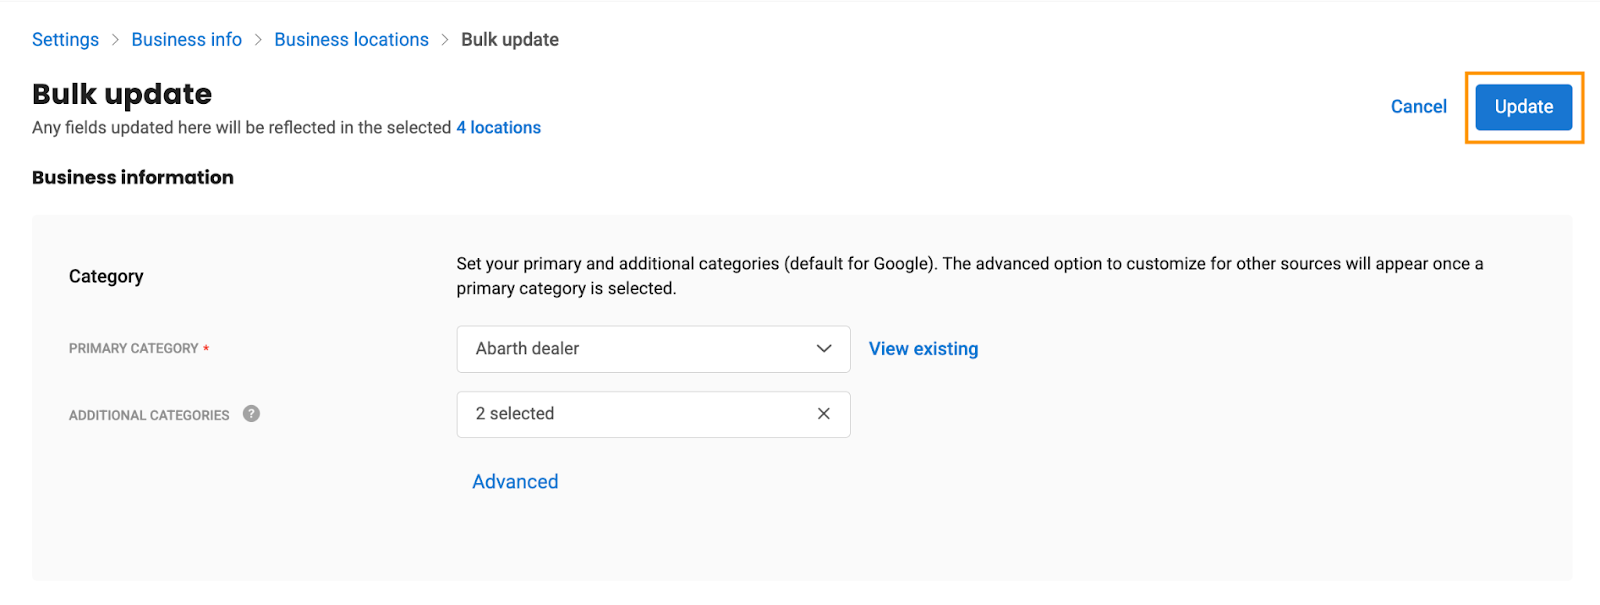
After selecting the categories, click ‘Update’ in the top-right corner of the screen to save your changes.
NOTE:
Any fields updated here will be applied to all the selected locations.
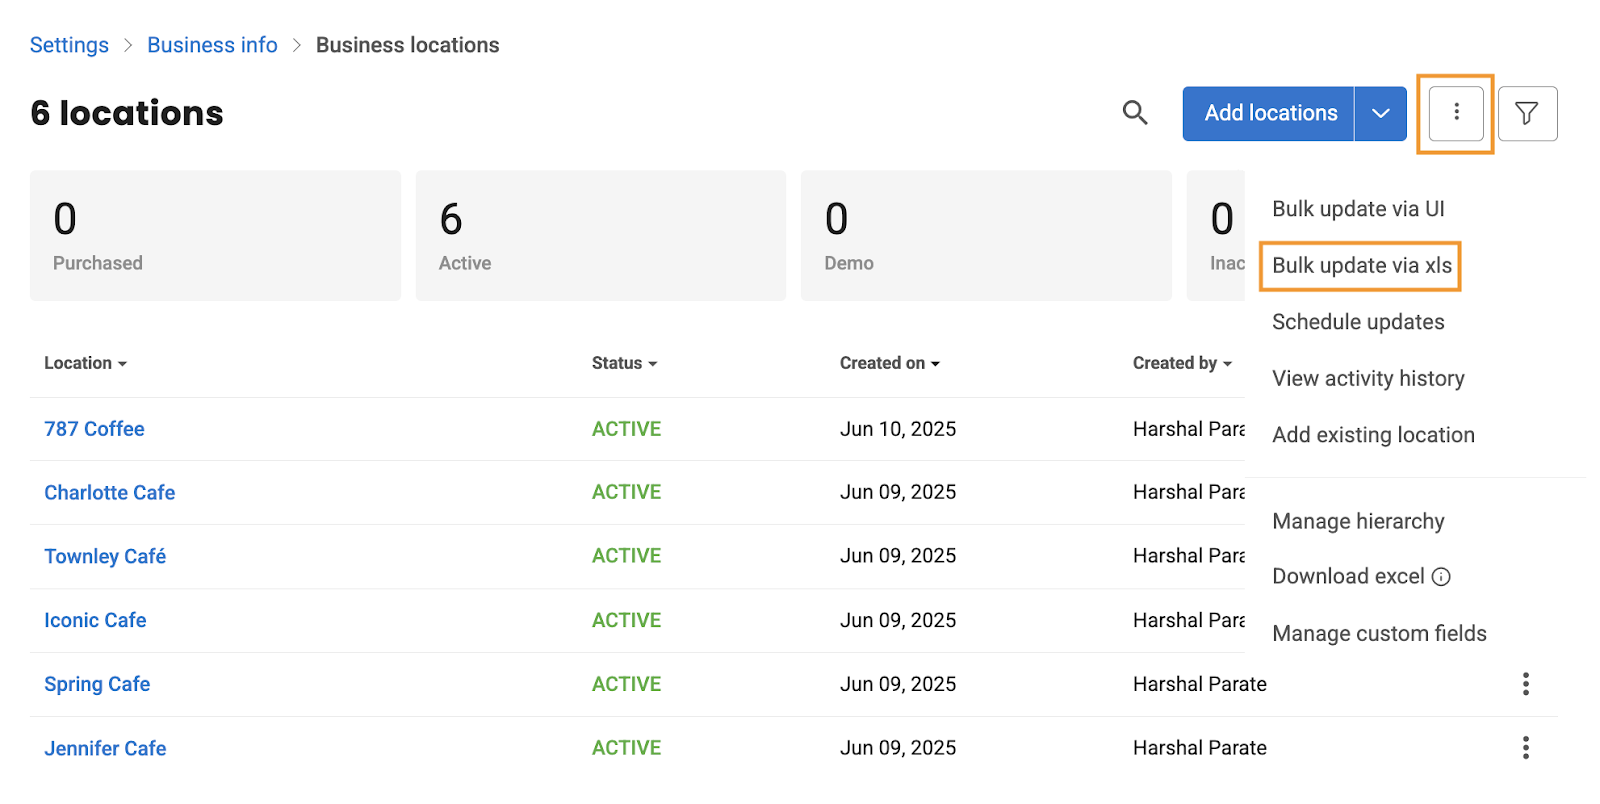
Bulk Update Via XLS
Click the three vertical dots and select ‘Bulk update via XLS.’
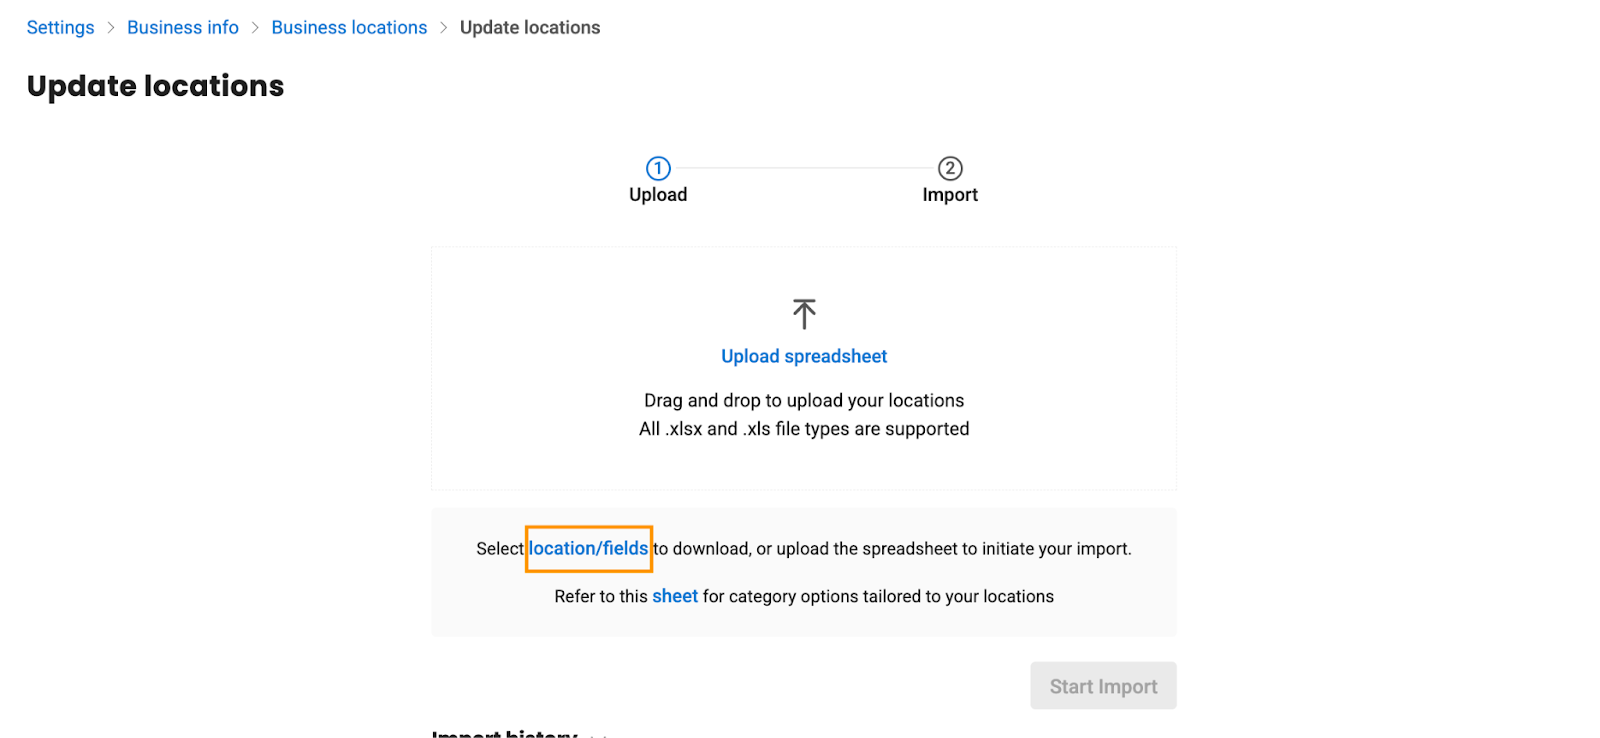
Click the ‘location/fields’ to initiate the process.
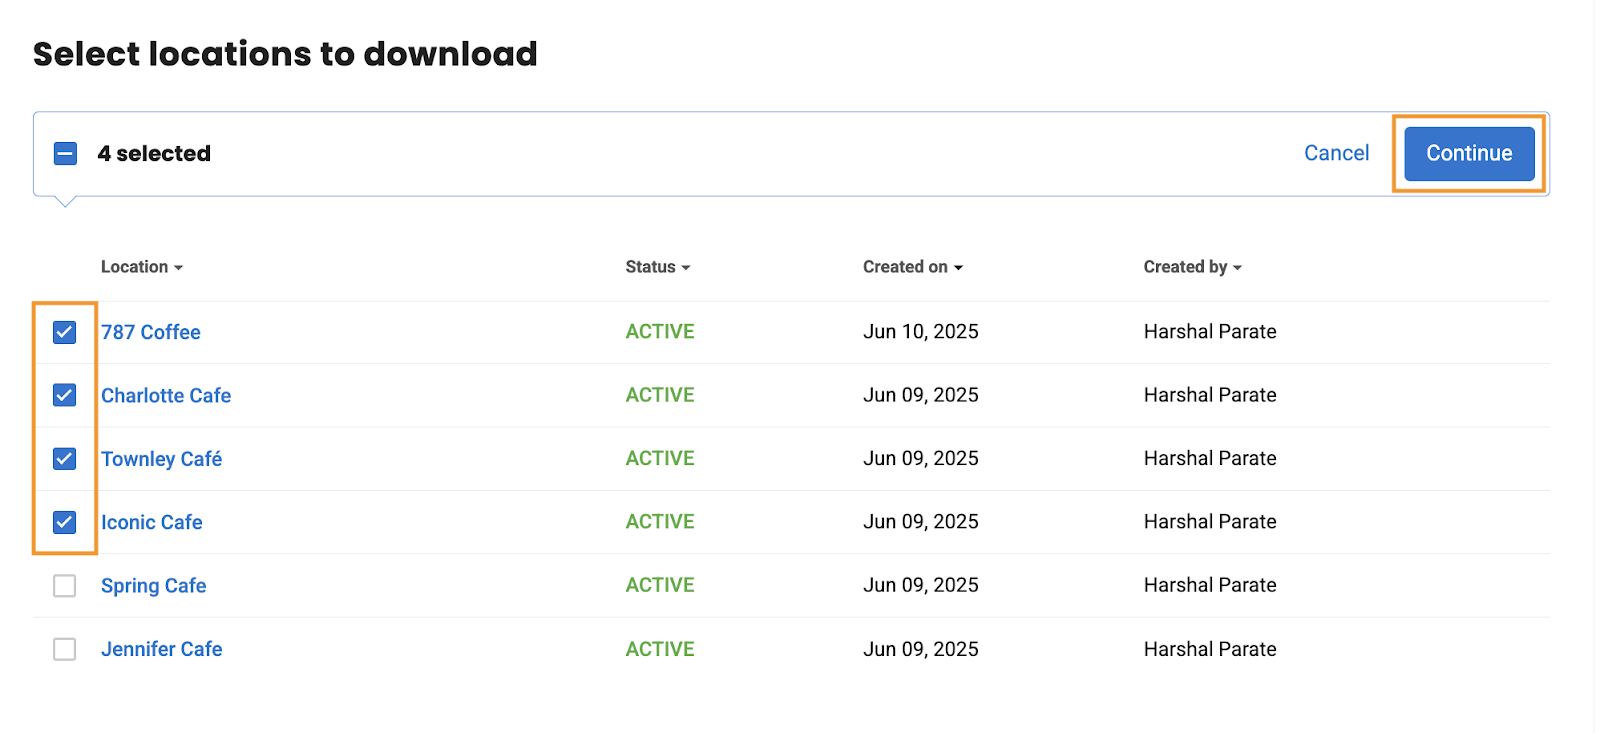
Select the locations to download and click ‘Continue.’
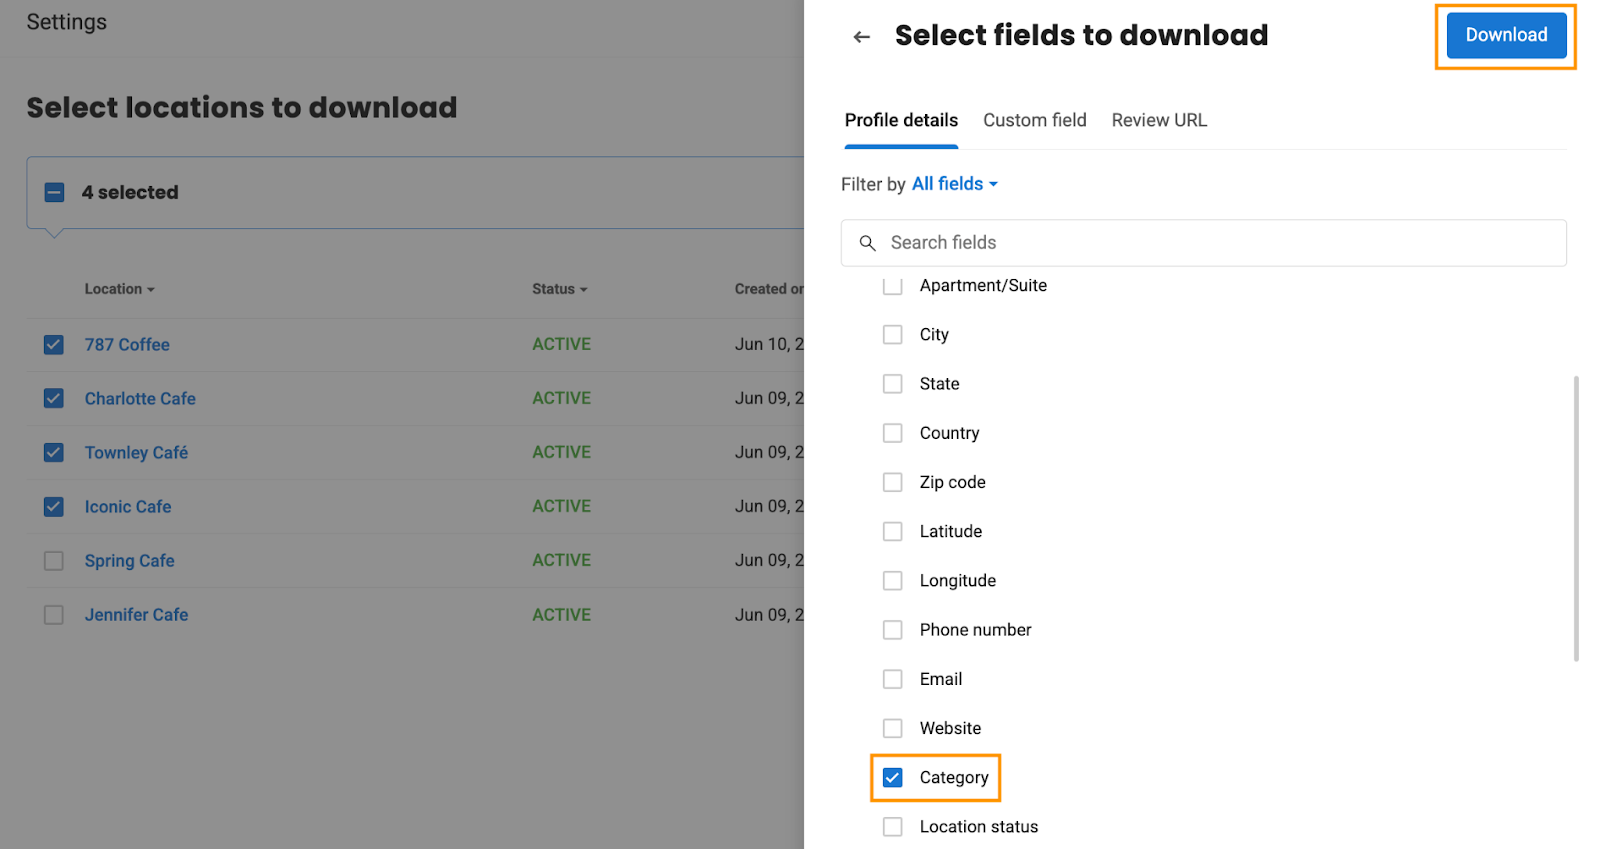
Select ‘Category’ as the field and click ‘Download.’
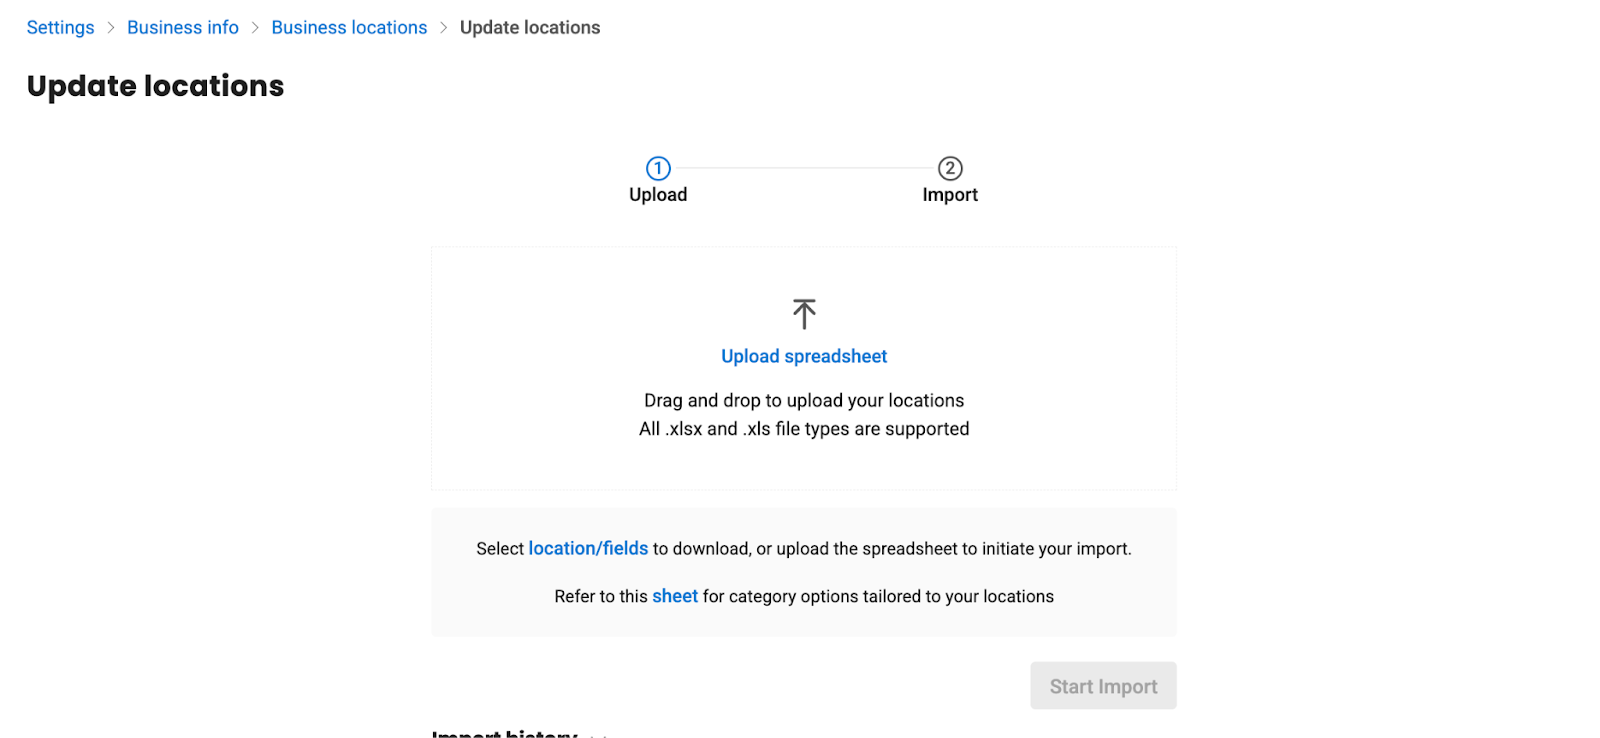
An XLS file will be downloaded, and you will be redirected to the upload spreadsheet page.
Open the downloaded file, in the first field you can view the ‘Business IDs’ of selected locations.
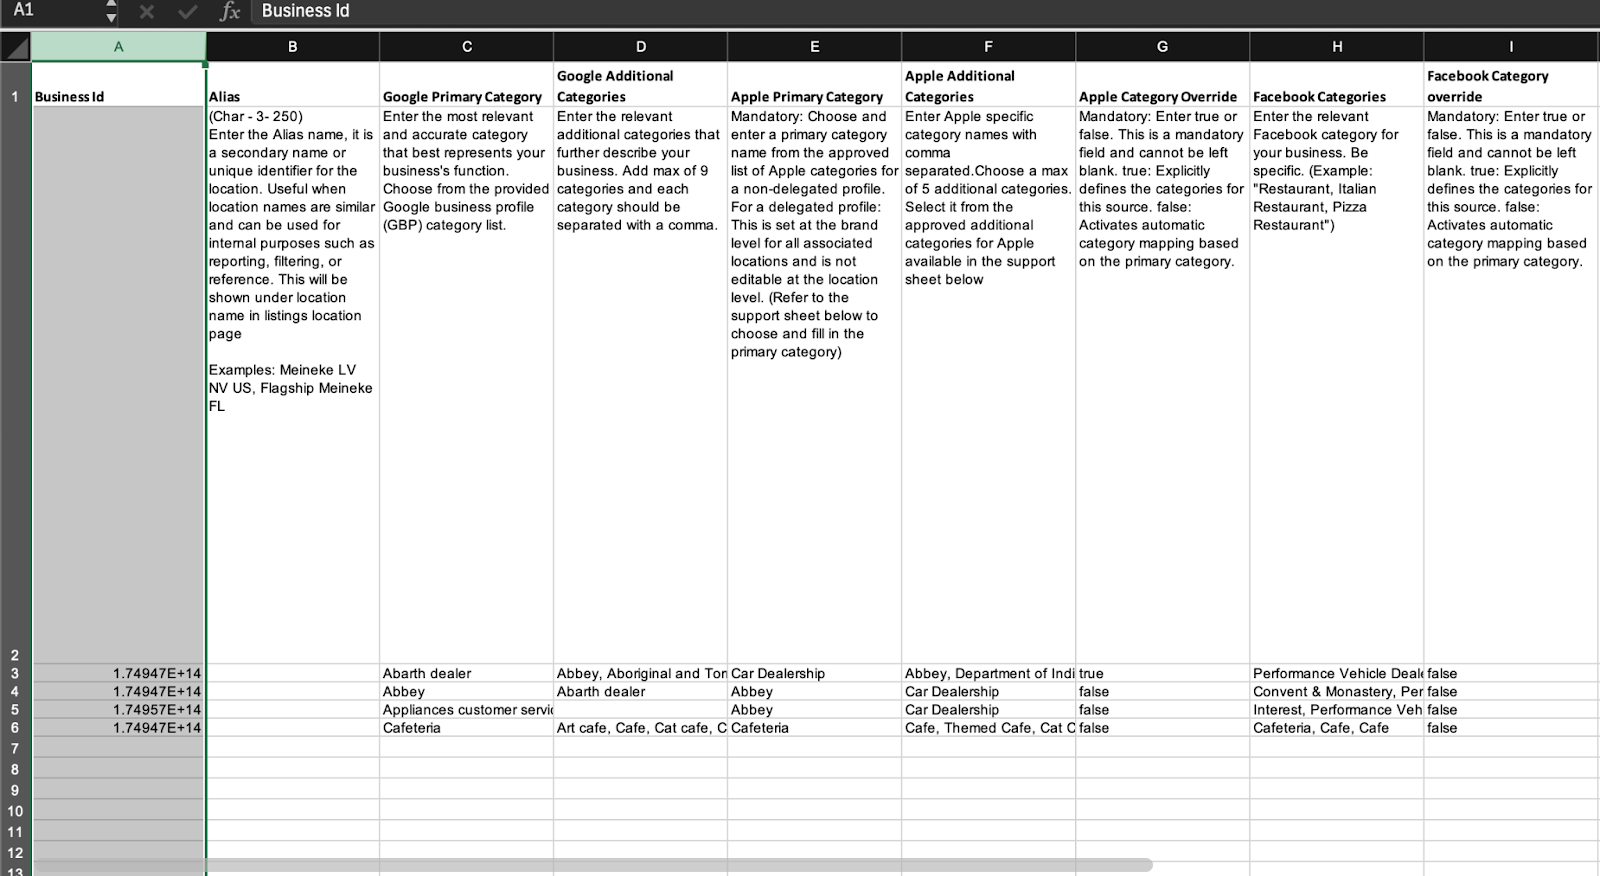
Under the ‘Google Primary Category’ field enter the relevant and accurate category name corresponding to the desired business ID. Enter the additional categories under the ‘Google Additional Categories’ field. You can add a maximum of nine categories, with each category separated by a comma.
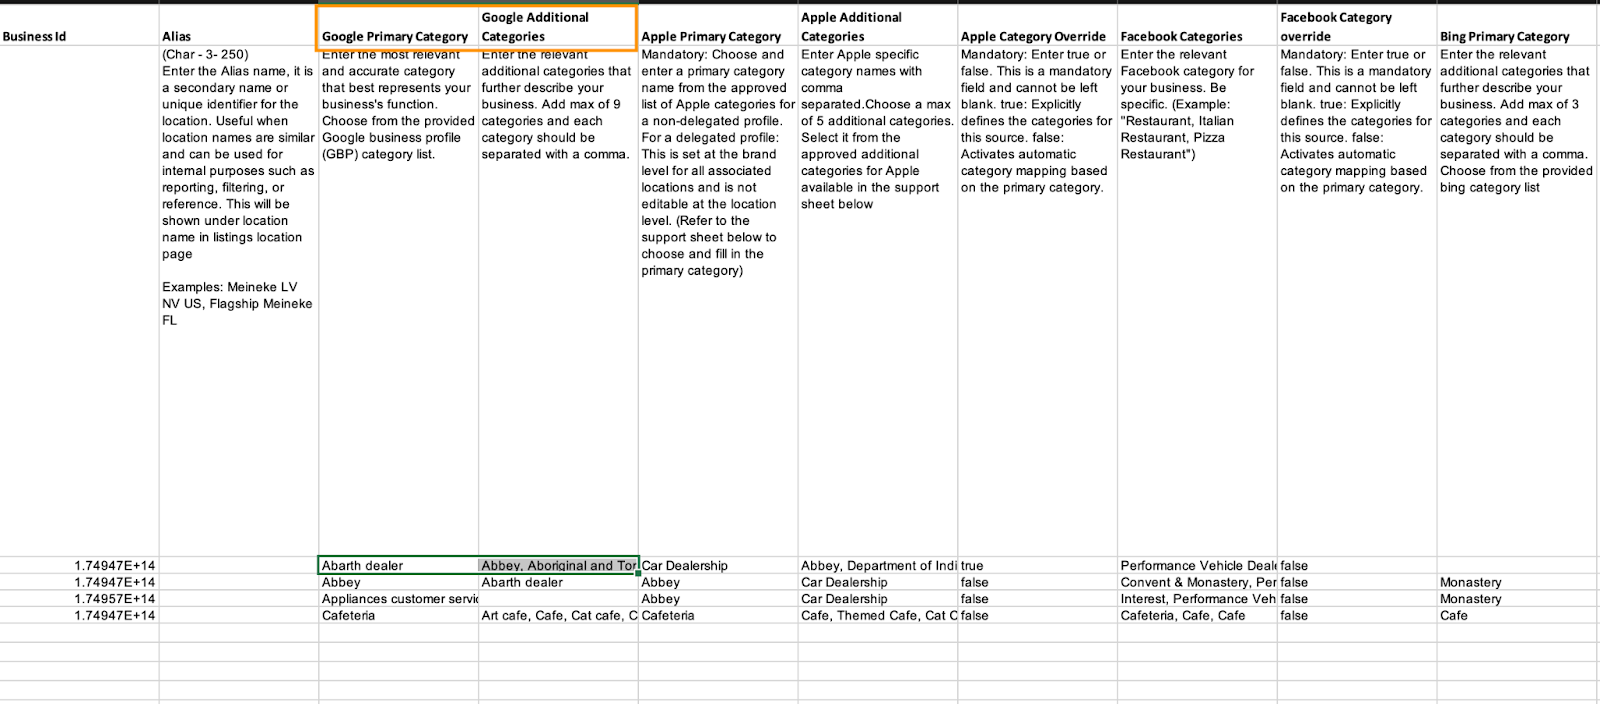
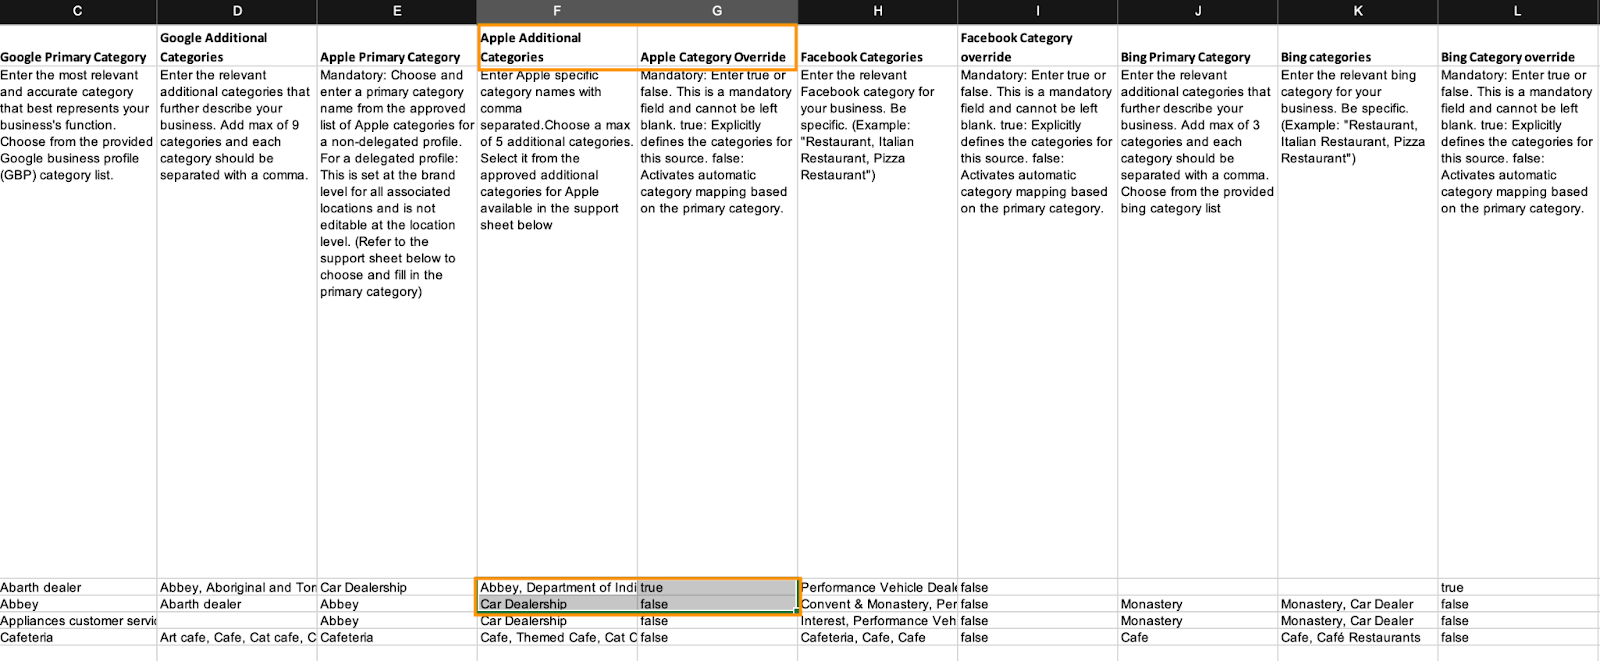
If you want to override the category for Apple, Bing, or any other sources, enter the desired category changes in the relevant field. You must also specify true or false in the category override field:
- True: Explicitly sets the entered category for this source.
- False: Enables automatic category mapping based on the primary category.
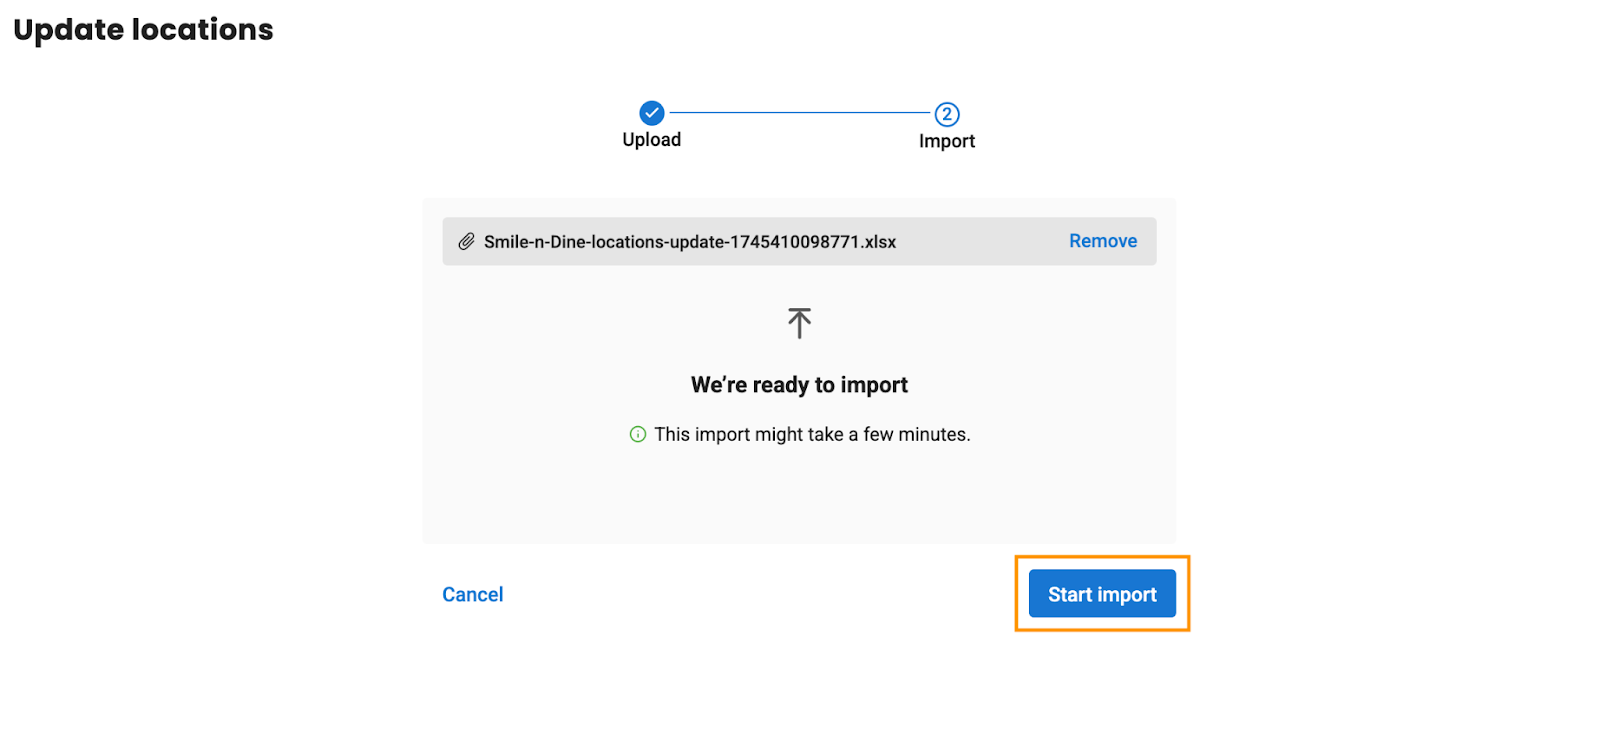
Once categories have been set, save the file and upload the spreadsheet.
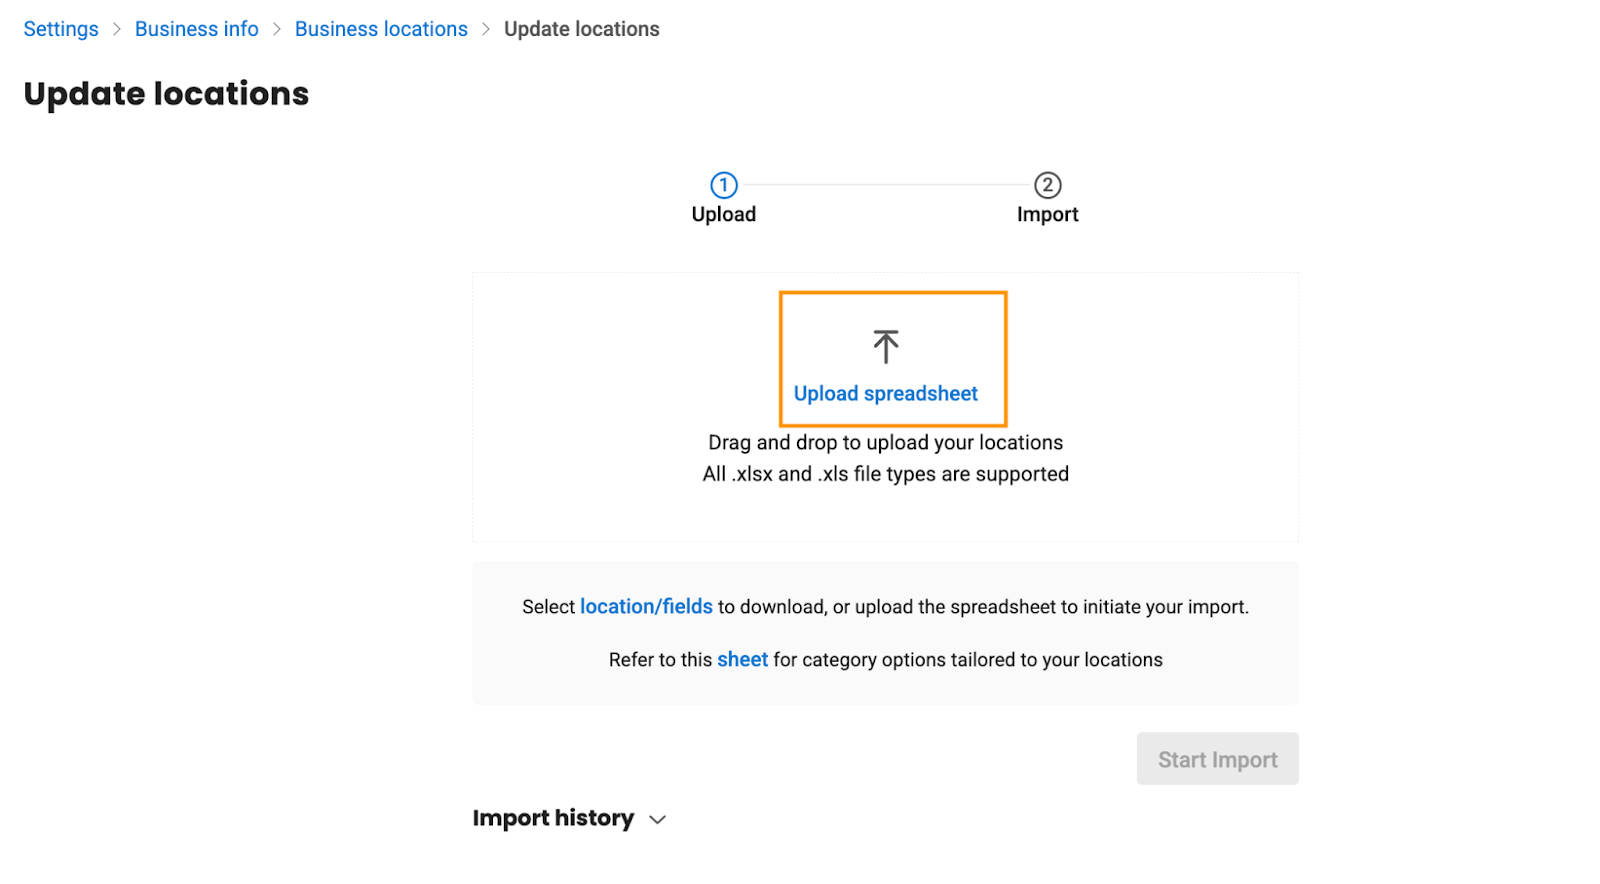
Click ‘Start Import.’
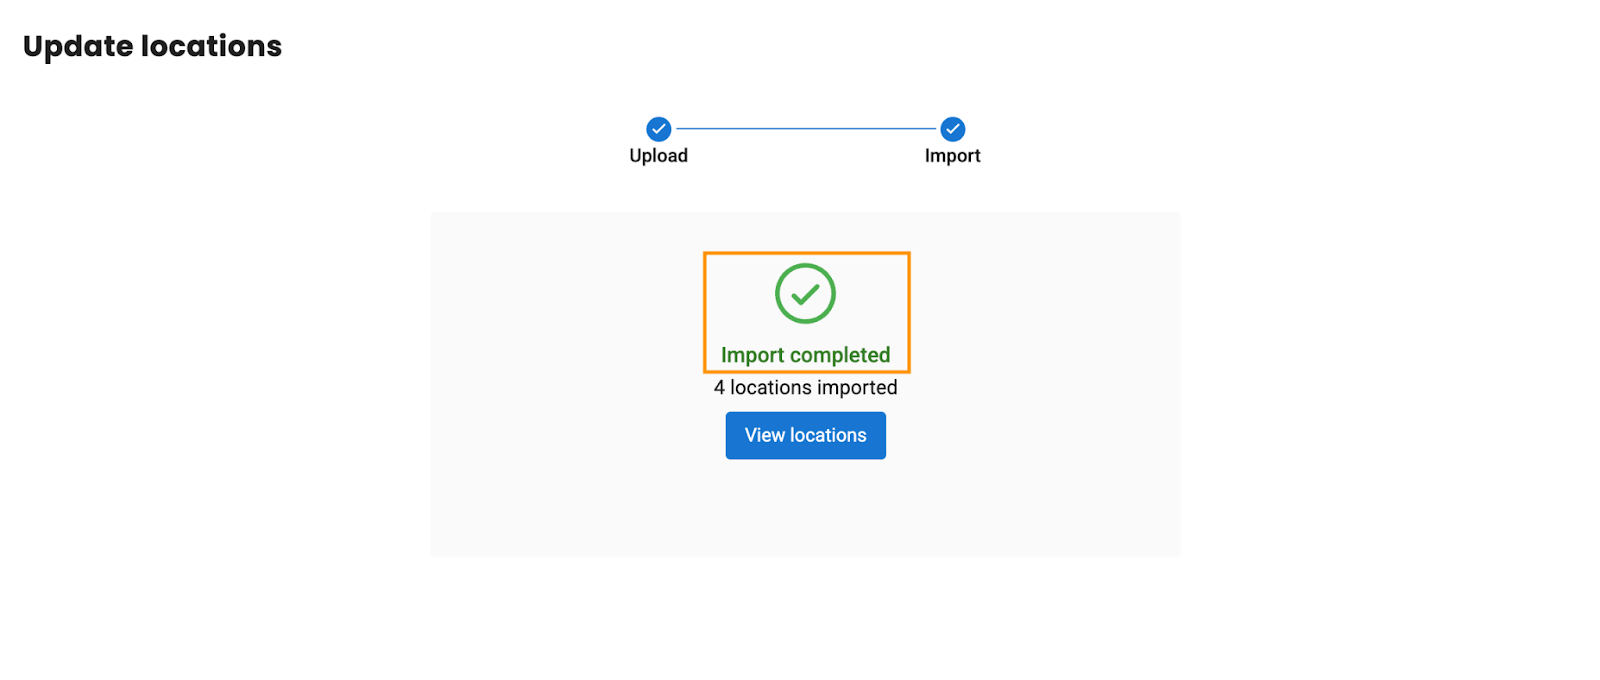
Import completed.
API Behavior For Category Classification
Scenario 1: Updating a Specific Vendor Category (e.g., Bing)
Description: If a user or an API call updates a category for a single, specific source (e.g., only Bing), the system will update that vendor's category for the business.
Override Flag Behavior: The override flag for that specific vendor will be set to TRUE, ensuring the user’s explicit input takes priority over any auto-mapping logic.
API Visibility: The override flag is an internal system setting and will not be visible in public API requests or responses.
Scenario 2: Updating Only the Google Category (No Vendor Categories Updated Explicitly)
Description: If an API call or user action updates only the Google category without specifying categories for other sources (e.g., Bing, Facebook), the system updates the Google category for the business.
Auto-Mapping Behavior: For other vendors where the override flag is set to FALSE (or not set), the system will automatically map categories based on the updated Google category. This preserves the default auto-mapping behavior for vendors not explicitly updated.
Scenario 3: Updating Google Category and Specific Source Categories for a New Listing
Description: This scenario applies when creating a new listing and providing both the Google category and specific vendor categories (e.g., Facebook) in the same update.
Override Flag Behavior: The Google category will be updated as specified. Any vendor categories provided (e.g., Facebook) will also be updated, with their override flags implicitly or explicitly set to TRUE, ensuring user-defined categories take precedence.
Default Mapping for Unspecified Vendors: For vendors not explicitly updated, their categories will be automatically mapped from the new Google category by default.
API Endpoints
There are no changes to the API endpoints; they continue to work as before:
https://api.birdeye.com/resources/v1/listing/businessNumber/create
https://api.birdeye.com/resources/v1/listing/businessNumber/update
Schedule Updates In Advance
Businesses can schedule updates and automate changes to key fields, such as Business Status, Hours, Special Hours, and Google More Hours across multiple locations.
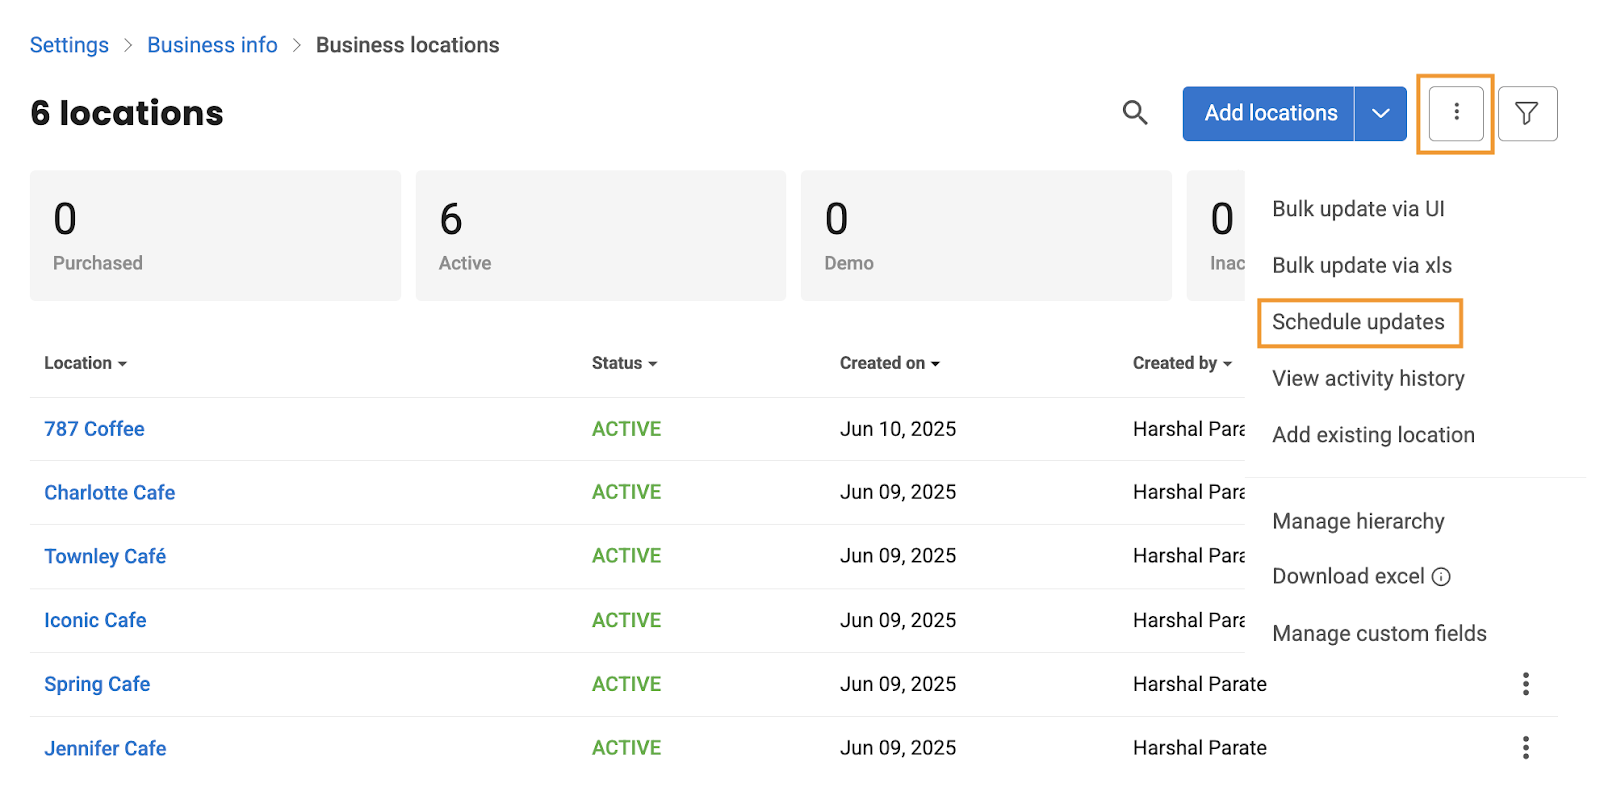
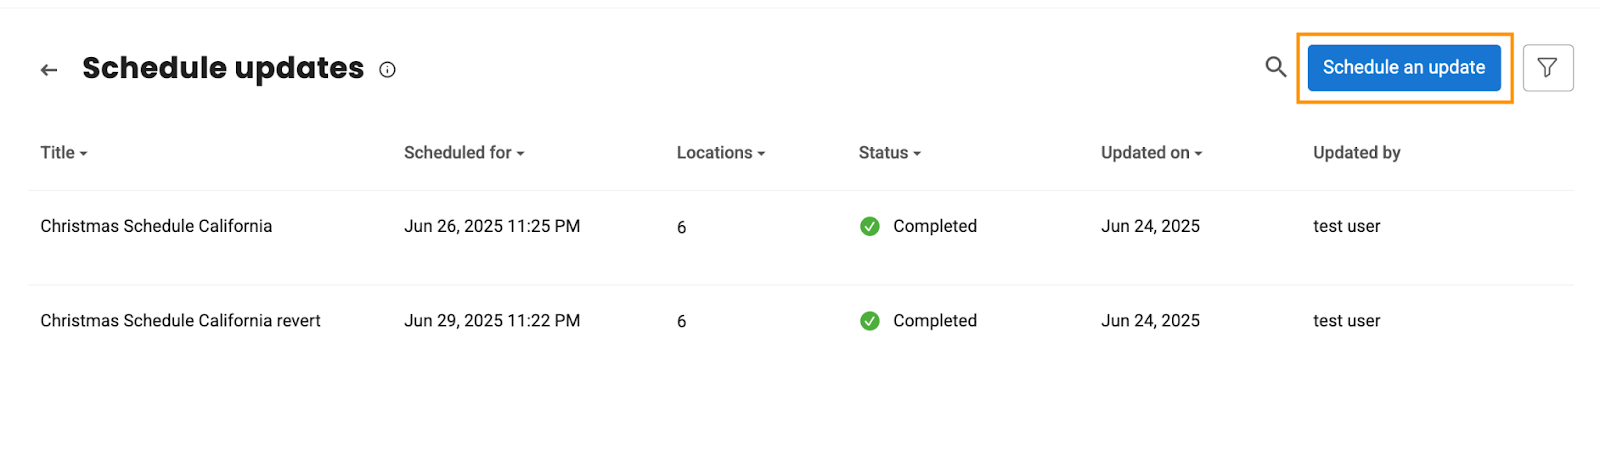
Go to the ‘Business locations’ page, click the three vertical dots, and select ‘Schedule updates.’
Click ‘Schedule an update.’
Title — Enter a relevant title for the scheduled update. (Mandatory)
Description — Add a description for the update. (Optional)
Locations — Select the business locations where this update should apply. (Mandatory)
Schedule for — Choose the date when this update will go live or become active. (Mandatory)
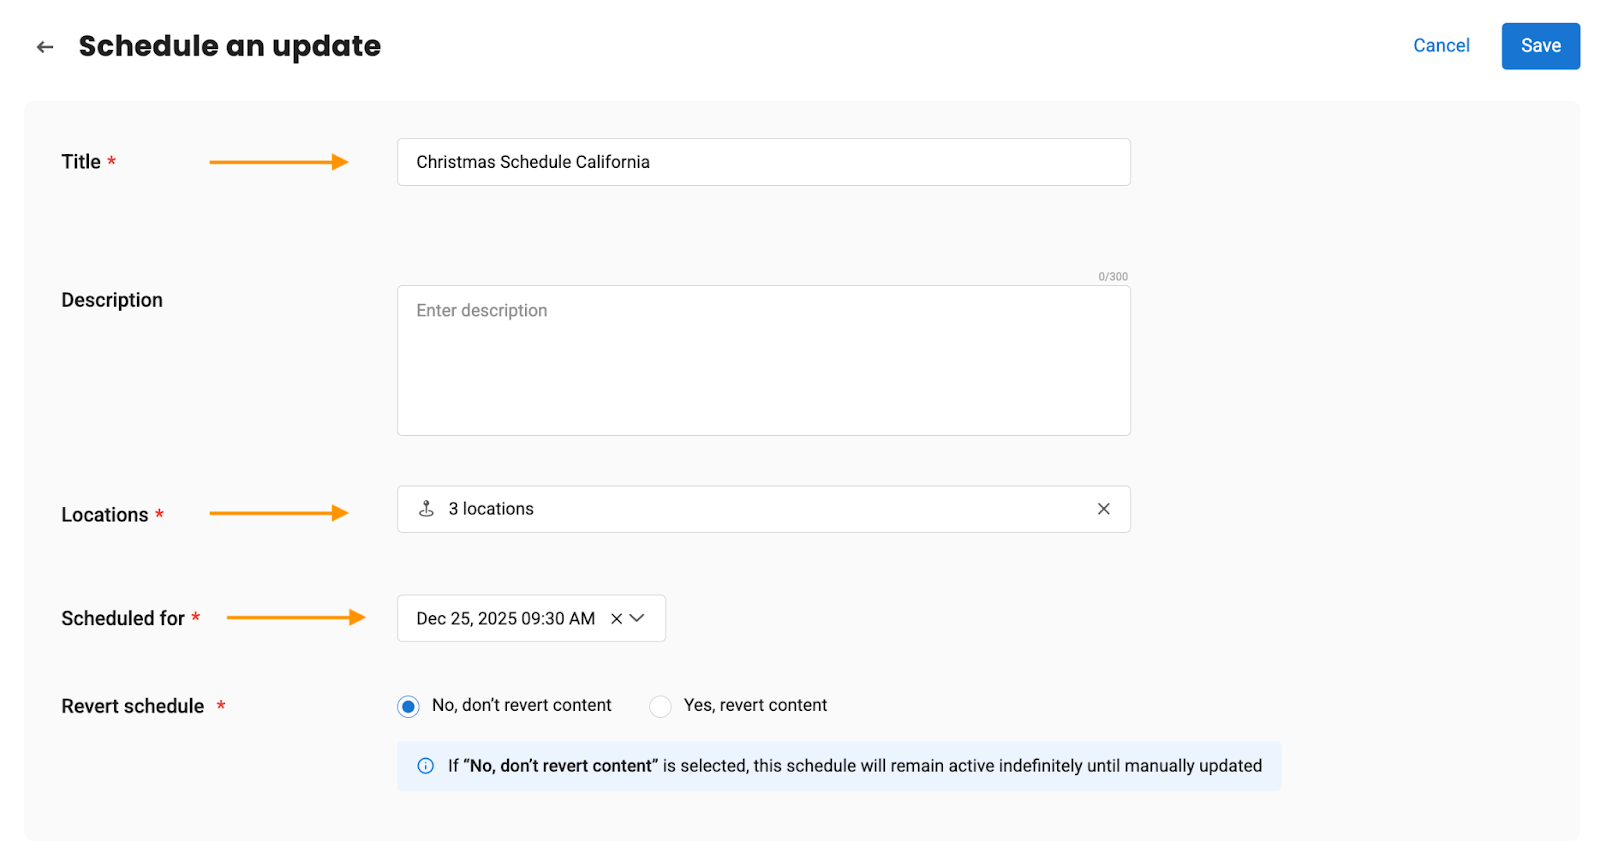
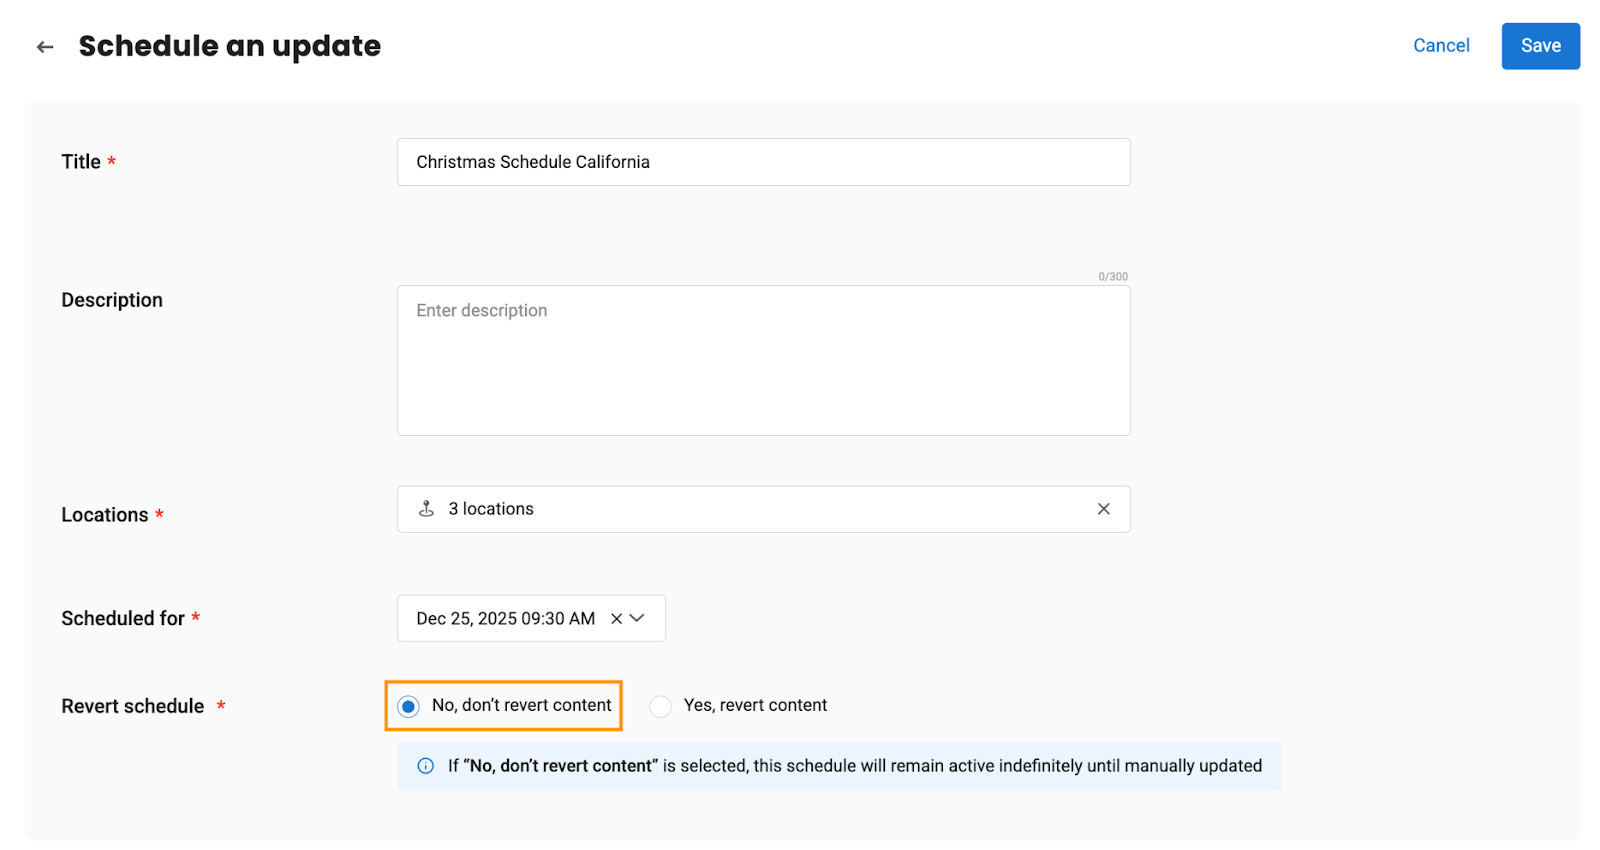
Revert schedule — If you select ‘No, don’t revert content,’ the schedule will remain active indefinitely until manually updated.
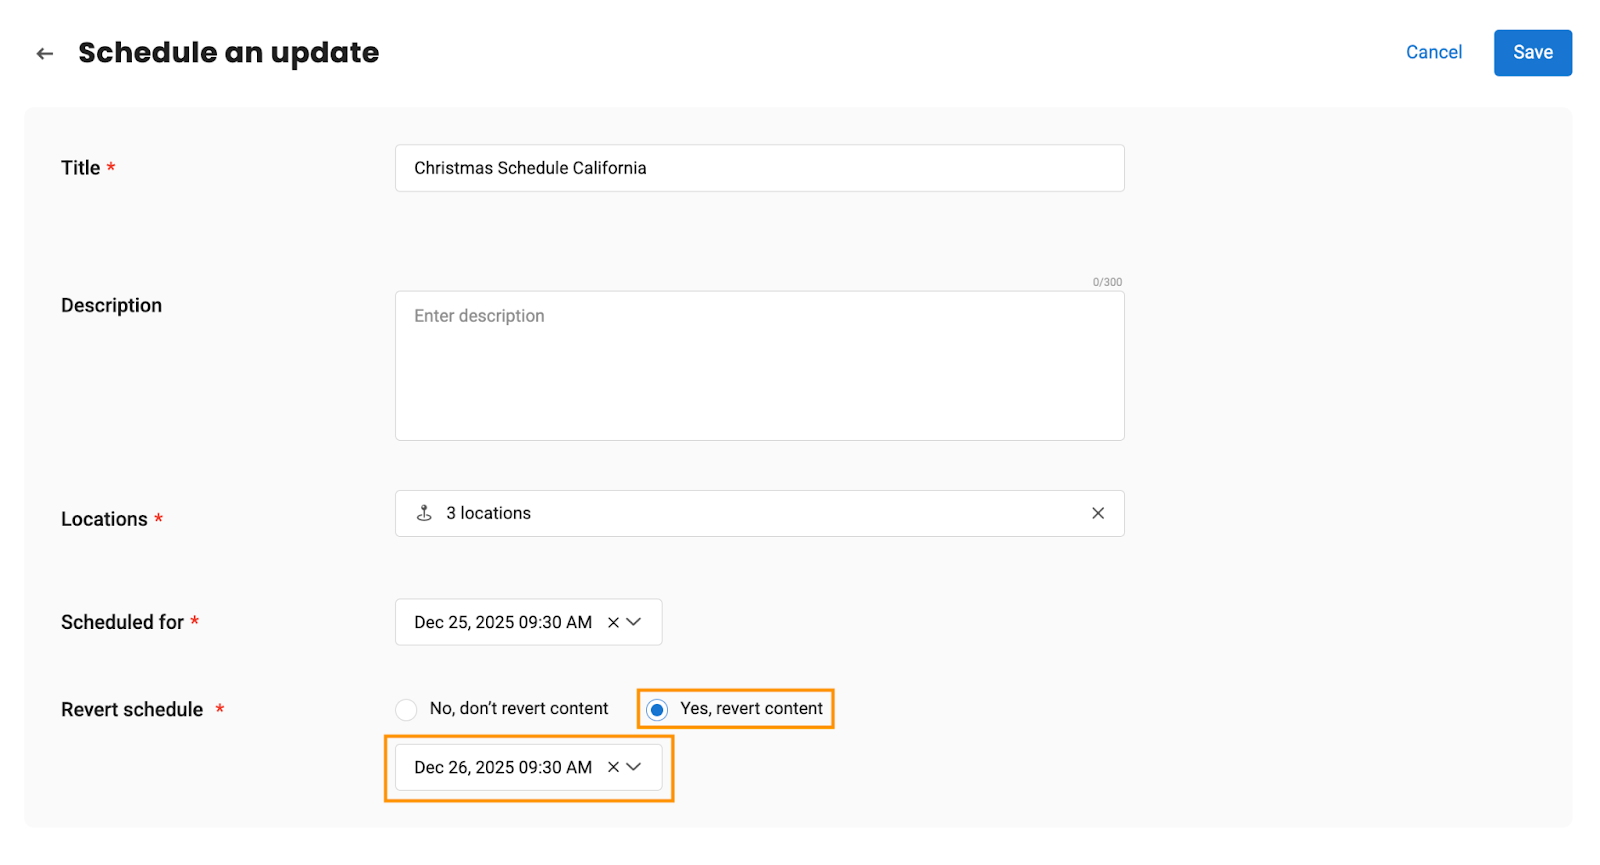
If you select ‘Yes, revert content,’ you will need to choose a date and time when this schedule will end, and your original content will be reinstated.
Fields To Update
Select the fields you want to update. By default, all fields are unselected.
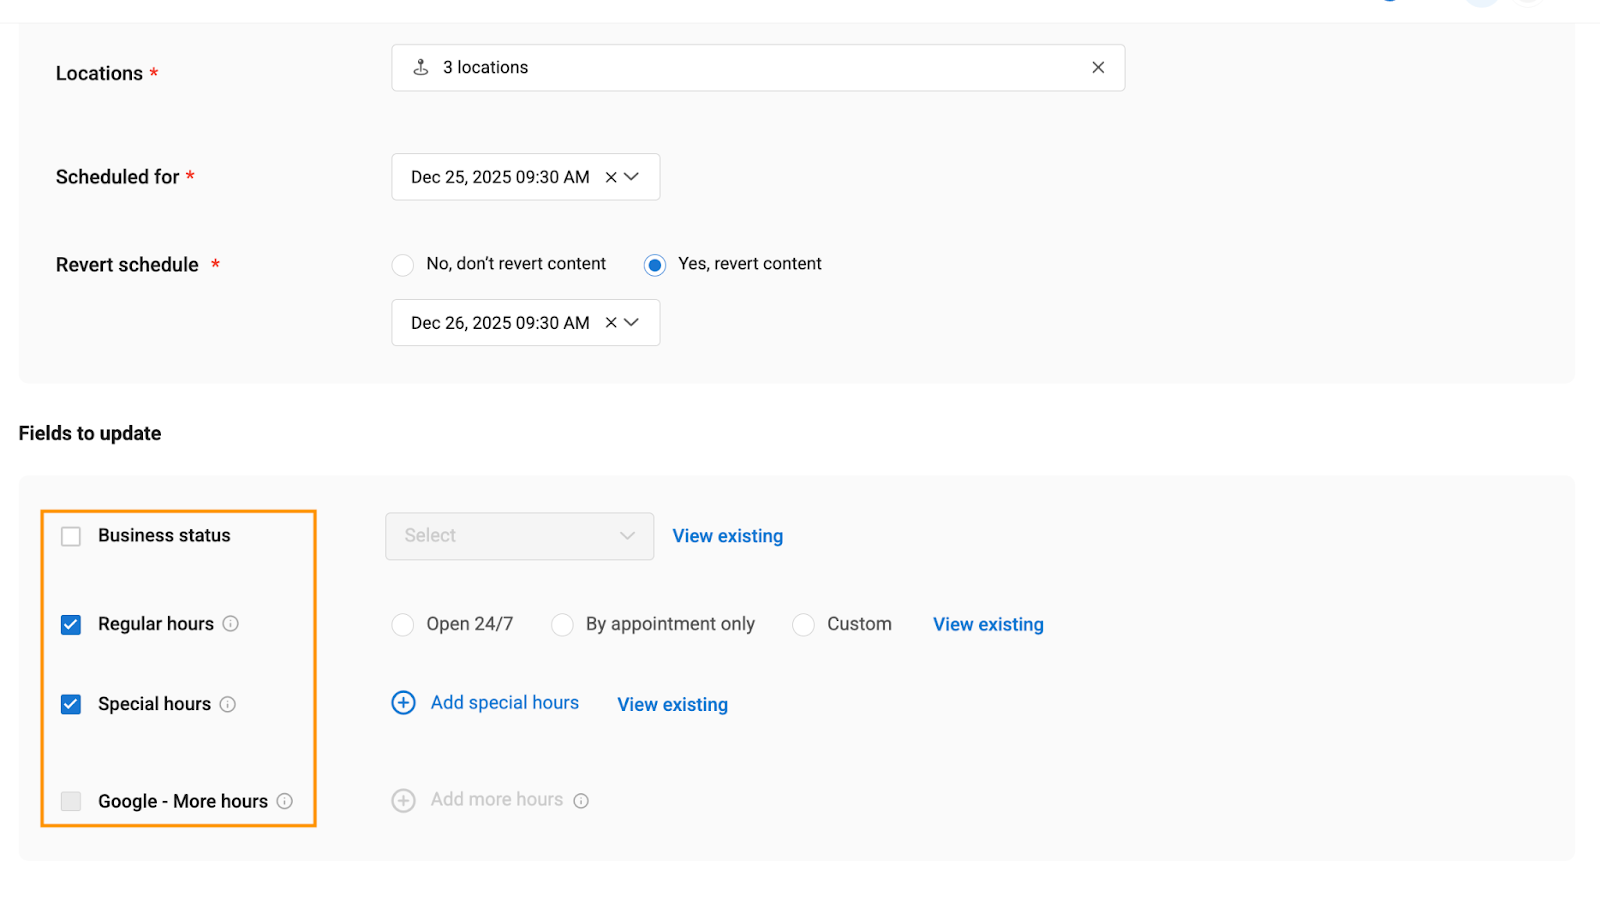
Business status — Select from the options — Open, Opening soon, Temporarily closed, or Permanently closed.
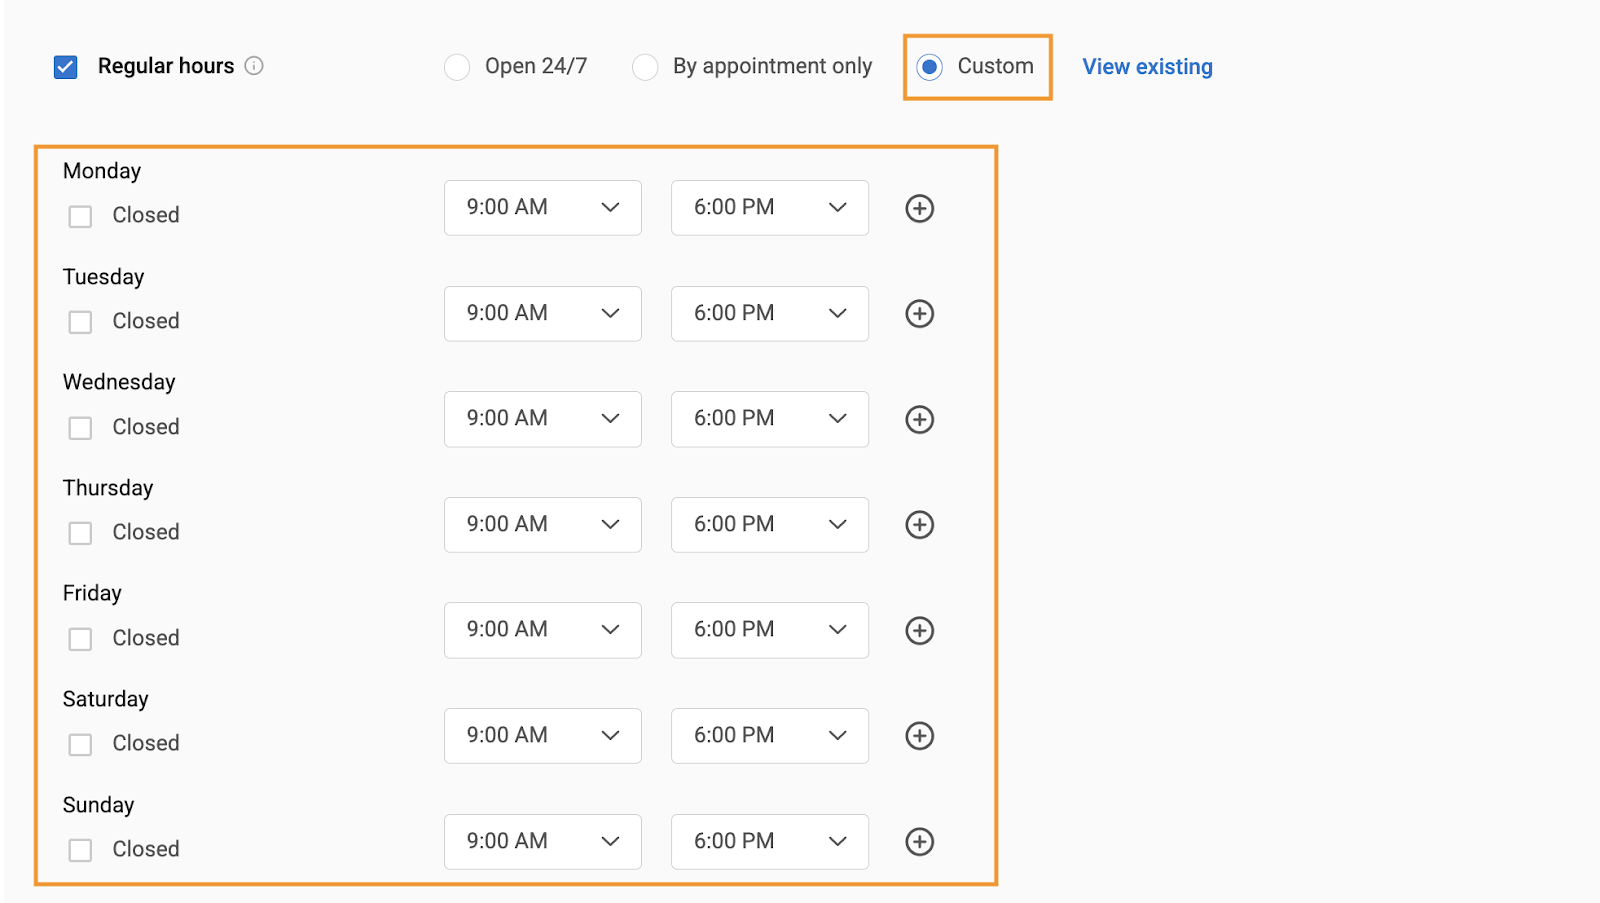
Regular hours — Choose from Open 24/7, By appointment only, or Custom. If you select Custom, specify the opening and closing times.
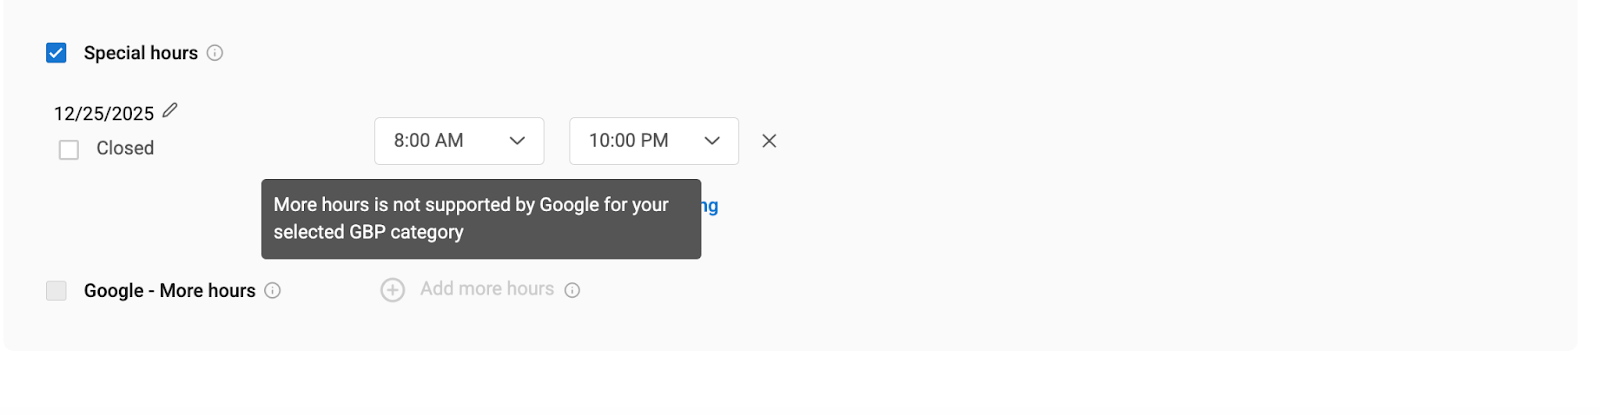
Special hours — Schedule special hours in advance.

Google - More hours — You can add more hours if supported by your Google Business Profile category. If it is not supported, you will not be able to select the ‘Google - More hours’ option.